
I've been walking you thru how to build your platform on WordPress in a series of posts.
- Part One: You need more than just a website
- Part Two: You need to start with a plan
- Part Three: You need to pick the base of plugins you'll use
- Part Four: Building an Author Site with iThemes Exchange
You'll recall, when we were planning, I mentioned the following components often found on an author's site:
- A blog
- Selling physical products (books)
- Video promotions (for your books)
- Downloads of sample chapters (free downloads)
- A membership site (fan club)
- Events / Locations where you'll be speaking / signing
So what I want to do is walk you thru the specific steps and features that make this possible.
Ready?
First, you need iThemes Exchange
Here's the good news, iThemes Exchange is completely free. 100% free for the core plugin. That's great news for all that it does.
While you're there, you can also get the Stripe extension for your financial gateway for free.
Both of those components are free. But now I'm going to suggest you spend a little bit of money.
First, let me tell you what to get, and then I'll show you how I use it all. So what I'm recommending to you is The Exchange Pro Pack – for $197.
Now, consider that the membership add-on is already $97 (and a bargain at that), paying $100 for all the rest of the pack of add-ons included is a great deal.
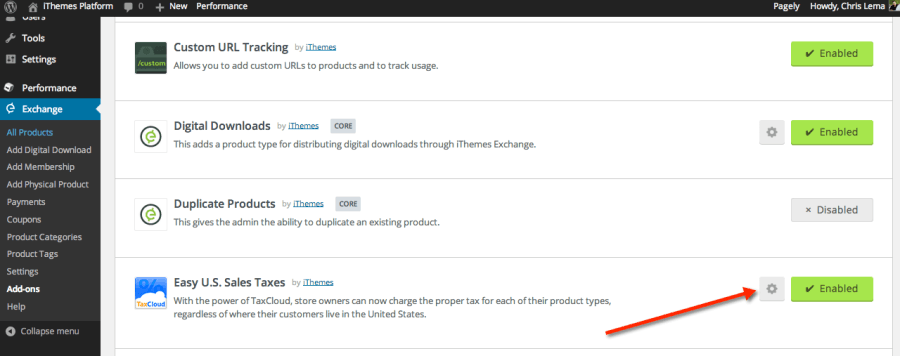
What you get, that we care about here, includes:
- Membership Add-on
- Easy US Sales Tax Add-on
- bbPress Membership Add-on
- Featured Video Add-on
- Custom URL Tracking Add-on
These five add-ons, along with Exchange, will take care of most of what we need for this site.
Now, let's get started
The first thing we'll work on is our book page, because, after all, if you can't sell your book, what's the point, right?
I'm going to assume that you've done the following:
- Installed Exchange
- Installed Add-ons
- Activated them all
- Gone to Settings > iThemes Licensing and authorized your add-ons
If I'm right, you also likely going to see the quick setup, where you'll want to put your Stripe credentials (available to you after you sign up with Stripe).
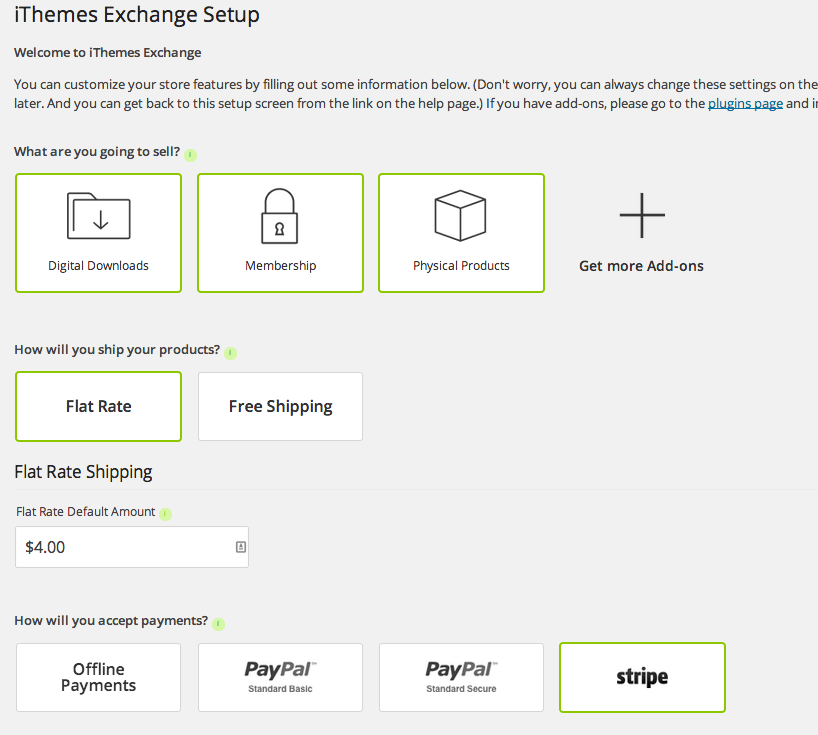
When you're done, it should look like mine – with green outlines in all these spots.
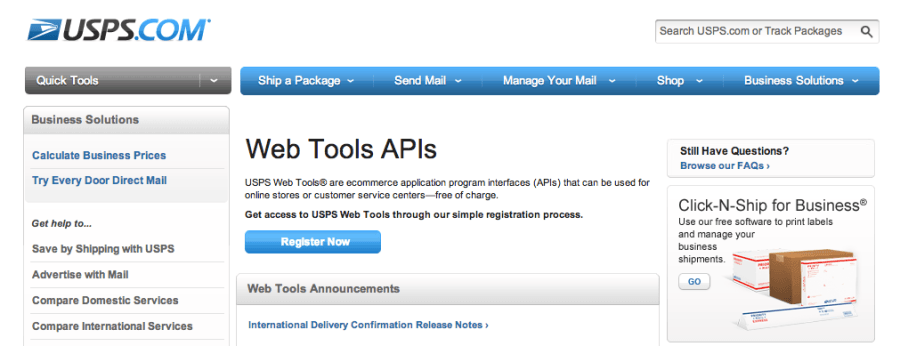
Before we create our physical product, we need to set up tax stuff
It is going to sound harder than it is. But there are three steps.
First, go to USPS and create an account for yourself to use their API. You'll need your userID in a second. Click the big blue button.
Second, go to TaxCloud to set up your free account. Click the big orange button.
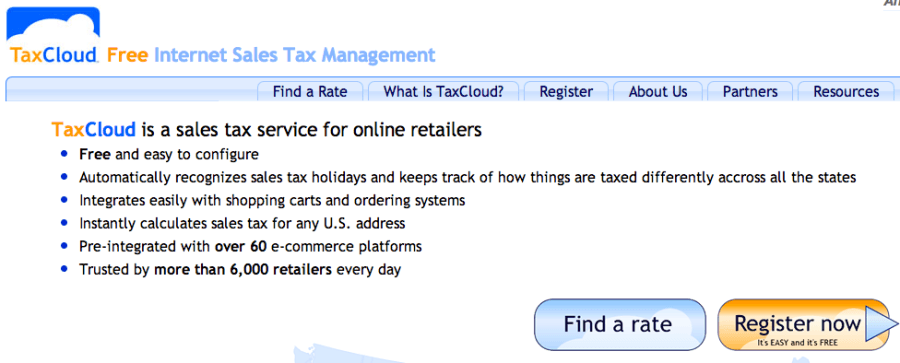
Once you've entered all your information, you'll want to click on the websites section and add your website. This will result in you getting an API ID and an API KEY.
When you have all that info, you are ready for step three – putting it into the iThemes Exchange Tax add-on settings section. Like I said, it feels complicated, but when you realize that all your tax calculations disappear, you'll be pretty happy!
Now, let's get our assets together
By now you can tell I'm trying to get all your basics covered before we create the final physical product. We've configured iThemes Exchange to recognize that we'll send physical products (books), and we've covered taxes. And shipping (flat fee) was on that quick setup.
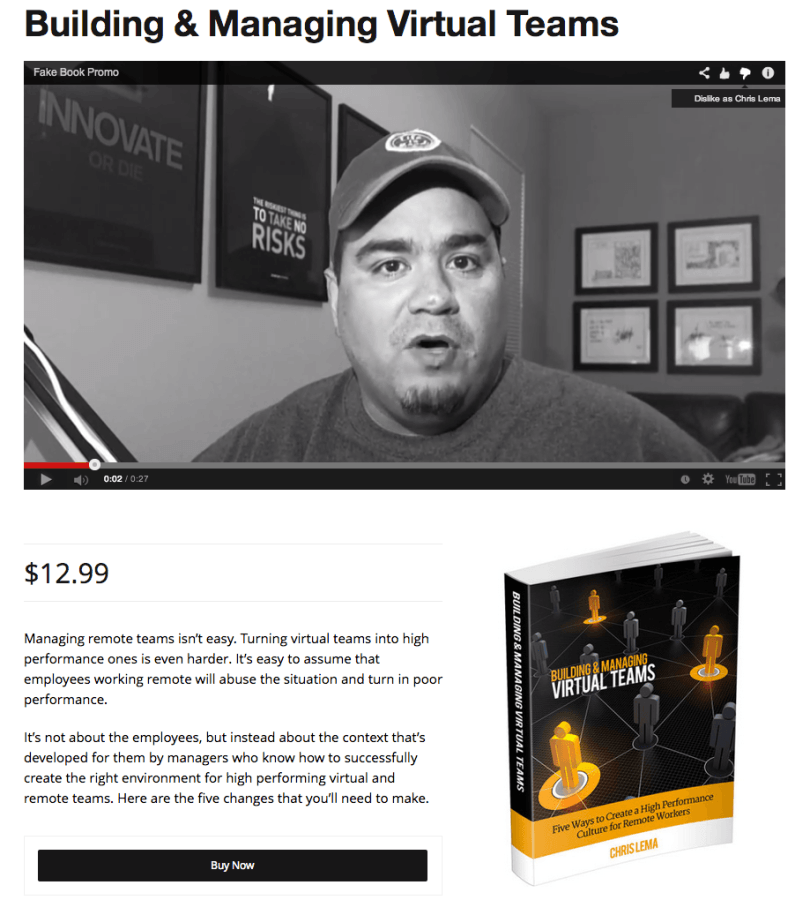
So we're ready to think about our video promo.
For my example, I just spoke to my camera, but I'm sure you'll do better. The point is that when you're done, you'll have a video that you can upload to YouTube. When you finish that, you'll be ready to use it on your book page. All you'll need is your YouTube video url.
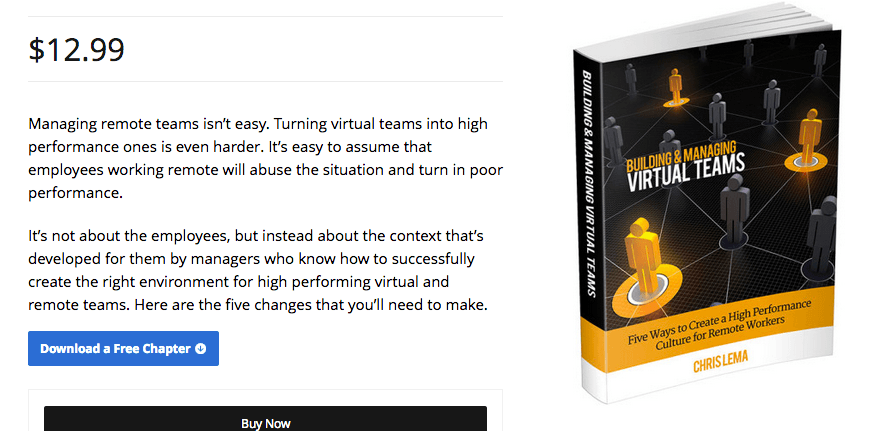
But we have one more thing to do before we create our product page. We need an image for our book – either a cover image, or a 3d book cover that you can create online for free.
With that, we're ready to create our book product.
The Product Page is Easy
One of the things I love most about iThemes Exchange is how easy it is. It's like it was designed for authors instead of programmers.
Know why? Because it was!
I would love to write a lot about this step, but honestly, it's plain simple. Just fill in the blanks.
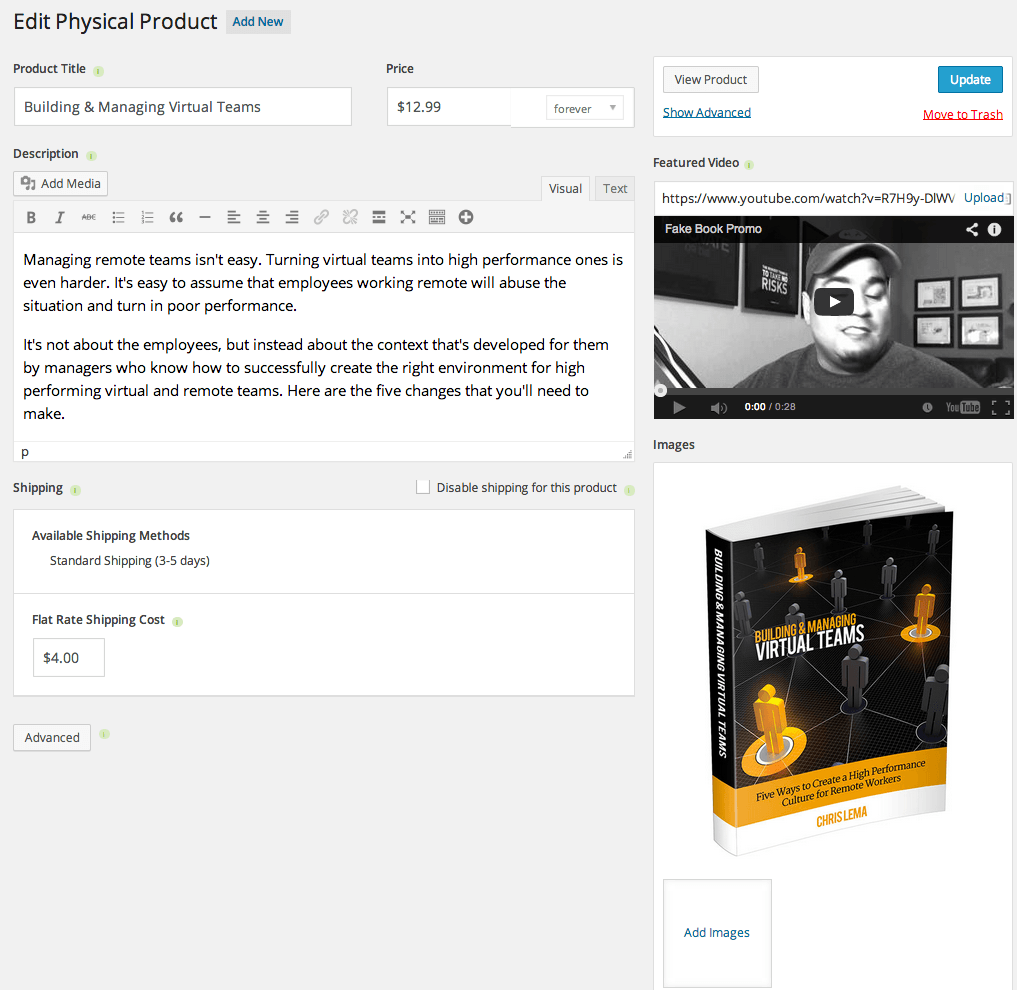
When you finish and save it, you're almost done with your book page.
Always think promotion and tracking
There's a little add-on that comes in the pro pack that most people ignore. But not you. You're a smarty pants, so you know where I'm going to go.
See, more than anything else, as an author, you want data. You want to know who came to your site, from where, and all that good stuff, right?
And one simple way to do that is to use the Custom URL Tracking add-on. Don't worry, you don't have to buy it because it came with the Pro Pack and all you have to do to activate it is click Exchange > Add-ons and look for it to click the button to make it enabled.
When you do, you'll see this in the Advanced section of the product page. In the image above, the Advanced button hasn't been clicked. But in the one below, you'll see it.
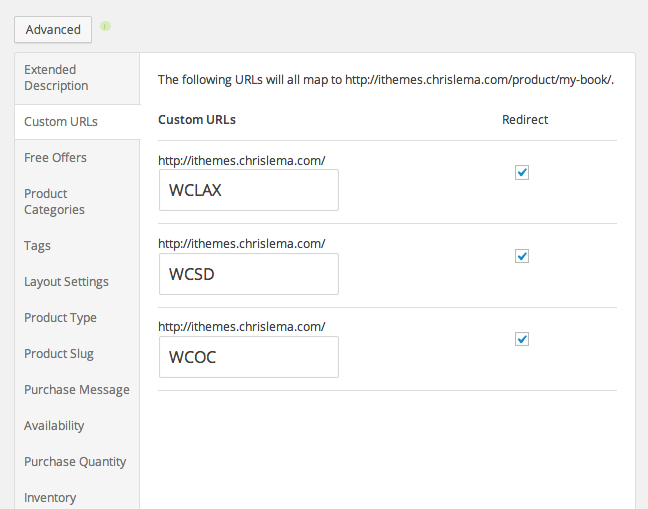
Now once you see it, you'll know why this is so cool. See, because I speak at conferences, it's nice to be able to give them a custom URL at each conference. But all of them go to my book page.
The result is that I can use Google Analytics to track traffic to each url – even if it's all the same page.
Pretty sweet huh?
You'll also notice that if you have a limited inventory, you can click on Inventory in the Advanced Menu and define how many you have, so that with each purchase, the count is decremented.
Wait – One Last Thing
I know. You're thinking, enough of this product page. What about the rest?
If this were a book, I'd tell you to put your finger here as a bookmark because we'd be back. Because we want to go do something and then come right back.
But this isn't a book – it's just about books. So for now, before we call the product page done done, let's hit update and go create another product.
Only this time it's a digital product.
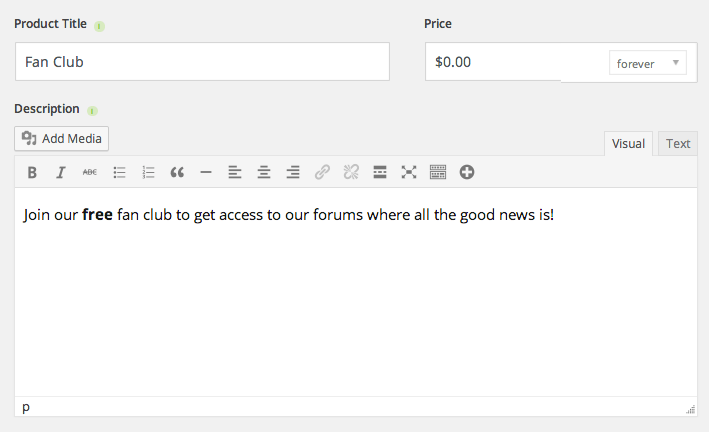
What we're doing is creating a free digital product – chapter one – of our book. So that people can check it out before making a buying decision.
To do that, you'll need to go to Exchange > Add-ons and activate the Free Offers add-on that came in the Pro Pack.
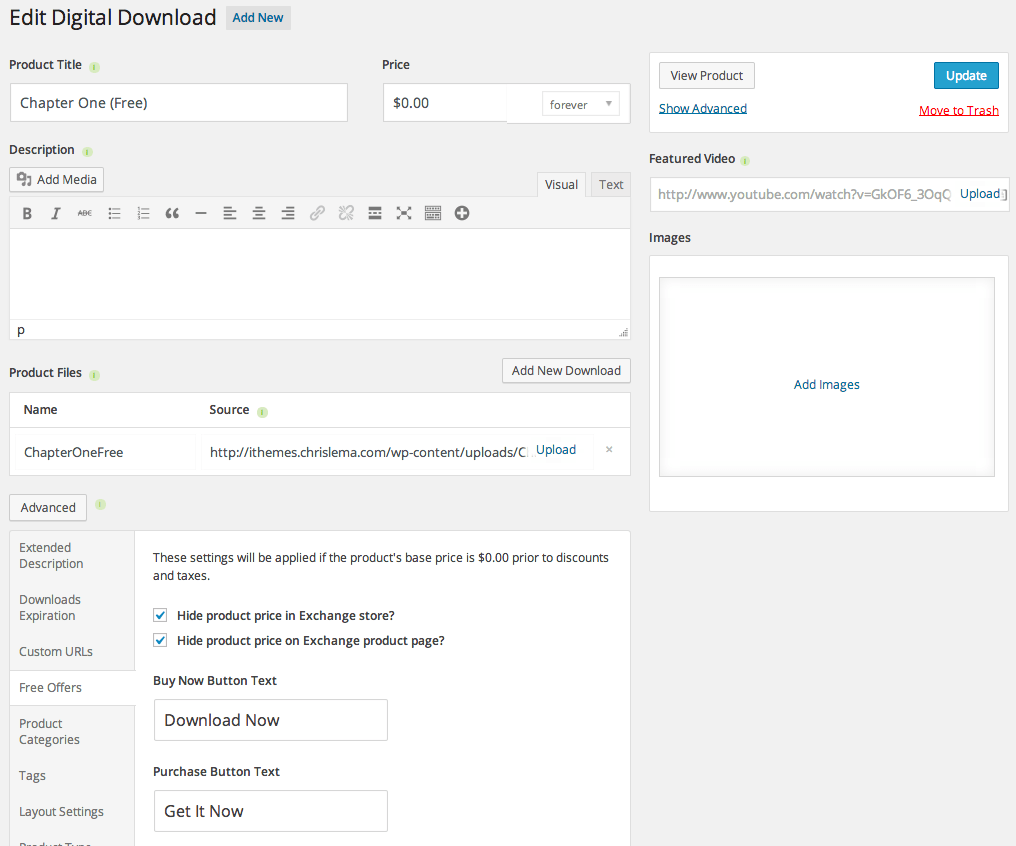
You name the product, set the price to $0.00 and then upload the product file.
After that, click on Advanced and go down to Free Offers so that you can configure what goes on the buttons. The first button is what they see when they get to the product page. The second one is what they see when they check out.
This is the product we'll put on our Book page, so that people can either buy our book, or download a free chapter – but with the benefit of capturing their information when they go to get that free download.
This is the big difference with just putting a link to a file. That way you don't know who did what. This way, you'll know.
So what you do is create that product and then view it, in your browser. It will give you the product URL. That's the url that you use to create either a link or a button on your original product page (see below).
 Ready to add a Fan Club?
With the eCommerce and book page out of our way, it's time to move to our last few things to set up.
The fan club is one of those things you can do a variety of ways, but in this case I'm going to suggest you think about it as two parts – a forum where people can interact, and a membership that gives you access to the forum.
To do that, you need the free WordPress plugin, bbPress, the membership add-on, and the bbPress Membership add-on that you also got with the Pro Pack.
Installing bbPress is rather straight forward and others have written about it already.
What I want to cover with you is how to protect it so that even if you don't charge for membership, you can make sure that the only people who join your fan club are registered members.
The other benefit of this approach is that by using the membership component of iThemes Exchange, you can later add other gifts and benefits to your fan club and protect those pages via the same membership.
Your first step is to create a membership product – called Fan Club.
Now, you'll see an option to create a protection rule underneath this area, but ignore it for now. Our next step is to go create the forum itself.
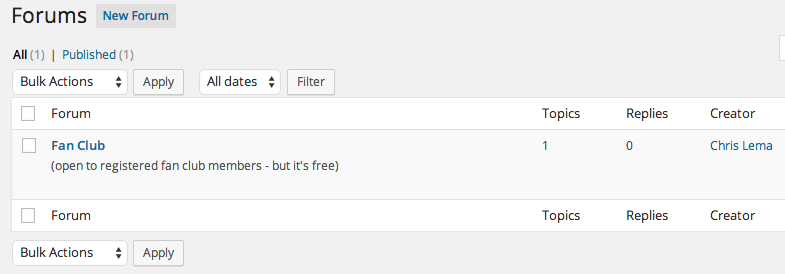
You go to Forums > New Forum and create one. As you can see above, I created a Fan Club forum.
From there, you go back to your membership product, and add a new rule.
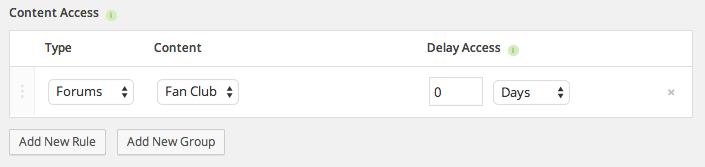
And with that, you've essentially created a forum that requires you to sign up for the membership product first (for free) and then you'll get access to the forum.
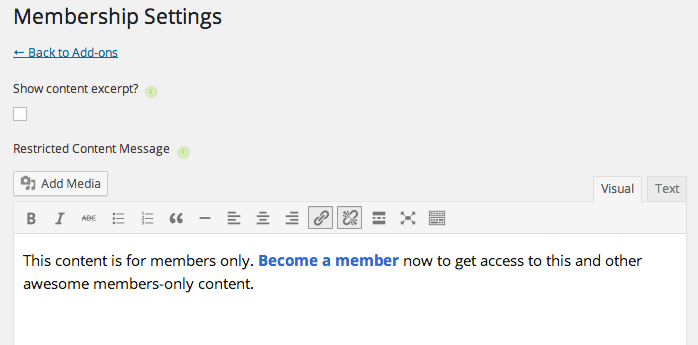
One little tip – if this is the only membership on this site (which in this case, it would be), you can also go to Exchange > Add-ons and click on the membership add-on settings. When you do, you'll get access to the “Restricted Content Message” which tells people they need to buy the membership product.
But since you only have a single membership, you can go there and tweak that message, even giving people a direct link to the membership product. This just gives your users a nice usability touch, so they don't have to go looking for the registration area.
And with that, we have our Fan Club set up.
What about the rest?
The beautiful part about the rest of my list is that it's all very basic.
Want to know how to set up the blog? No issue. It's already there. Just go to Posts > Add New and start writing.
Want to add a calendar or list of events? No issue. There are many event plugins. The one I've been using lately is called Event Organizer. It's free. And super easy! And if you want to sell tickets to events (which most authors don't), they have a Pro version that lets you. But for our purposes in building an author site we don't have to worry about tickets.
Conclusion
I know it feels like a lot of stuff. But when you think about it, other than hosting, we just built you an entire platform that will engage and develop your brand, your audience, and your profits – all for less than $200.
You can do that when you know what you want, know what you need, and pick the right tools for the job.
In this case, I think we can make the case that iThemes Exchange and the Pro Pack are a great deal!
I will share with you one last thing – we've covered functionality. And yes, for less than $200 and your time, you can build this out.
But it's also likely that you want it to look better than my sample. That's where you want real design. And you will want a real theme that helps you look good.
Don't walk away from here thinking you'll have the whole thing done for $200. I just wanted you to know that all the money you saved can now go to making your site look good.
And if you don't feel like doing all this work, hit me up on my contact form and I'm sure I can find some friends who would love to help you.