

What are Landing Pages?
The concept of a landing page is pretty simple – it's a distraction-free, targeted mechanism of communication that has an intended effect. In plain English, you create these pages for a reason, and you make sure nothing exists on the page that distracts from that purpose. Unbounce wrote a great article about the seven elements of successful landing pages, so I won't repeat all of what they say. Instead I'll just recommend you check out that great article.
My Simple Landing Page
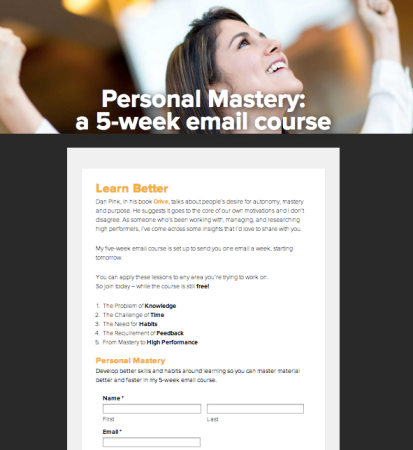
I recently invited people to take a 5-week free email-based course where I provide them some insight about how to learn more effectively. It's called Personal Mastery because we all have things we want to learn. How I created the email course using MailChimp's autoresponder feature is a topic for another article, but the landing page was my invitation to learn how to leverage a little neuroscience.
Using the Catalyst Theme
One of the things you often want to do on a landing page is remove your normal header, navigation bar, and sidebar so that none of those provide distractions. Mind you, I'm not telling you that you have to do that every time. I'm just saying it's a common thing you'll want to do. Thankfully, Catalyst makes it really easy to do.
Step One: Using Custom Layouts
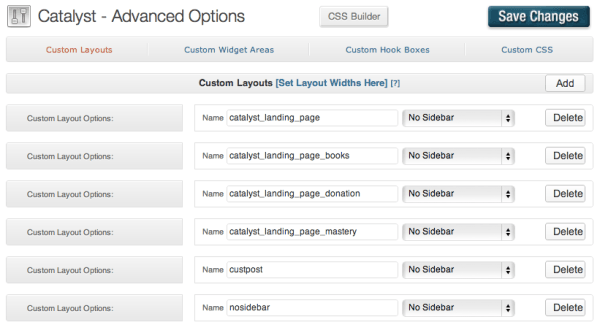
Catalyst makes it easy to create a custom layout. Simply click “add” in the top right and you'll see an empty row for a new layout. Then name it.
Your name must start with “catalyst_landing_page” as a prefix.
By using that prefix for the name of your layout, Catalyst will automatically remove your header, header links, navigation bars, and all that. All automatically. It's like magic.
Then, make sure you remove the sidebar by picking it from the drop down. Once you've done that, you're ready to go to the next step.
Step Two: Define the width of the Layout
The second step simply tells Catalyst how wide your want your one column of content. You've already removed everything else, so now it's just a matter of shaping that single column to what you want. Just a quick reminder: simply because you have a single column of content doesn't mean you can't put multiple columns of content in that space. I'm using the “single column of content” to mean a content container, not as a prescription of your look and feel.
You were in the Advanced section before. Now head over to Dynamik, if you're using that child theme (like I am). You'll see a tab for “Widths” where you can define your width for the specific layout you're working on.
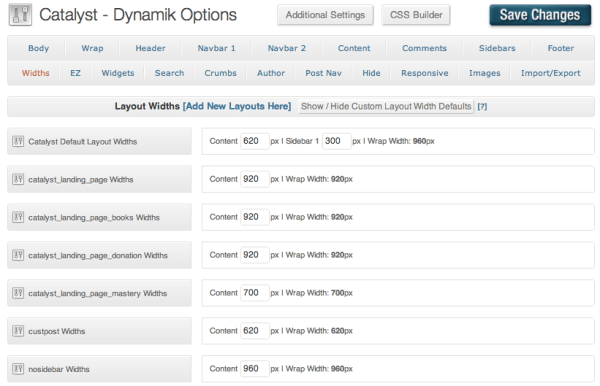
In my case, for my “mastery” course, I set it to 700 px.
Step Three: Create Content
We're almost done. Just this and one more step. But here's where you do all the important stuff. You'll create your page and drop in all your great content, images and/or video and your call to action (CTA). Sometimes your CTA is an image, other times a link, and other times a form. In my case, I was using a form that subscribed people to the Personal Mastery email course.
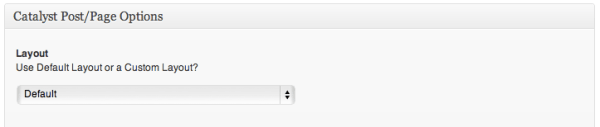
The one thing you have to do when your content is created, is configure that specific page to use the layout you've created. It's easy to do because it's one of the meta boxes that's available in the page creation screen. It's called the Catalyst post/page Options metabox and looks like this:
Our Last Step: Leveraging Hook Boxes
I don't want to get into the details of hook boxes in this post, so I'm just going to show you how to leverage them, and explain why they work, and in another post we'll look deeper at all the cool things you can do. Ok?
So what you can do is drop in any content you want, just about anywhere in the page – because there are a ton of spots where Catalyst has created on-ramps for you to do so. In our case, we like the “catalyst_hook_before_html” hook.
This tells Catalyst that before it starts doing other stuff, it should do what we put in the text below. And you can see below that all I've done is
- create a div,
- put an image in place as the background of that div,
- and then add text in front of it, towards the middle bottom.
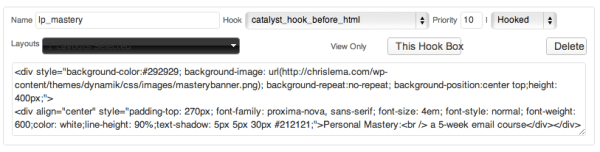
Because I connected it where I did (“before_html”) and because I clicked on that black box called Layouts, and tied it to the layout I wanted, now when people go to that page, they'll see this content first, and below it the main content of the page. Just like I wanted.
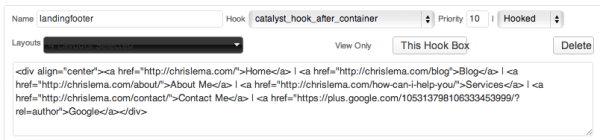
And just because I created one hook box doesn't mean I can't create another. In fact I did. For my footer text (links).
The Results
Creating the landing page took virtually no time once I knew what to do (which you now do). In fact this one was my third, so it was fast and painless – taking less than 15 minutes. Even if it takes you an hour or two though it's still worth it. Because my landing page has invited and enrolled over 80 folks into my Personal Mastery email course.