The Problem
Not everyone has huge carts filled with tons of goods. Not every store has tons of products which require the kind of workflow that WooCommerce initially sets up. Sometimes you don't want a “shop” screen with product categories listed. Sometimes you don't want a a products detail page. Sometimes you just have a “buy now” or “add to cart” button and you want to move people directly to the cart after they click it.
The problem is that WooCommerce sets things up to navigate from the shop page, to the product detail page, and from there to the cart page. That's two clicks to cart.
What you want is 1-click to cart.
The Goal: A Better WooCommerce Add to Cart Button
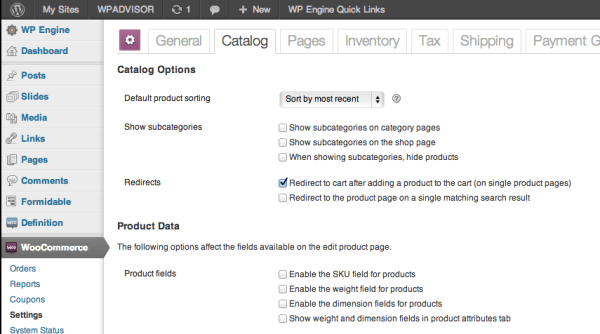
Now, the truth is that WooCommerce does have a setting (WooCommerce > Settings > Catalog) that lets you navigate people directly to the cart after adding an item. This check box triggers the right behavior. But there's one problem. It only does it from the single product page.
Maybe you've read about this hook you can use but you noticed it wasn't working. That's because it only works from the single product page.
So don't waste time with this action:
add_to_cart_redirect
Instead, get ready to build an express lane.
You want people to click “add to cart” and have the page redirected right away to the cart.
The Solution
Here are the three steps you need to take, each of which is pretty easy. Of course if you don't want to do the work yourself, you could contact Tweaky, who could probably do it for you for $25.
Step 1. Change the Setting
The first step is to go into your WooCommerce settings and change the routing so that you have it set to route to the cart after you click the “add to cart” button. I know it only works on single pages, but you still need to set the setting, in order to use it later.
Step 2. Change the Add to Cart Template
The second step requires you to look in your WooCommerce plugin directory.
Look in /Templates/Loop for a file called add-to-cart.php
Make a copy of that file and then open it. In that file, you're going to look towards the bottom of it for code that outputs the “add to cart” button. It looks like this:
printf(‘<a href=”%s” rel=”nofollow” data-product_id=”%s”>%s</a>', $link, $product->id, $product->product_type, $label);
This is the code that creates your button, and this is what you want to change. So when you find it, you'll replace it with this code:
printf(‘<a href=”%s” rel=”nofollow” data-product_id=”%s”>%s</a>', $link, $product->id, $label);
Now, before you think I'm telling you something horrible (like editing core files), just finish reading step 3.
Step 3. Copy Template into Theme
Now you have one last step to take. What you're going to do is take that file that you've changed (the copy of the original plugin template), and you're going to move it into your active theme folder.
But not just the file! It needs to be in a specific folder.
So inside wp-content/theme-folder/ you're going to want to create a folder called woocommerce. Inside that, you'll want to create a loop folder. Inside that, you'll copy your file. That's it!
Why This Works
In essence you've done two things. You've told WooCommerce to output the “add to cart” button that it normally does on single pages, only now you're asking for it to always be that kind of button. This means that the feature of auto-routing will now work because WooCommerce thinks it's on the single products page.
The second thing you've done is made that happen by overwriting the template files. The way it works is that WooCommerce first looks in your theme and if it doesn't find files, then it goes back to the plugin files to look for it. You've basically created the place it initially looks for, and because of that, you take priority.


