
If you've wondered, one of the chief aims of this blog is to help you do what you do better.
Now, I know that's not unique or anything. I get that. But to help with that, I've focused on trying to help you in specific areas – many of them related to WordPress.
One of those areas is helping you with your membership site or your online course. I've written tons of posts just focused on WordPress, Membership Plugins, Courseware, and how to pick the right stuff and use it.
I've also recently told you about the new Rainmaker platform – which will soon house one of my own sites, focused on team building, team management and more.
Building a Membership Site in a few hours
What I did last night was to build out an entire membership site and online course on Rainmaker and today I'm going to walk you thru the 12 steps – without writing a line of code, or doing any design work.
First, let me show you that it was actually real, in this two minute video.
Three hours – but just uploading files, clicking within the site, and filling in the blanks.
All because Rainmaker is awesome!
Step One: Log in. It looks great & still is WordPress
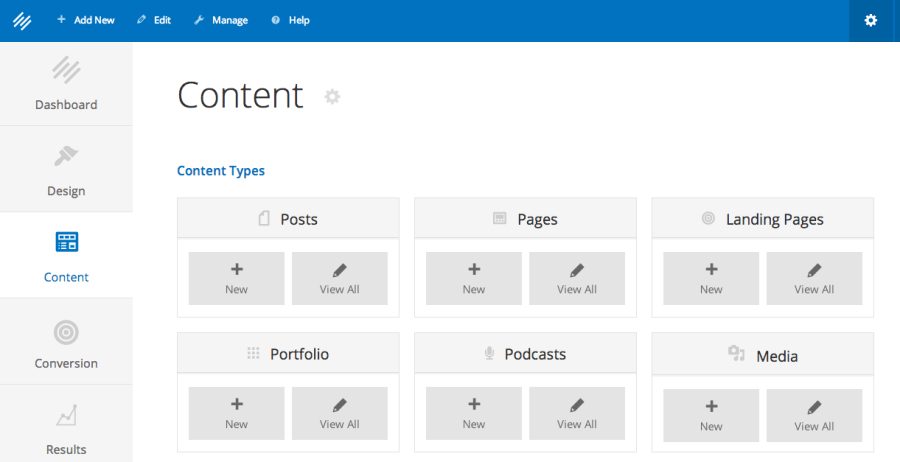
So the first step is to set up an account and log in. Once you do that, you'll be able to click into the Content area and even though it looks different, if you've used WordPress before, much of this will feel very similar.
And that's great news. They've just made it easier (reason 212 why it's awesome).
Step Two: Loading up Content Files
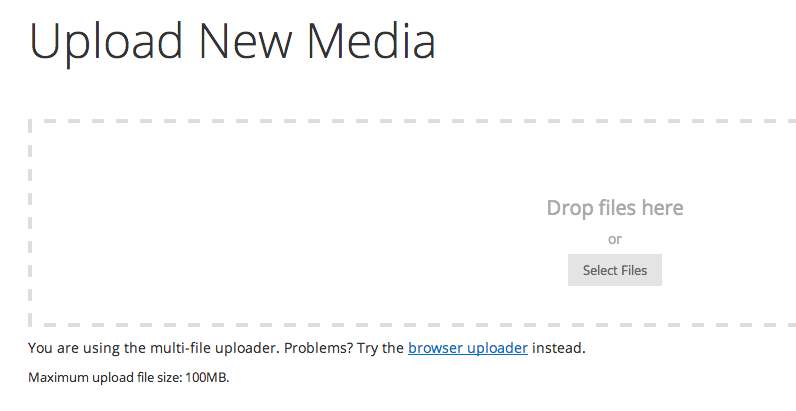
There is another section I found later in Rainmaker that lets you load in files. But I didn't realize that up front, and it wasn't that big a deal to me. Either way, in step two, I went to the media section and loaded in all the files I had for this course.
You may think files are only images. But in the case of a course, it is often:
- video transcripts
- PowerPoint slides
- homework assignments.
All of that was stuff I loaded so that my online course and membership site could get started.
Step three: Configure Vimeo
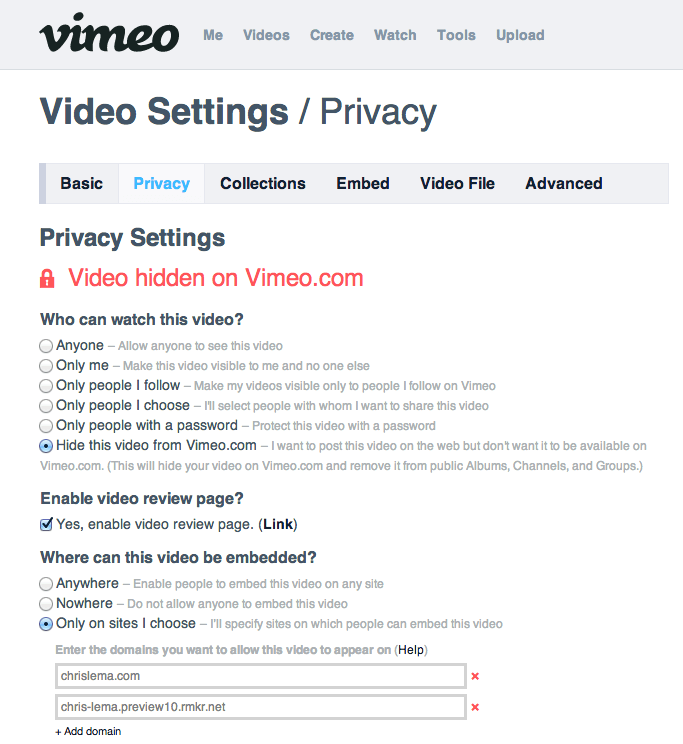
I know this isn't about Rainmaker, but I put a lot of video on my Vimeo Pro. One of the things it let's me do is hide my content from the regular Vimeo site, as well as limit where it can be embedded from (by url).
So in this example, I had to add that second URL so that I could play videos on the new site.
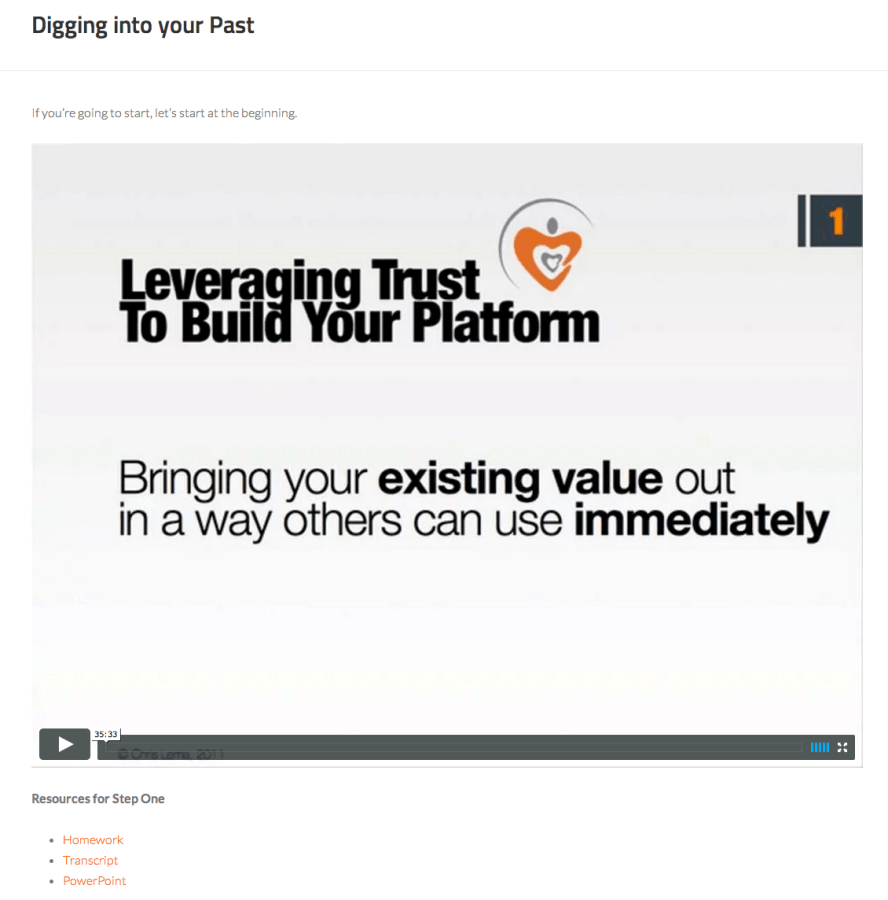
Step four: Create Course Pages
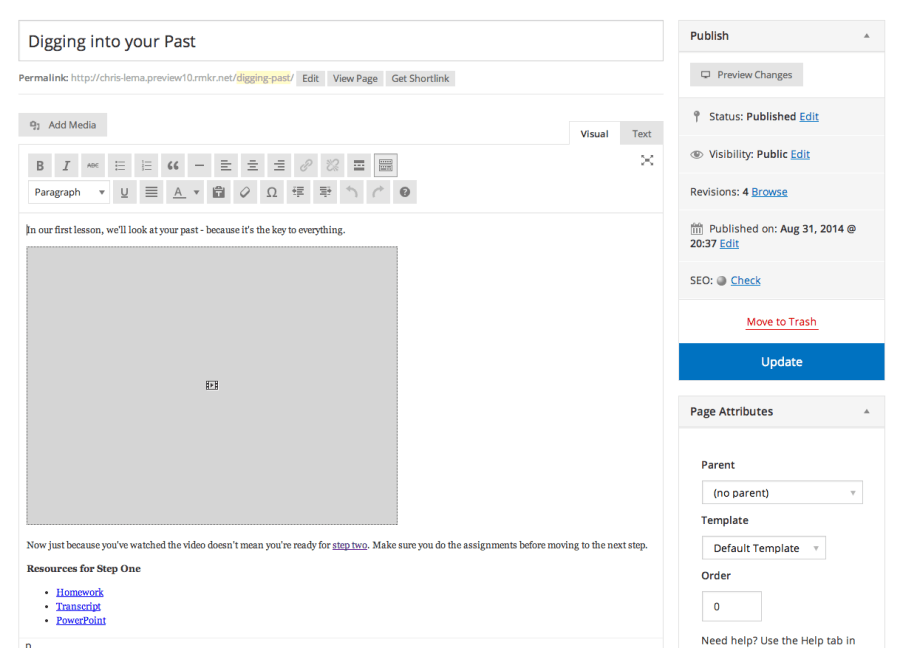
Now this is the particular approach I took, and I'm sure there are other ways to do it. But I like to go create all my pages first, and load in all my content before I create products, pricing, or restrict it via membership.
You can see that I was now able to use the Vimeo embed code to drop in the video, and I was able to link the text for homework, transcript, and PowerPoint to each of the files I'd already uploaded.
This represents a “lesson” on this site.
I did this for each lesson in the whole course.
Step five: Stepping into the Conversion area
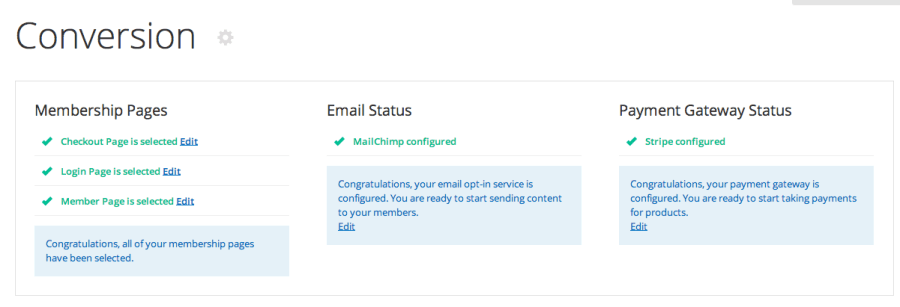
From here, the next step was to click on “Conversions” on the left side. At the top, you may see a lot of to-dos to take care of.
For me it meant configuring this new site to trust MailChimp, as well as to integrate with Stripe for payments. Once I got all the green checkboxes marked, I could move on.
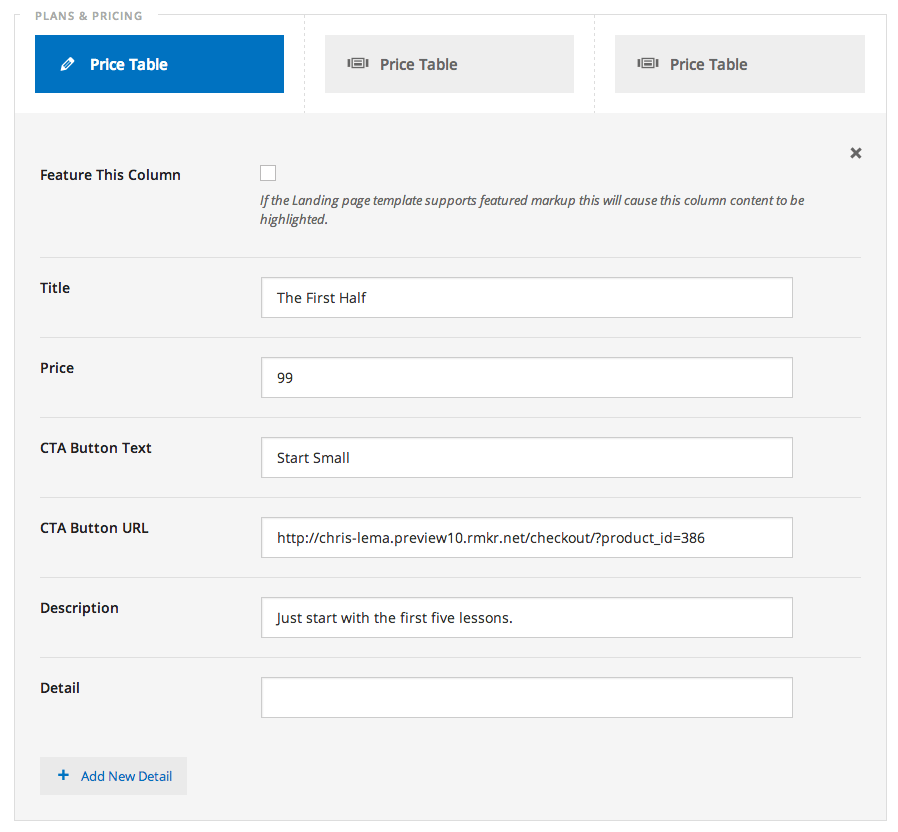
Step six: Create Products
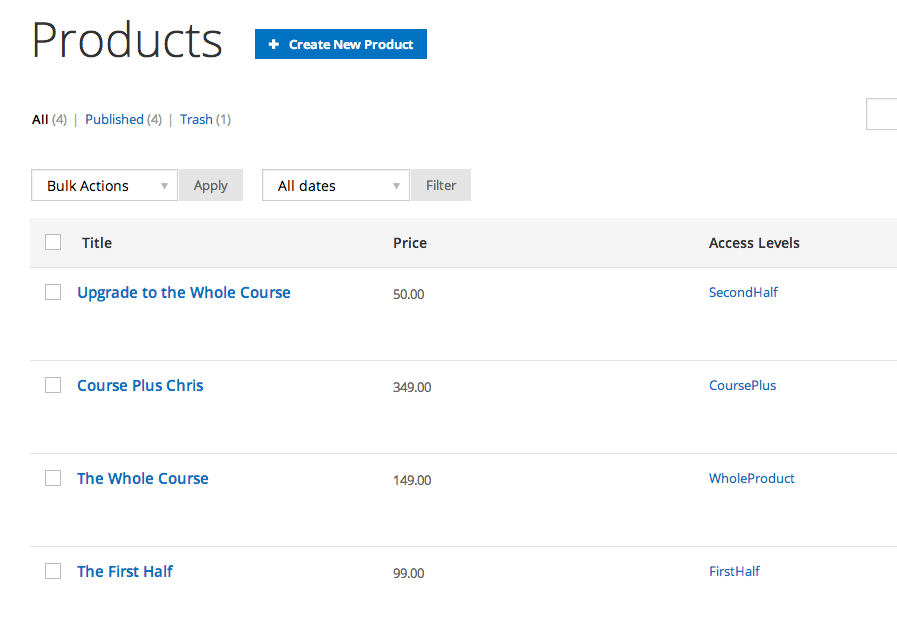
Remember in the video how I told you I figured out how to charge three different amounts for a single course? Where here it is – my products page. Here you can click on that “Create New Product” (which we'll do next) and create as many products as you want.
What I did was realize that the first 5 lessons of my 9 lesson approach constituted a nice mini course. It's a way to get a lot of value and it delivers actionable work to that point that some people could take and run with.
So I created a product for it. But I know others who would need the next several steps. So I priced a new product for the whole course.
Then I added another option which included two meetings with me – which I priced higher.
And lastly, I know some people would buy the First Half, and then want the Whole Course. So I created an upgrade product for the difference.
Four prices for a single course -and Rainmaker didn't break a sweat!
Step seven: Configure your Product Details
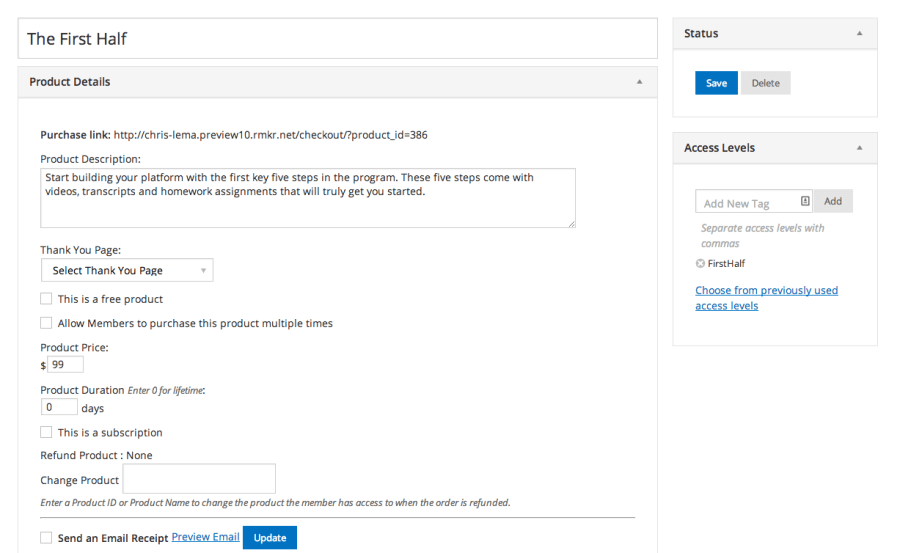
You'll notice you get to name your products. You also get to write a description and set a price.
You have the ability to create different thank you pages, and determine if you'll charge once, or every month.
Towards the bottom there you'll notice you can integrate with email, so that you send out a receipt, put them on your newsletter or more.
Now up in the right, you'll see Access Levels. That's another phrase for “membership levels.” It's what you'll use to protect your pages. By typing in “FirstHalf” I just created a new membership level tied to this product.
Someone who buys this will be able to see all content that is protected only for FirstHalf folks.
Step eight: Go back and Protect Pages
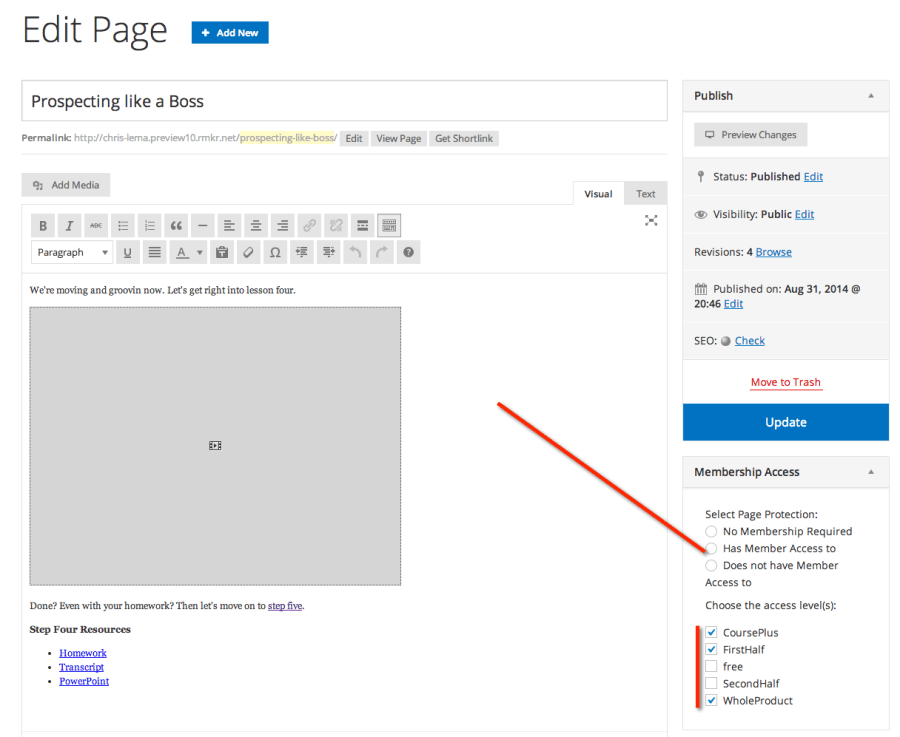
Now that we have those membership levels set up, you can use them to protect course lessons. As you can see, this lesson isn't part of “SecondHalf” but is part of “WholeProduct,” which makes perfect sense.
Step nine: Let's make this look Pretty
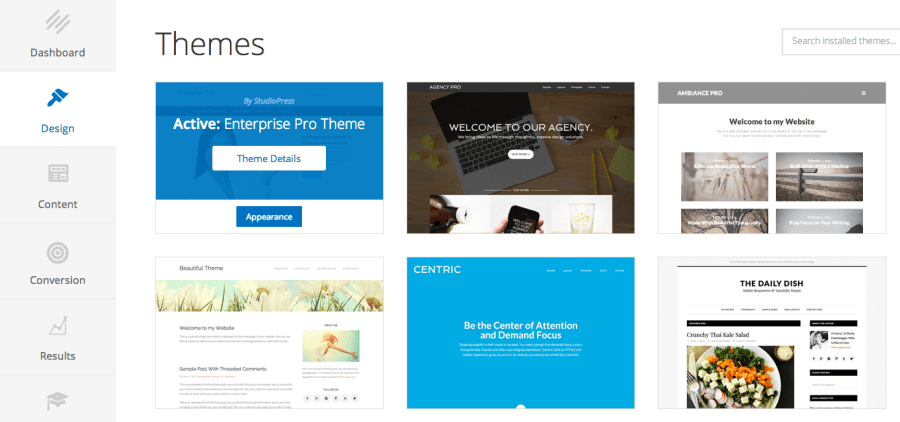
I promised no coding, and this is where most things fall apart – because to make something look pretty will mean work. But no! This is Rainmaker, by the same folks who created StudioPress themes. So you know you'll look good.
I picked a theme called Enterprise Pro and it was easy to work with.
Step ten: Configure your Home Page
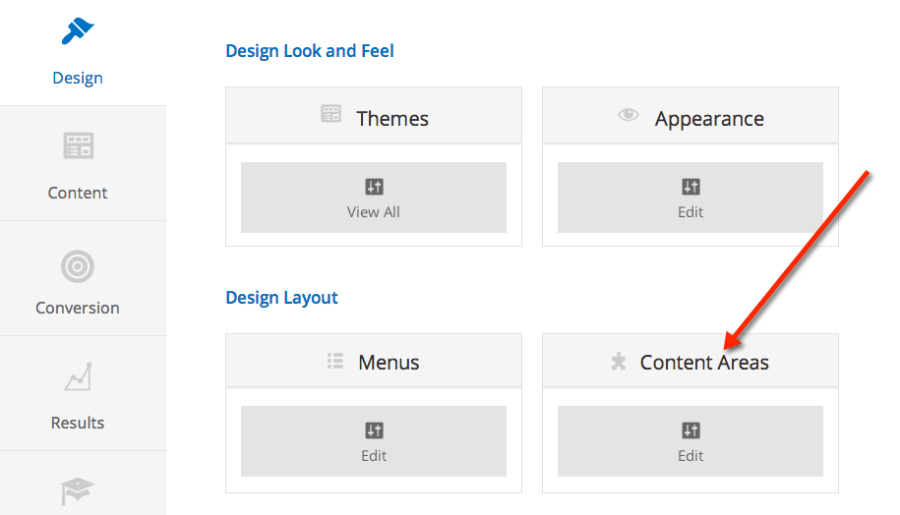
Rainmaker calls it “content areas” but if you know WordPress, it's widgets. Either way, this is what we'll need to configure our home page.
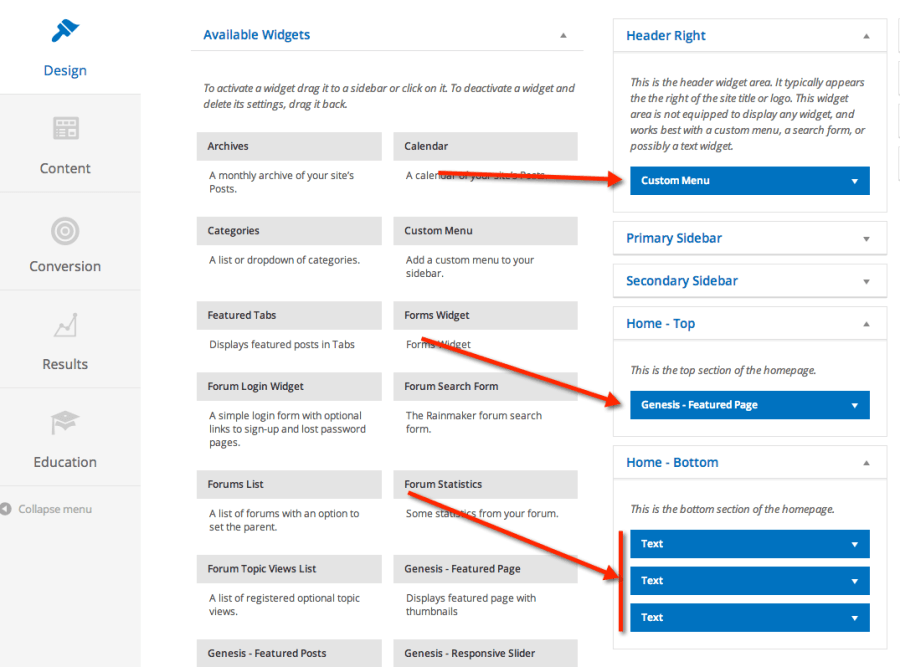
To make the page look pretty, we'll need to add a custom menu that will go in the upper right section, we'll need to highlight the page that will represent the content on the home page, and we'll need to use three text widgets to drop in our testimonials.
This means you'll need to go back and create a content page for the home page, with a featured image and some text, and the call to action.
Once you've created the page, you go back to the Home – Top widget area and use the Genesis Featured Page widget to put it on the top of the page.
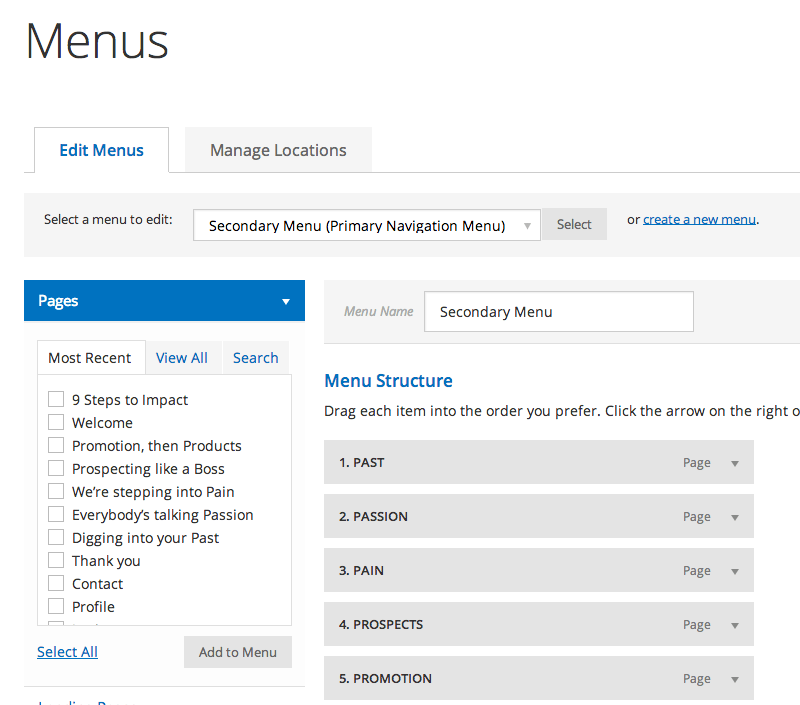
Step eleven: Create your Menus
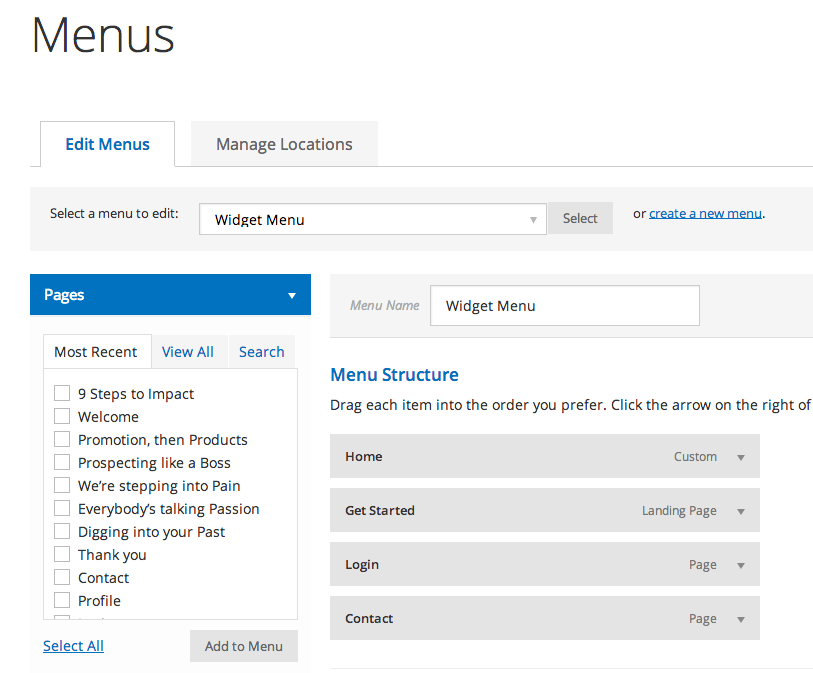
As I mentioned above, you'll want to create at least two menus for this kind of membership site and course. The first is the one I talked about already, at the top right.
The second is the course outline – showing all the key steps in a single menu bar for easy navigation.
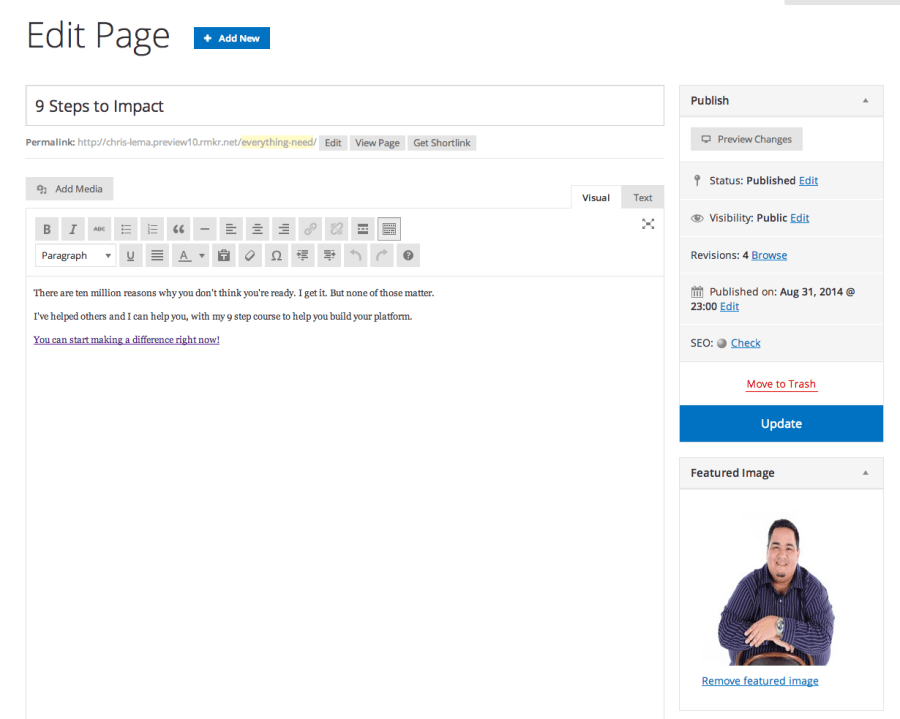
Step twelve: Create your Landing Page
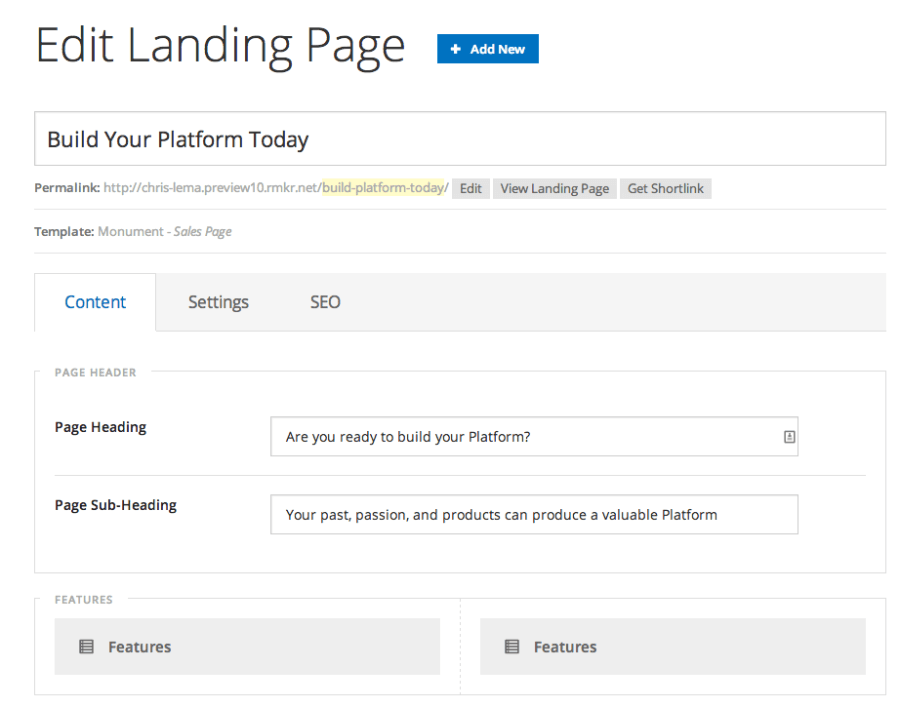
This is the page that “sells” your course. And it does so in a beautiful way.
To be clear, you have many different layouts available to you, with different looks.
Rainmaker also lets you tweak the colors and use whatever images you want.
What I'll show you here are the steps to putting in the content for your sales page.
(and if you're counting, we're on our last step and we've still not written a line of code or done anything difficult, huh?)
You start with your heading and sub-heading, but you'll see those grey boxes for features – you just fill them in. And you can add more, if you need them.
As you scroll down the page, you'll get to load in testimonials and call to action (CTA) buttons.
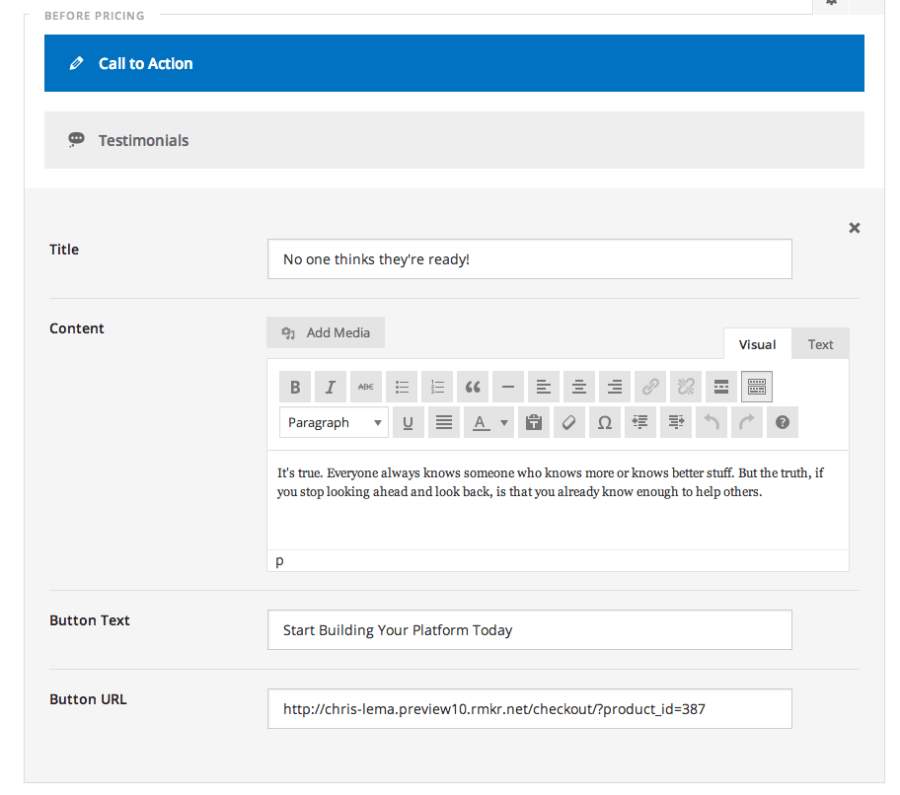
You'll also be able to do this below your pricing table. But let's not rush things – because honestly, this pricing table is also really nice and easy to configure.
Notice in both of these last two screens all I've needed to help someone buy my course is to give Rainmaker and this landing page the URL of the product.
It will drop it right into their cart and upon payment, give them direct access to the right content.
Conclusion
When it's all done, and you've paid, you can immediately click on the first lesson, and see the page with the video, as well as links to all the course materials.
Pretty neat, huh?
12 steps in three hours – not long because of complicated work. In fact, I bet I could do it faster if I hadn't been watching a movie at the same time.
But that's the beauty of Rainmaker, it's easy, fun, makes you look good, and never requires you to become a programming god just because you want to build your platform.
So you know what I'm going to ask you, right?
Are you ready to try Rainmaker?