August 9, 2021
Building a Pick and Mix Solution with WooCommerce
In the eCommerce space, there are always puzzles. The other day a person asked a question in one of the Facebook Groups focused on WooCommerce. I don't recall the whole question, but at its core was a question about building a pick and mix solution and how to do it with WooCommerce. If you've never...
In the eCommerce space, there are always puzzles
The other day a person asked a question in one of the Facebook Groups focused on WooCommerce. I don't recall the whole question, but at its core was a question about building a pick and mix solution and how to do it with WooCommerce.
If you've never heard of a pick and mix solution, you've surely experienced it. I was in a candy story in Sacramento once with my buddy Justin Wise, and I discovered (for the first time) that he was really into candy.
We walked in and they had this scenario where you could buy a huge tin, and then fill it up with any of the candies in their store, all for one single price. (He tried to say it was for his family.) I can't recall, but he may have had to buy new luggage to take this thing home!
That's a pick and mix solution.
But you may have never been to a candy store like that. What I know you've experienced is buying a dozen donuts. Right? You get to pick 12 and they can be from any of the main set of donuts, in any mix you like.
So how do you build a pick and mix solution with WooCommerce? I'll tell you.
What You Need to Build a Pick and Mix Solution
You'll need three things to make this work - and I'm assuming you already have two of them.
- First you need WooCommerce Hosting (starts at $19/month)
- Second you need WooCommerce (free)
- Third you need the Product Bundles extension ($49)
That's all you'll need, which is a pretty short list, if you ask me.
Defining Our Pick and Mix Solution
As with every kind of project, the most important stuff happens before you do any development. It's all about understanding what we want the user to experience.
If you think enough, and the right way, solving the problem becomes trivial.
So let's assume we want to sell cupcakes. And we will sell them individually and also at a discount when selling a dozen.
The trick about selling a dozen is that we want our customer to have the limit of 12, but no limit on the configuration of the dozen. It's a perfect example of a pick and mix solution with WooCommerce.
First, Create a Variable Product
So the first thing we're going to do is create a variable product.
To do that, we always start by creating a product, marking it as variable, and then moving to attributes to create the attribute that will be used for variations. In this case I'm creating a single attribute called Flavor.
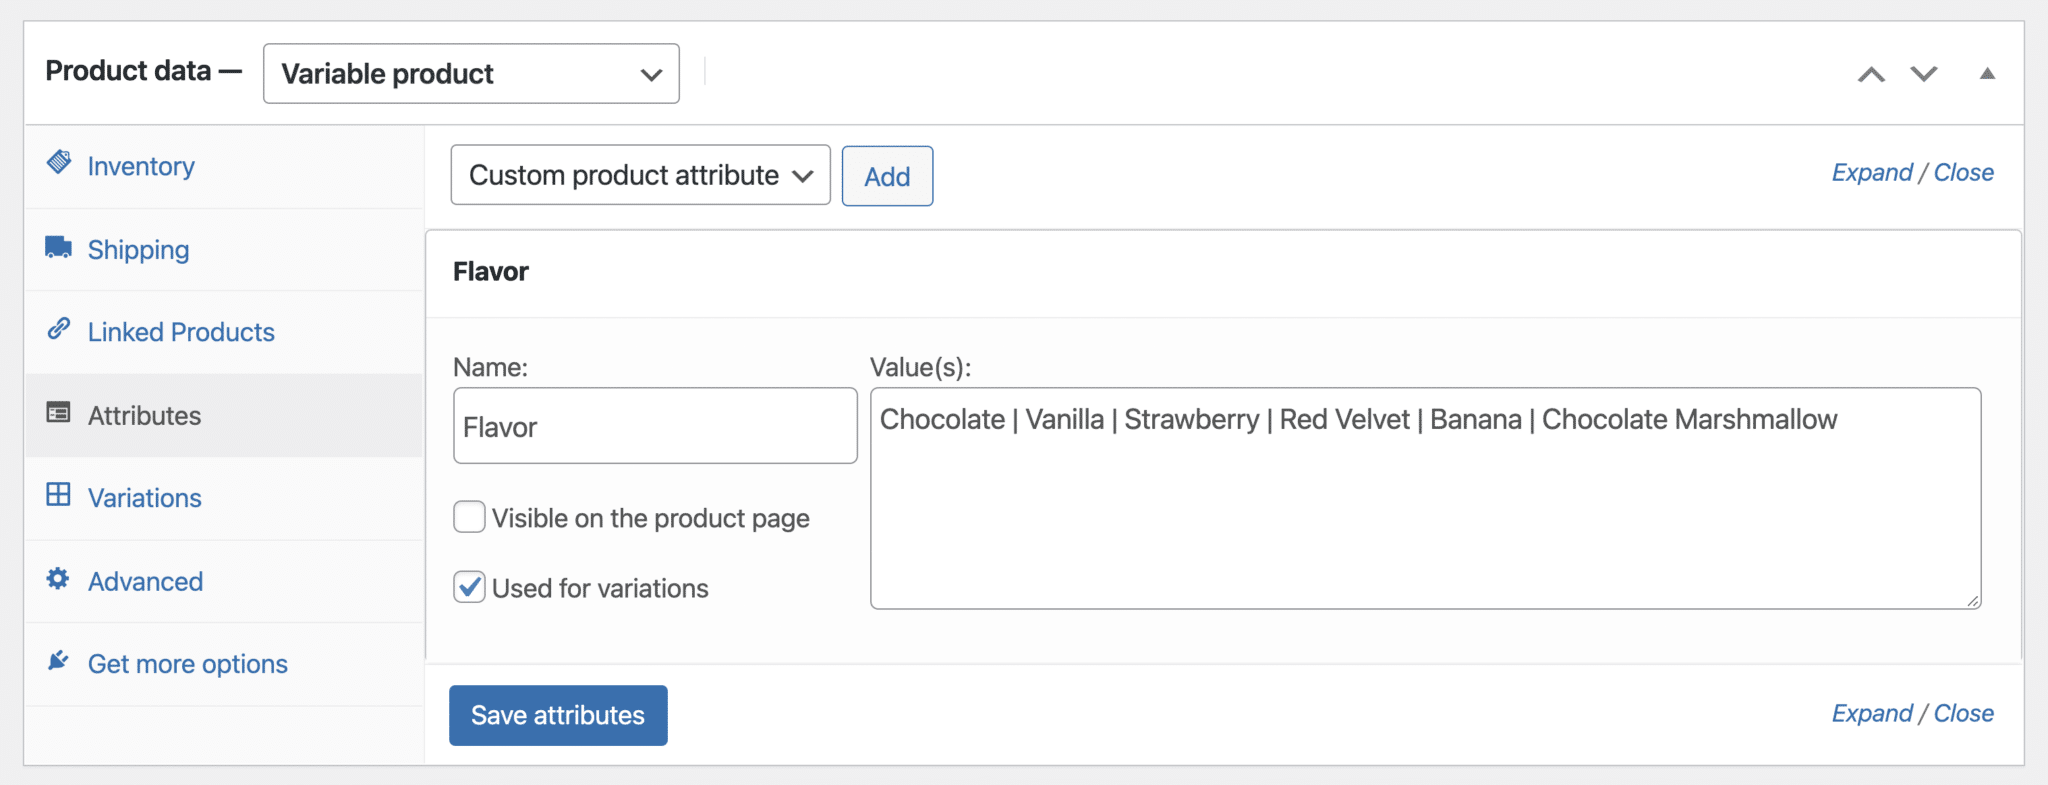
From there I'm going to create variations. I do that by first marking the attribute as "used for variations," and then heading to the Variations tab and clicking "create variations based on the attribute" from the dropdown. This will ask me if I'm sure, and then create as many variations as I have values in the attribute - which is 6 in this example.
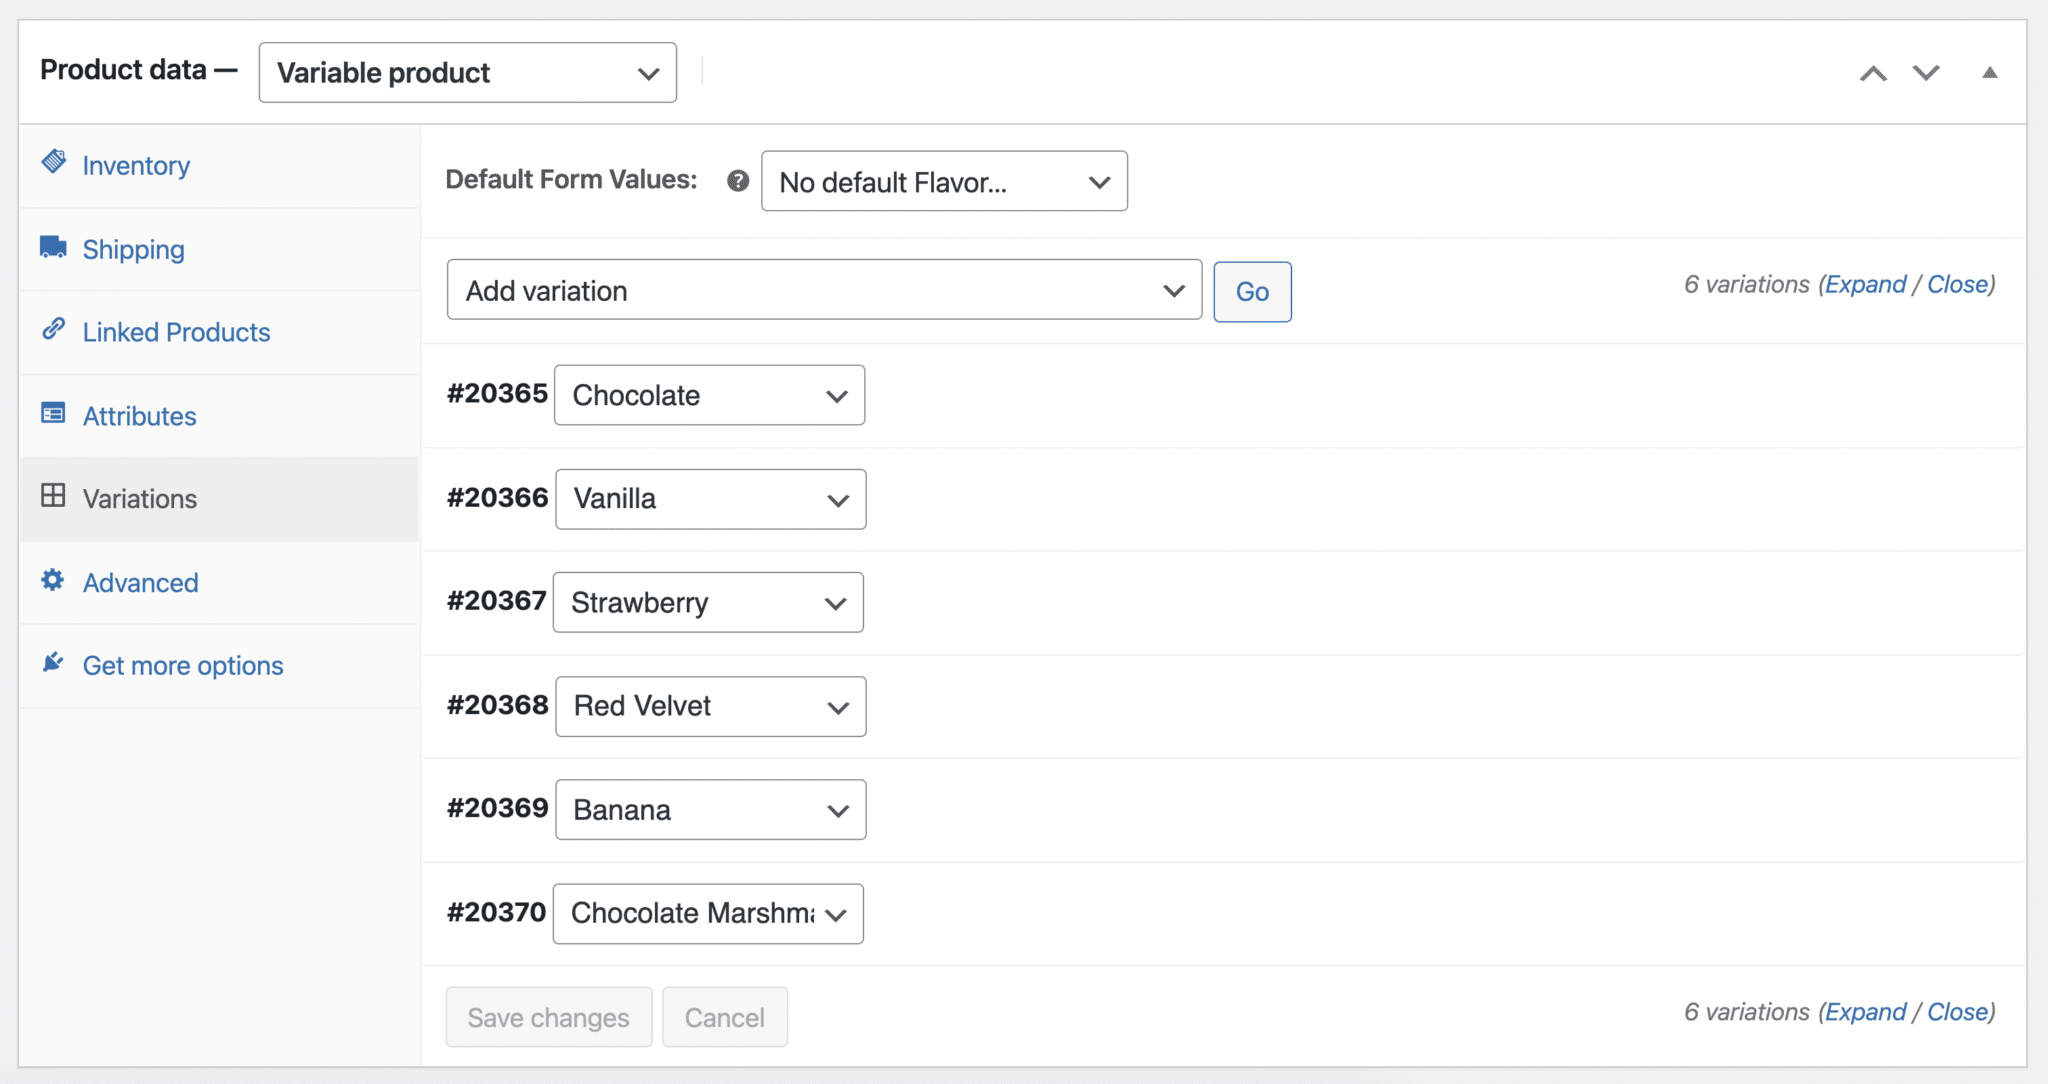
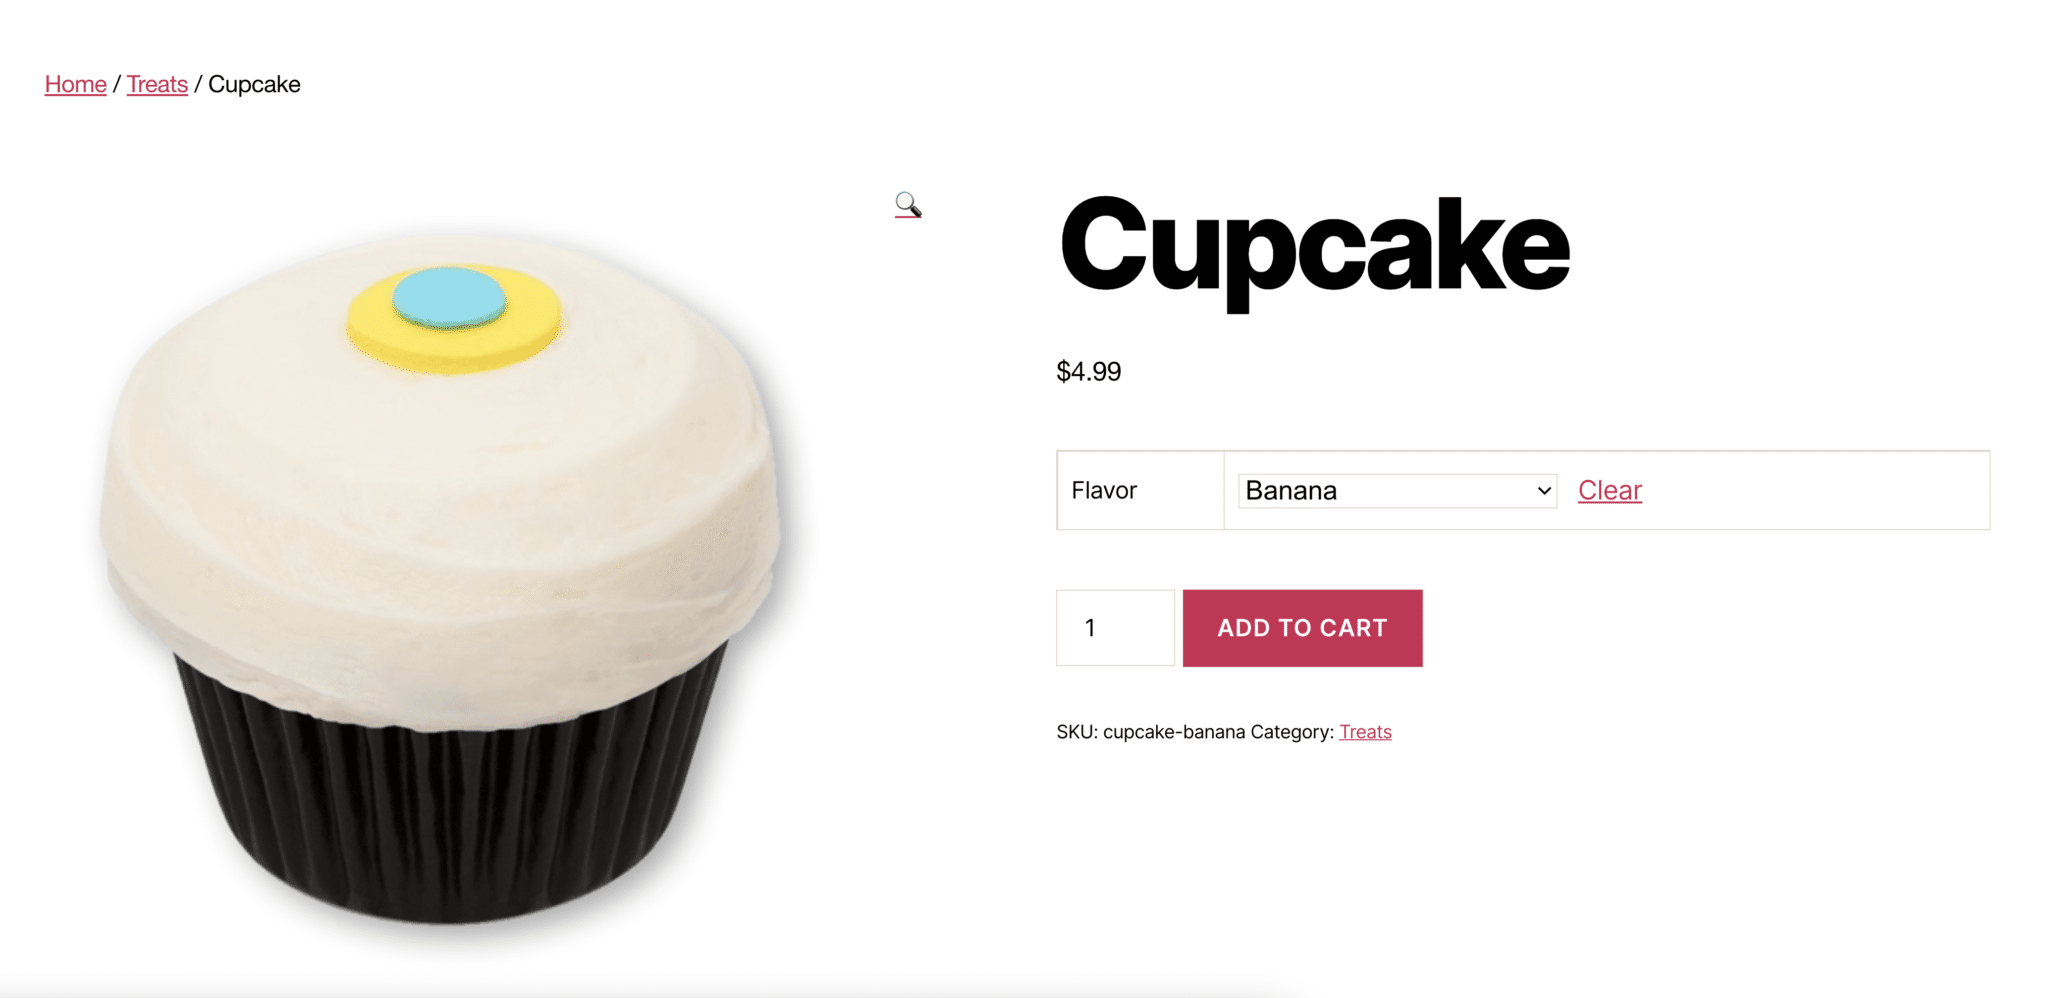
When these variations are complete, you can go into each one and add the right image, and set the individual price. The result will be a cupcake that anyone can buy, and it will be presented to the user with an option for one of six different flavors.
Part one is done. Now we have to create the pick and mix solution.
Then, Create the Product Bundle
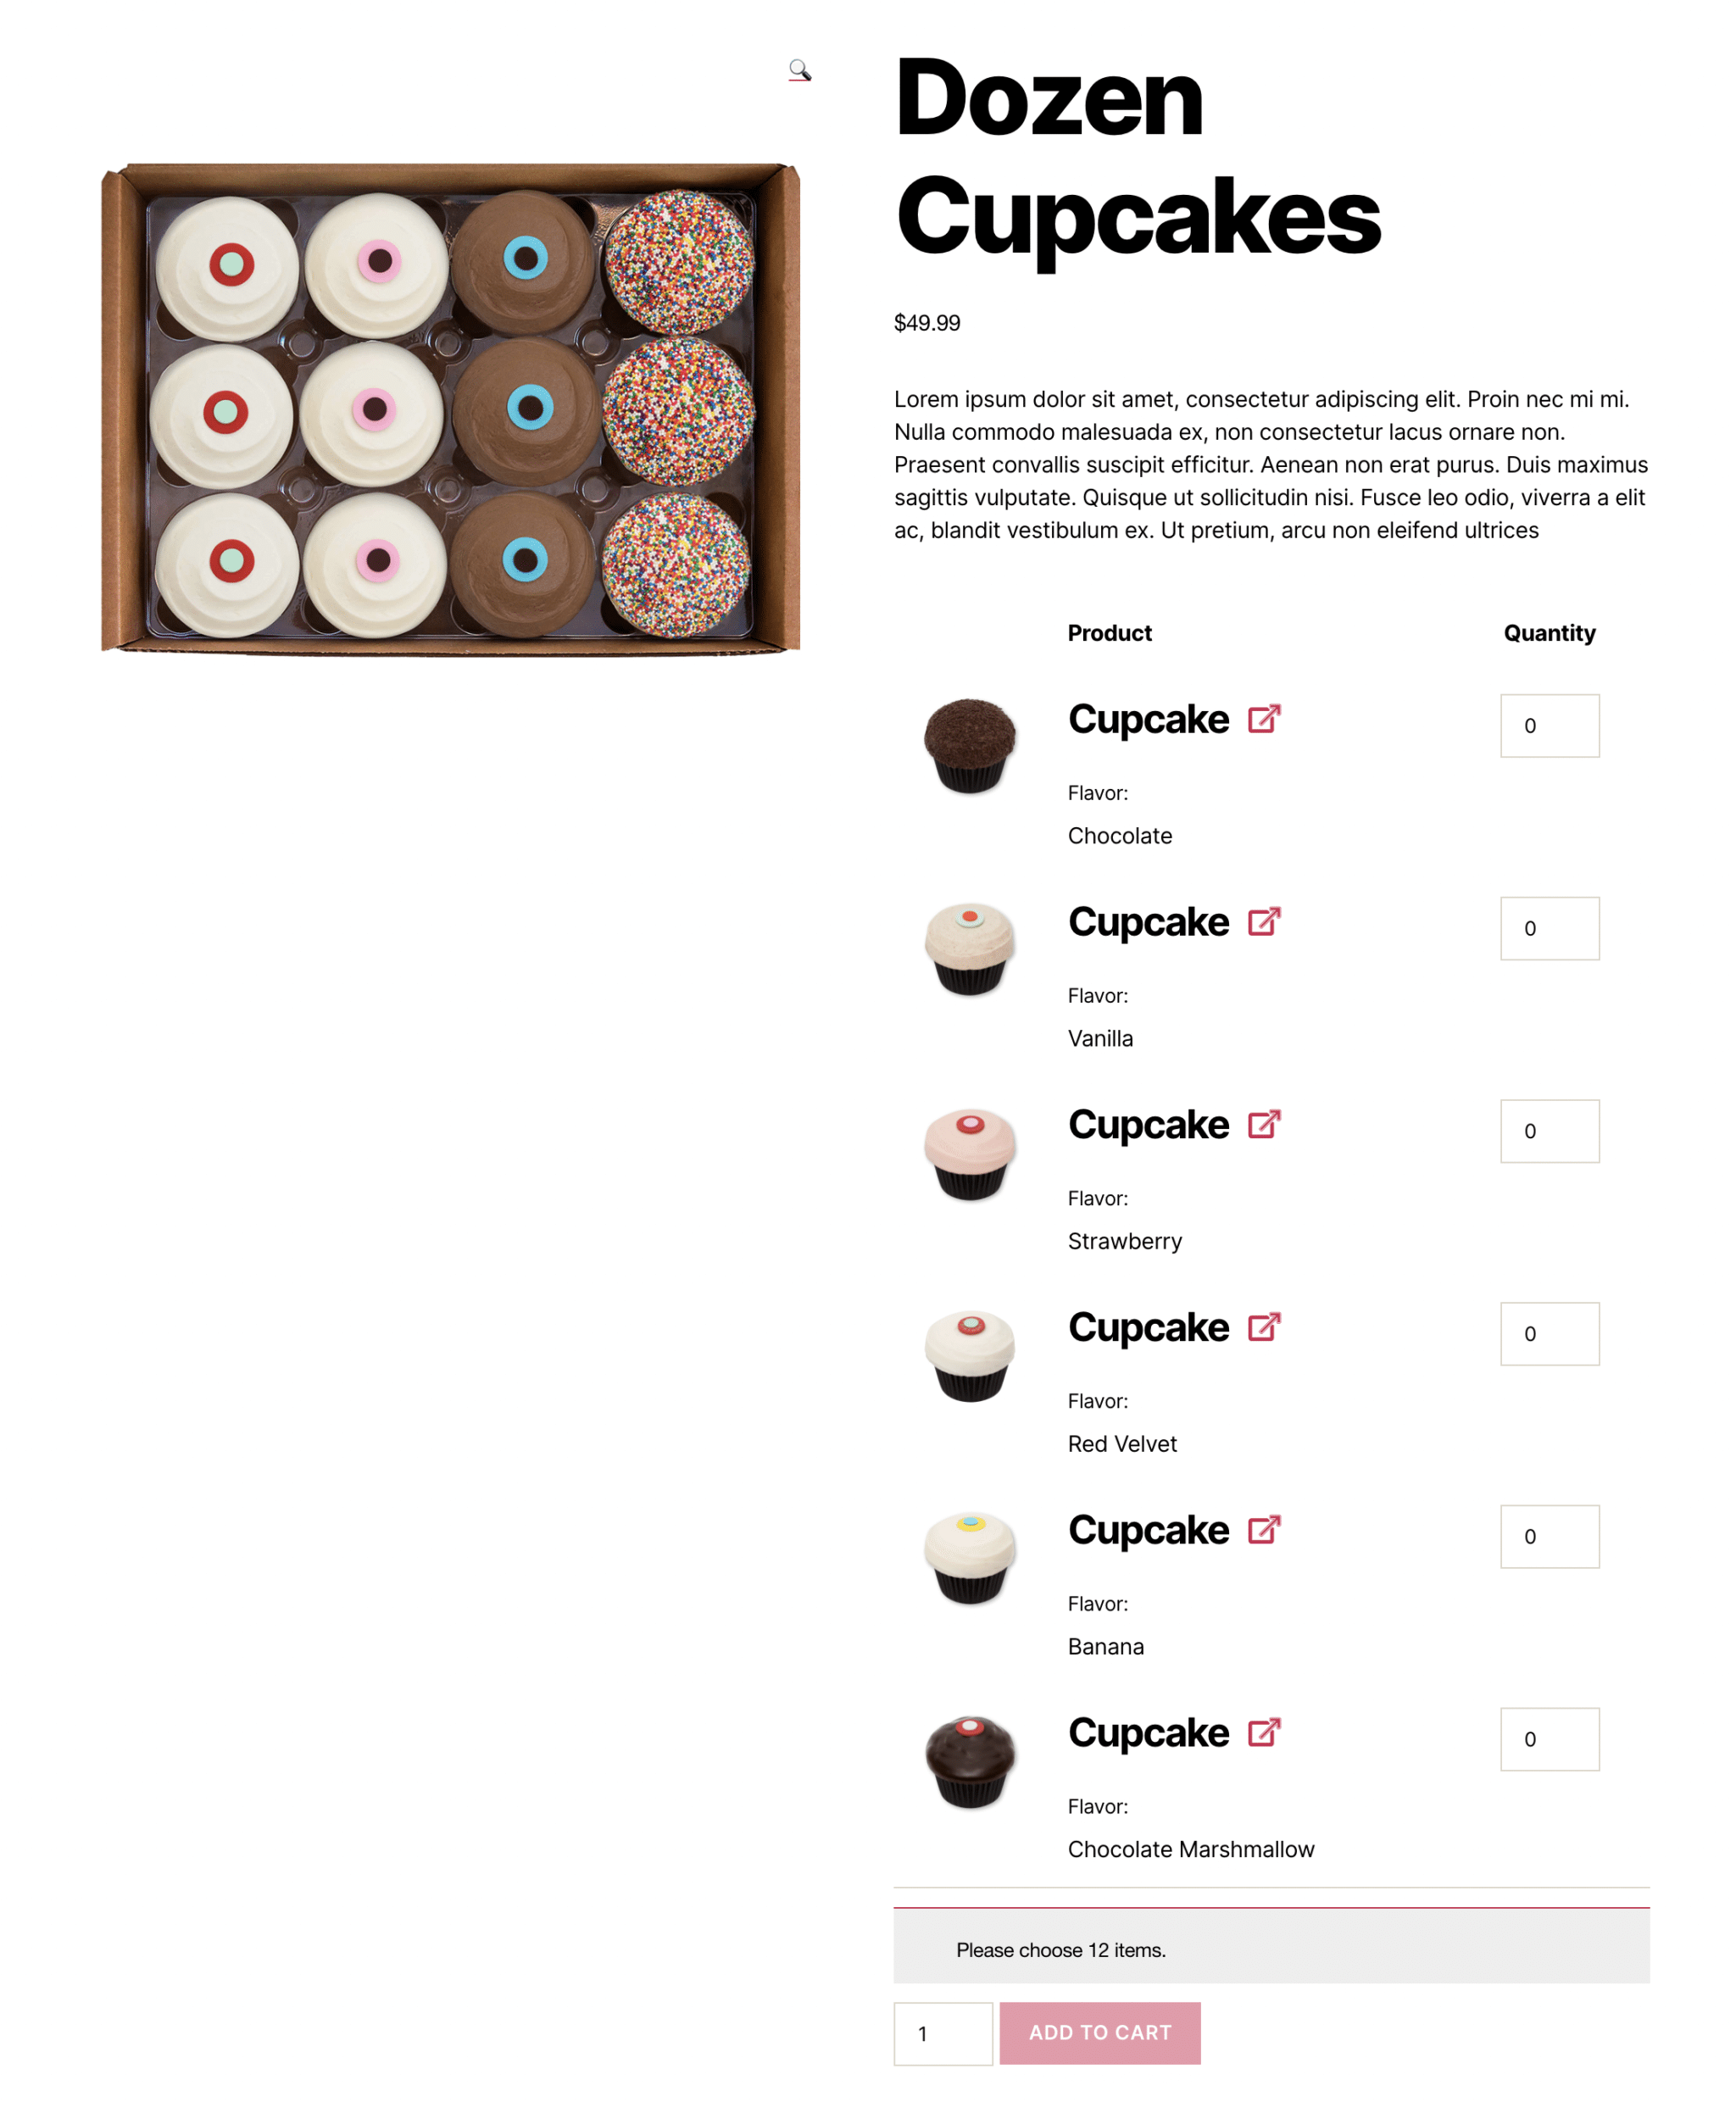
When we're done, what's this going to look like? Let's start there. What we want is a way for customers to not only have picked what they want in their dozen, but be able to manipulate it. And only be charged for the dozen, not for each individual cupcake.
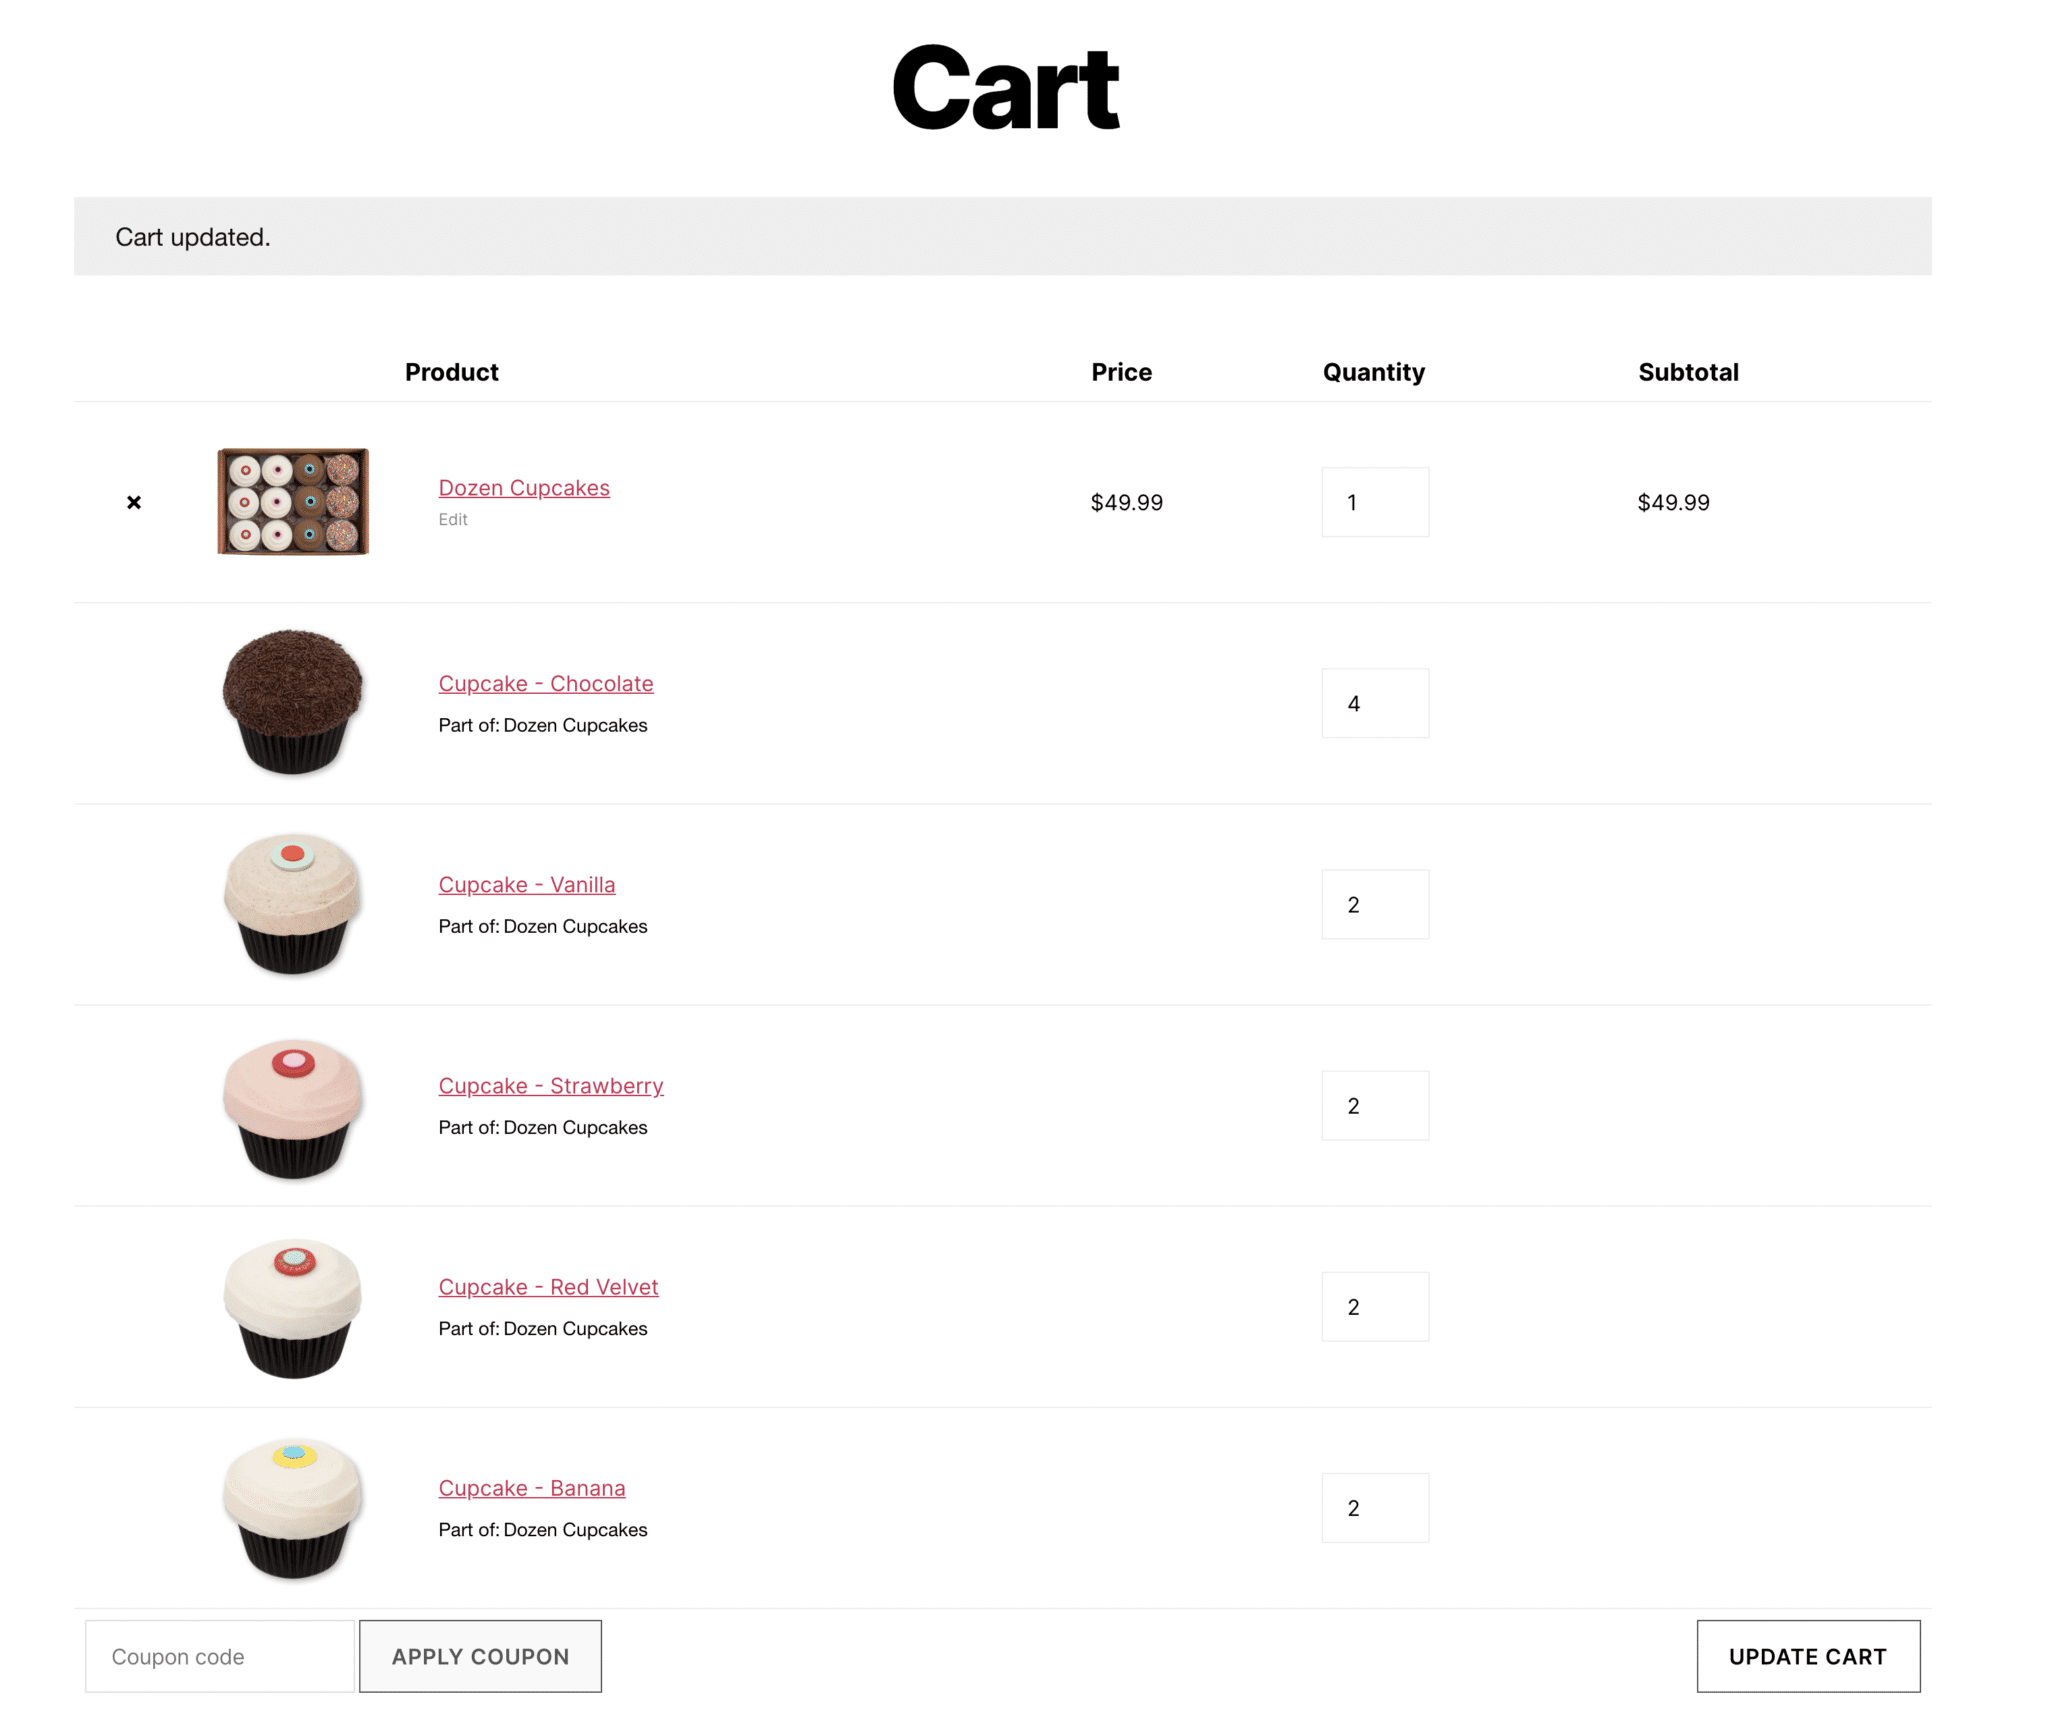
There it is. A single price for the dozen, and a way to decide which twelve cupcakes I want. How did we do it? That's where the Product Bundle extension comes in.
Configuring the Product Bundle
There's a lot of configuration that you're going to see in this screen, but it's not as complicated as it looks.
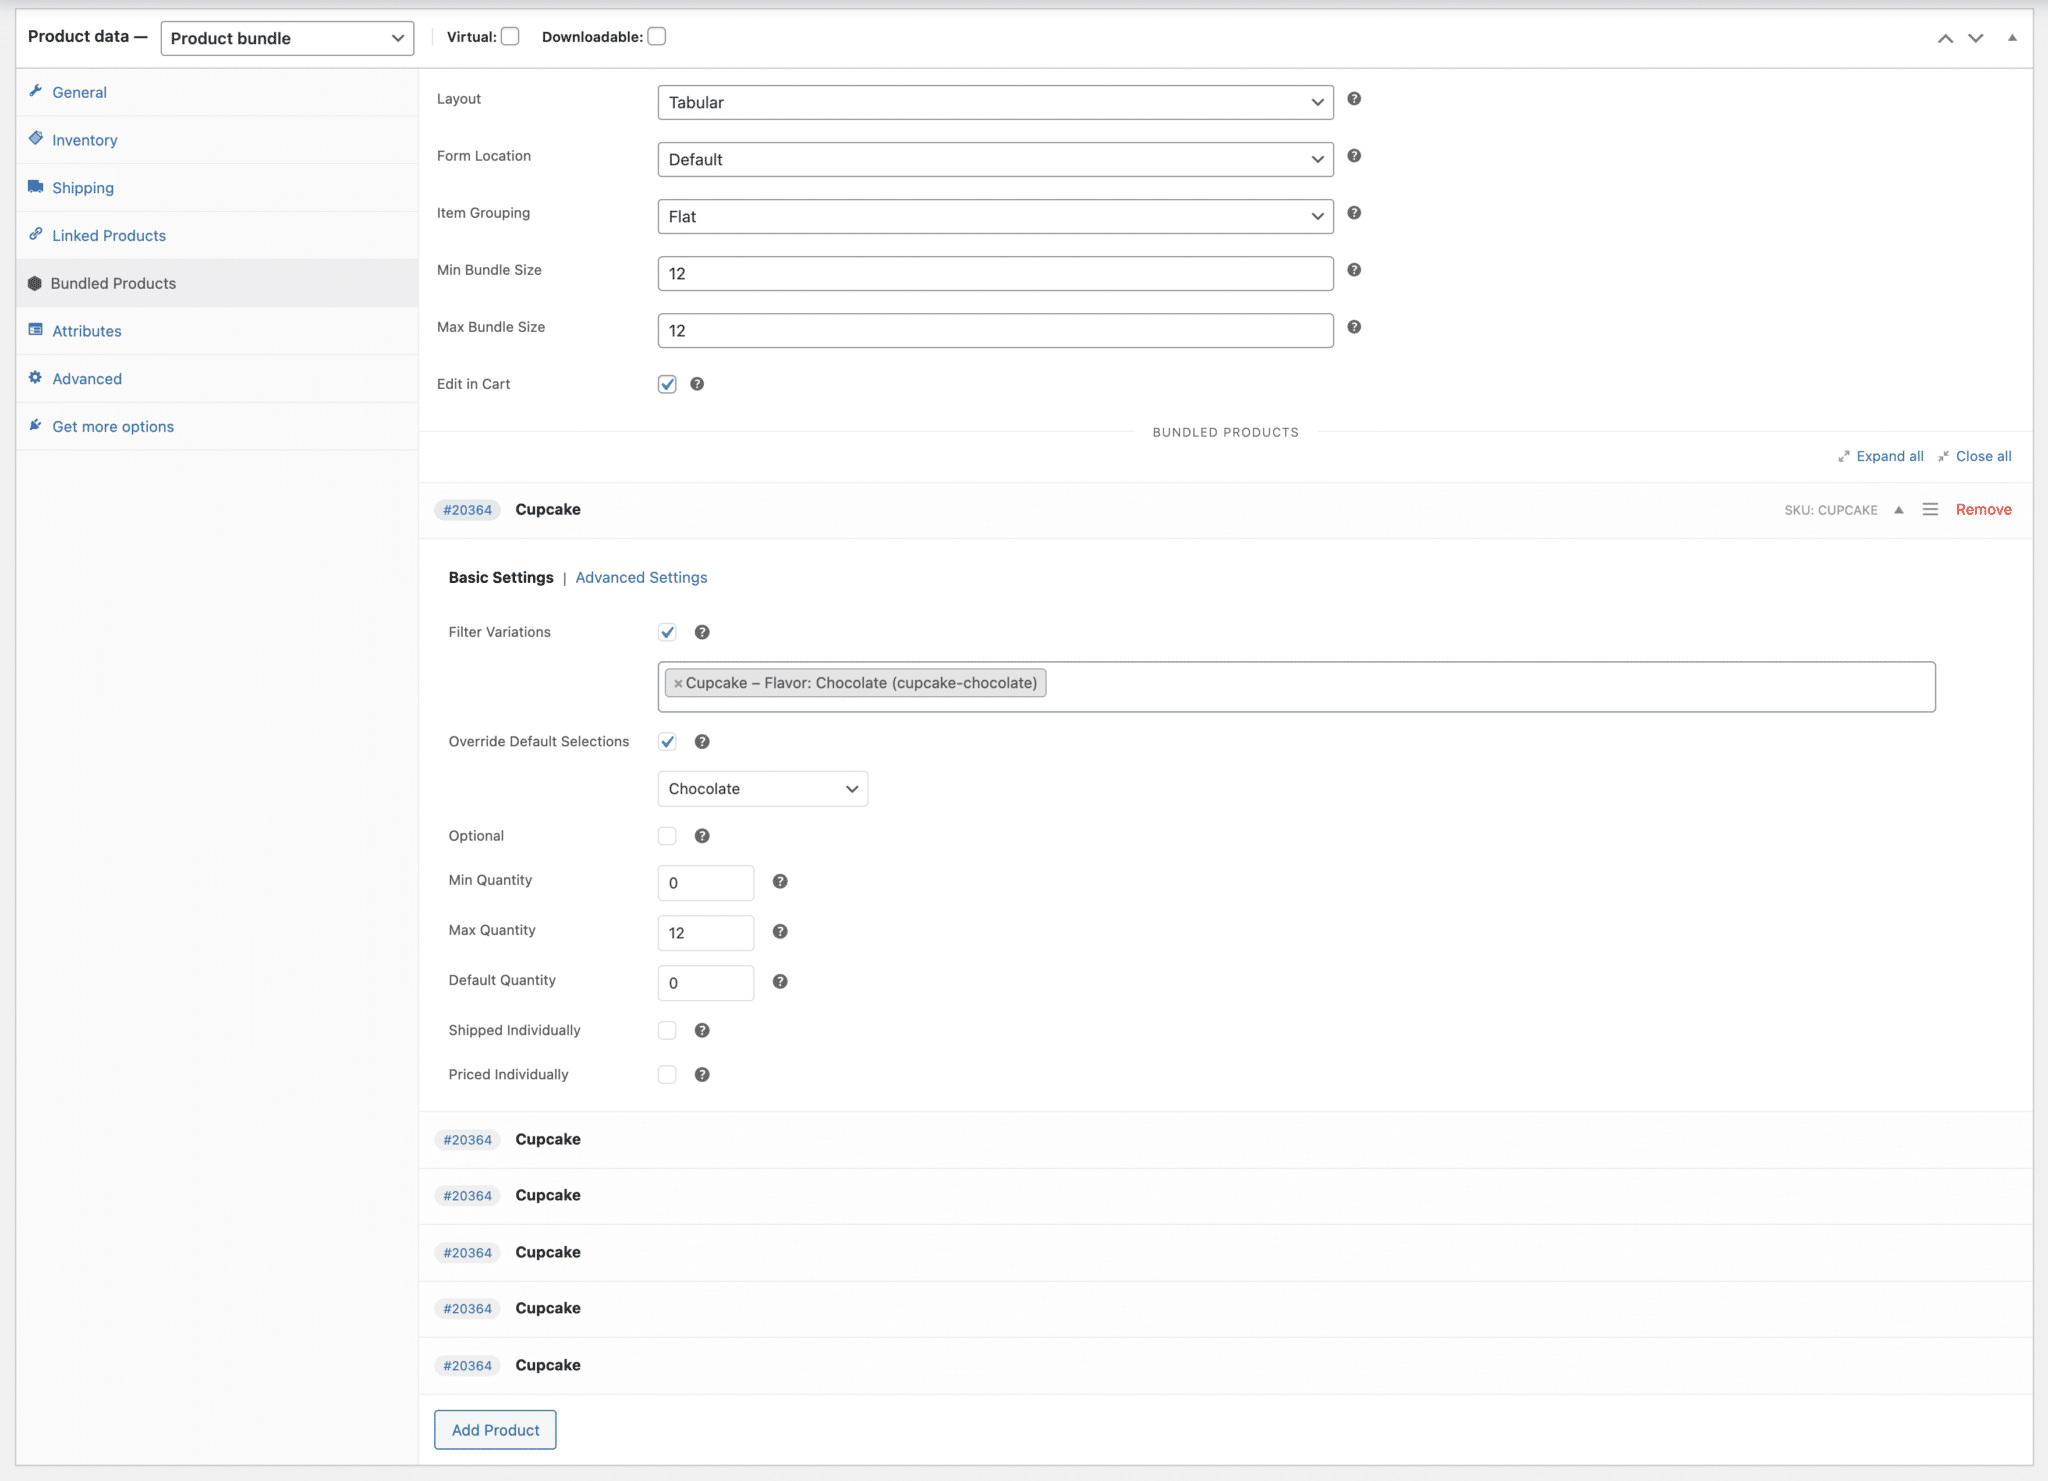
Product Data - The first thing you're going to do is create a new product, and the type, in the product data drop down is a product bundle.
Layout - For most pick and mix solutions, choosing the Tabular layout will work great.
Location - Again, this is not likely going to be a thing you need to worry about. Leaving the default will be fine. The look will be based on your theme more than anything else.
Grouping - Flat will work fine since there's no inherent hierarchy with most pick and mix bundles.
Now we get to the good stuff.
Min & Max Bundle Size - Since you have a locked in quantity, it will be 12 no matter what.
Edit in Cart - The last option, which gives us the look above, is the "edit in cart," which I'm a big fan of. The only reason you wouldn't do this is if the options were so many that it didn't make sense. In my case I have 6 flavors. Not an issue.
Putting Products into the Bundle
Once you have all that in place, you have to add your products. Now, since I'm adding variations of a single product, you'll see that I've added the same product 6 times (for the six flavors). So while I show you one above, it's the same for all 6 entries.
If you had not created a variable product, you might have several different products listed here. Each one will need to be configured.
Filter Variations - I marked this as true, and then picked the variation. That means a person can tell me how many Vanilla they want. And how many Chocolate. You get the idea.
Override Defaults - I marked this as true and set the right option (Chocolate with Chocolate) so that the customer doesn't have to do anything other than place a quantity in the box.
Optional - I didn't make this optional. If you mark it optional, then the user has to say that yes, indeed, they want chocolate, and then tell me how many chocolate cupcakes they want. Too many clicks. In other words, the chocolate item shows up on the page every time. But as you'll see below, the default quantity is 0, so that's not a big deal.
Minimum Qty - You don't need to pick any chocolate at all if you don't want to, so it's set (in every case) to 0.
Maximum Qty - The max is 12. You can have all 12 be of one flavor.
Default Qty - My default is always 0. So that's what you put here. Because you don't want to force them to eat a cupcake they don't want.
Shipped Individually - In some other scenario this might be helpful, but not here. You're buying a dozen, as a pack.
Priced Individually - The point of buying a bundle is that you get bundle pricing. So this is left unchecked as well.
Building a Pick and Mix Solution with WooCommerce
When everything is done correctly, you end up with something that looks like this (it does depend a bit on your theme and I'm using a default theme here). But what you see is that the user is presented (much like in the cart image above) with an option to pick from the six different flavors. When they get to 12 items, their dozen is done, and they can add it to their cart.
So that's it. Maybe you'd never heard of a pick and mix solution, or maybe you didn't know how to do it in WooCommerce. Maybe you don't need the tutorial but you needed a reminder that cupcakes are oh so good. Whatever your situation, I hope this helps.
A story. An insight. A bite-sized way to help.
Get every article directly in your inbox every other day.
I won't send you spam. And I won't sell your name. Unsubscribe at any time.
About the Author
Chris Lema has spent twenty-five years in tech leadership, product development, and coaching. He builds AI-powered tools that help experts package what they know, build authority, and create programs people pay for. He writes about AI, leadership, and motivation.