April 26, 2026 | Chris Lema
The Non-Developer's Guide to Building a Website with Claude
A 24-step walkthrough for non-technical readers — how to build, edit, and deploy a free website using Claude Cowork, GitHub, and Cloudflare Pages, without writing a single line of code.
My buddy Steve is not technical. He keeps hearing that he could use Claude to build websites but has no idea how to do it. Of course the idea of simply telling Claude what he wants, and what edits he needs to see, is compelling. But how does one go about setting that up?
Today I'm going to show you. In detail. With every step and every screenshot — so you have nothing to fear.
Step 0 — Download Claude Desktop
I'm going to assume, since we're talking about Claude, that you can download Claude Desktop. It lets you work on local files in one of its three modes, Claude Cowork. That's what we're going to be using today.
Step 1 — Open Cowork and start a new project
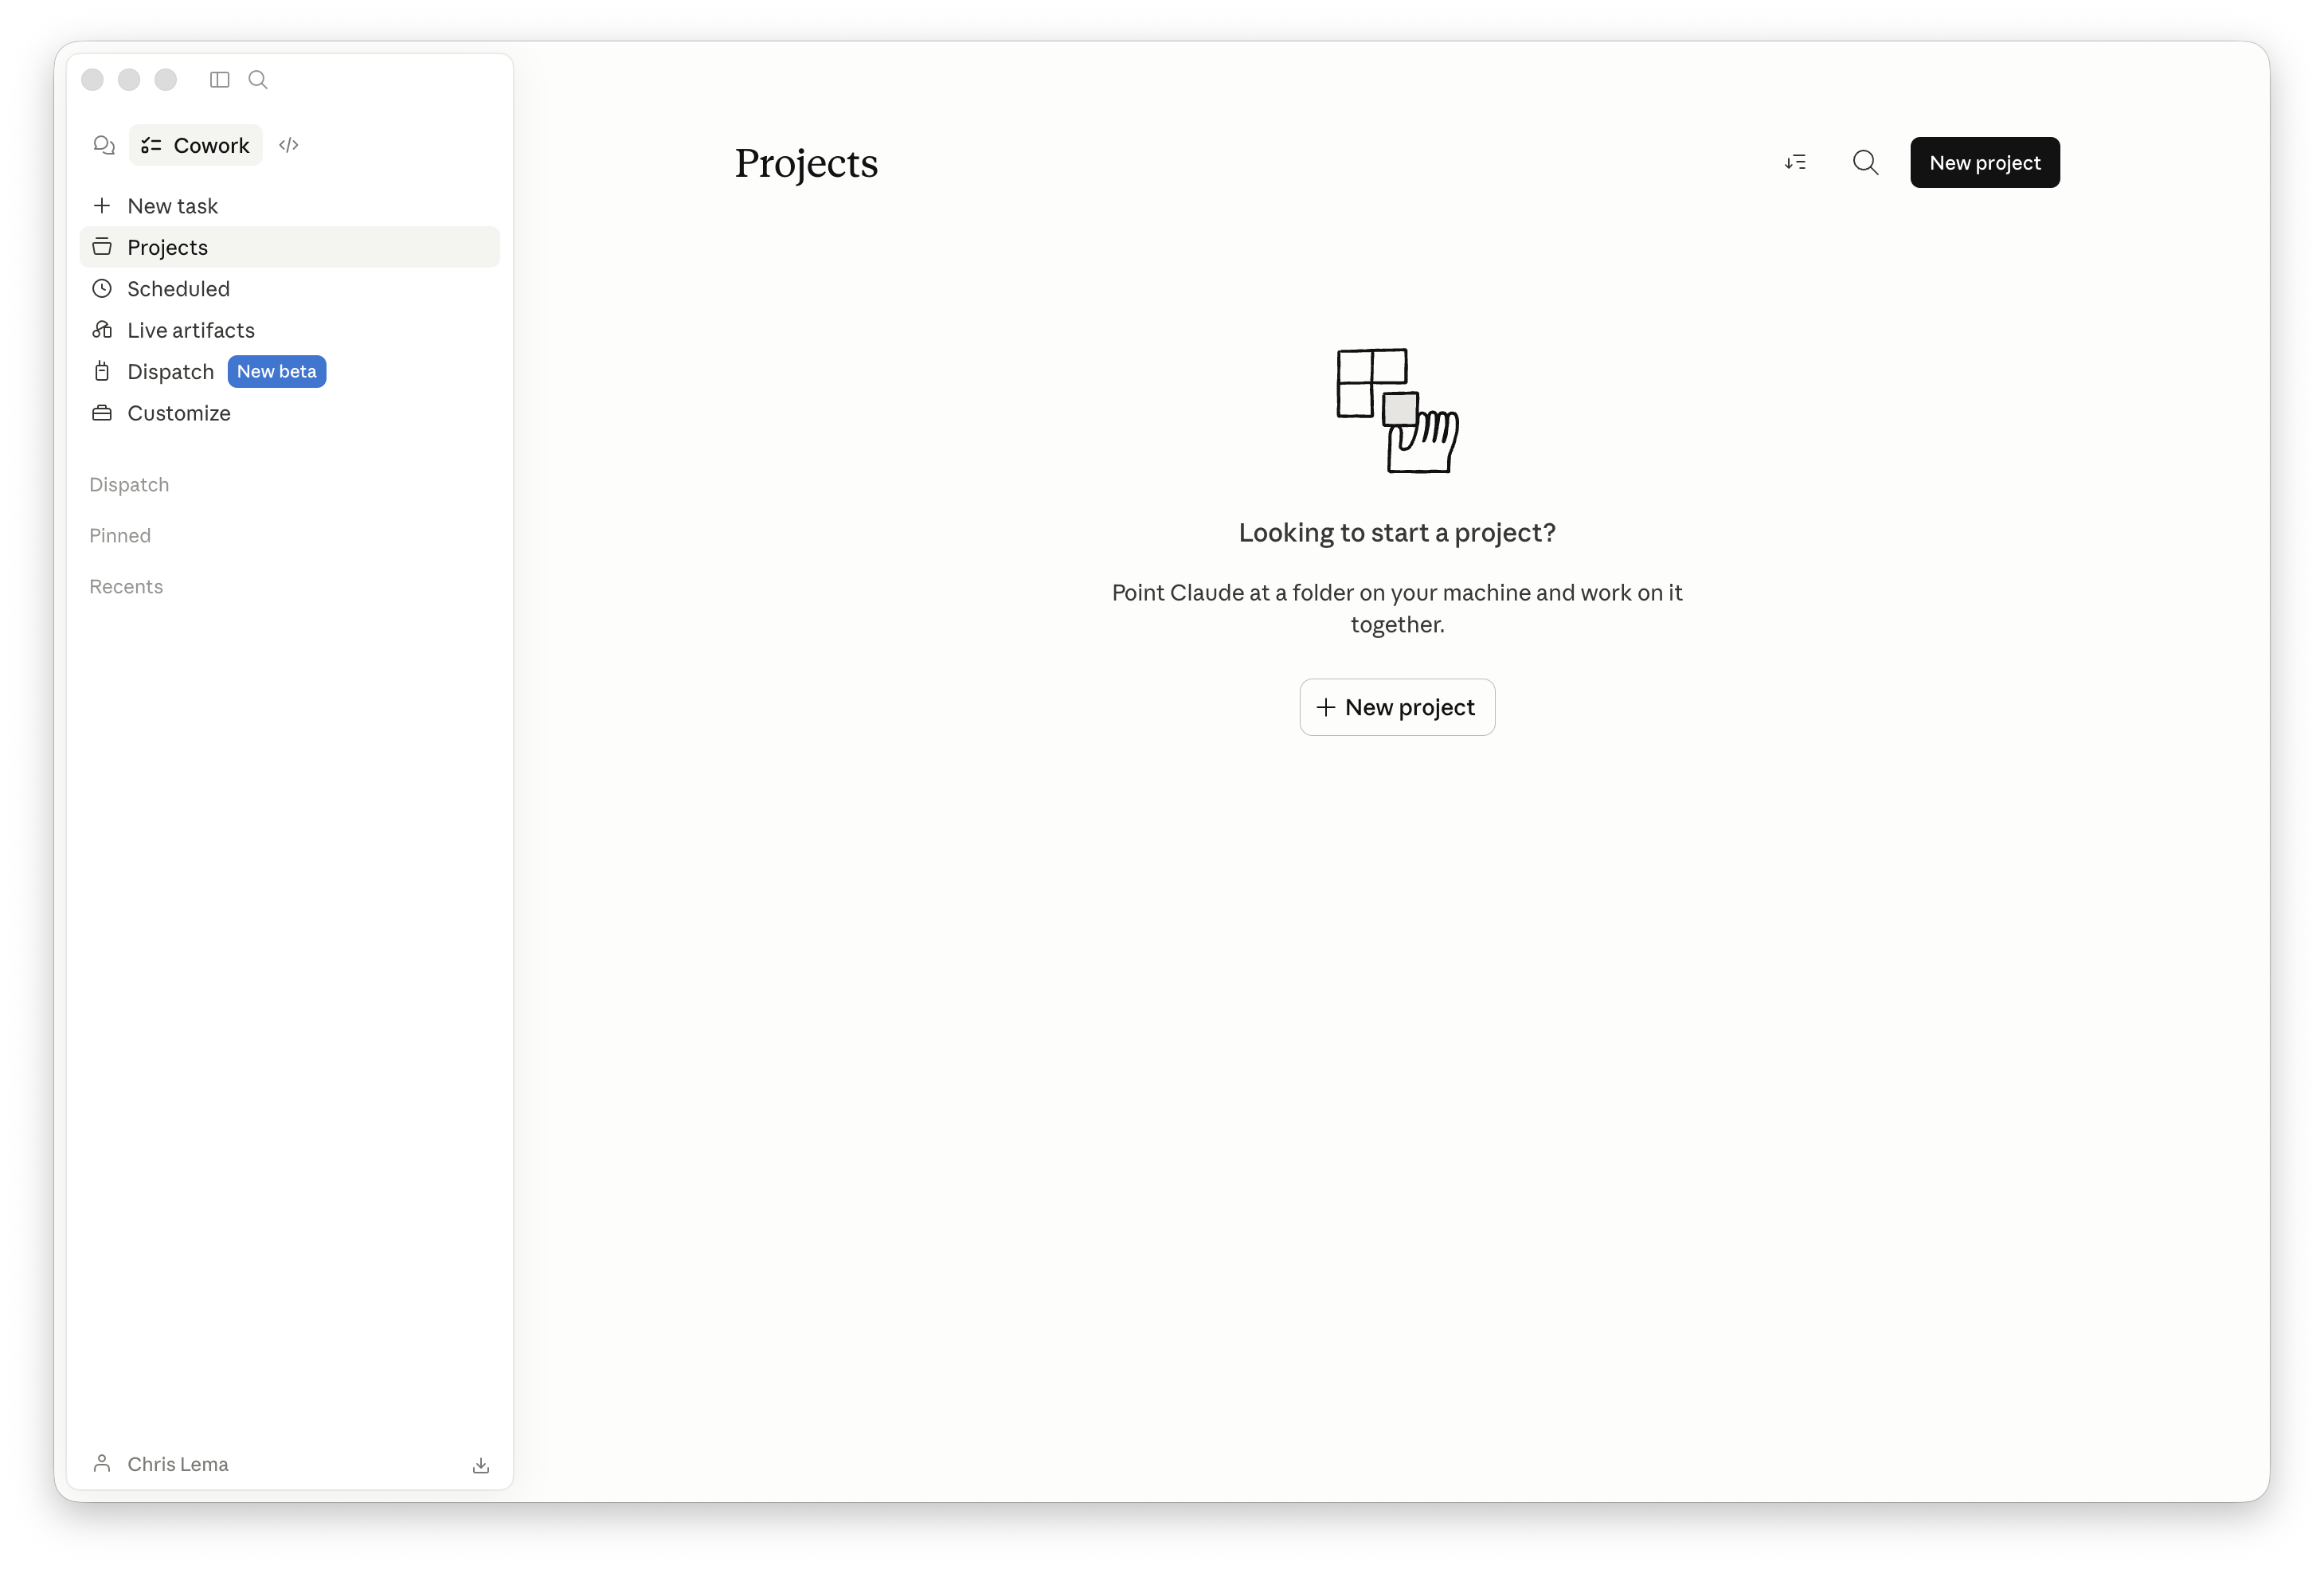
Open Claude Desktop and click into the Cowork section in the left sidebar. Cowork is the part of Claude that can actually work with files on your computer — not just chat about them, but read them, edit them, and create new ones in a folder you choose.
Click Projects, then click the New project button in the top right.
Step 2 — Choose "Use an existing folder"
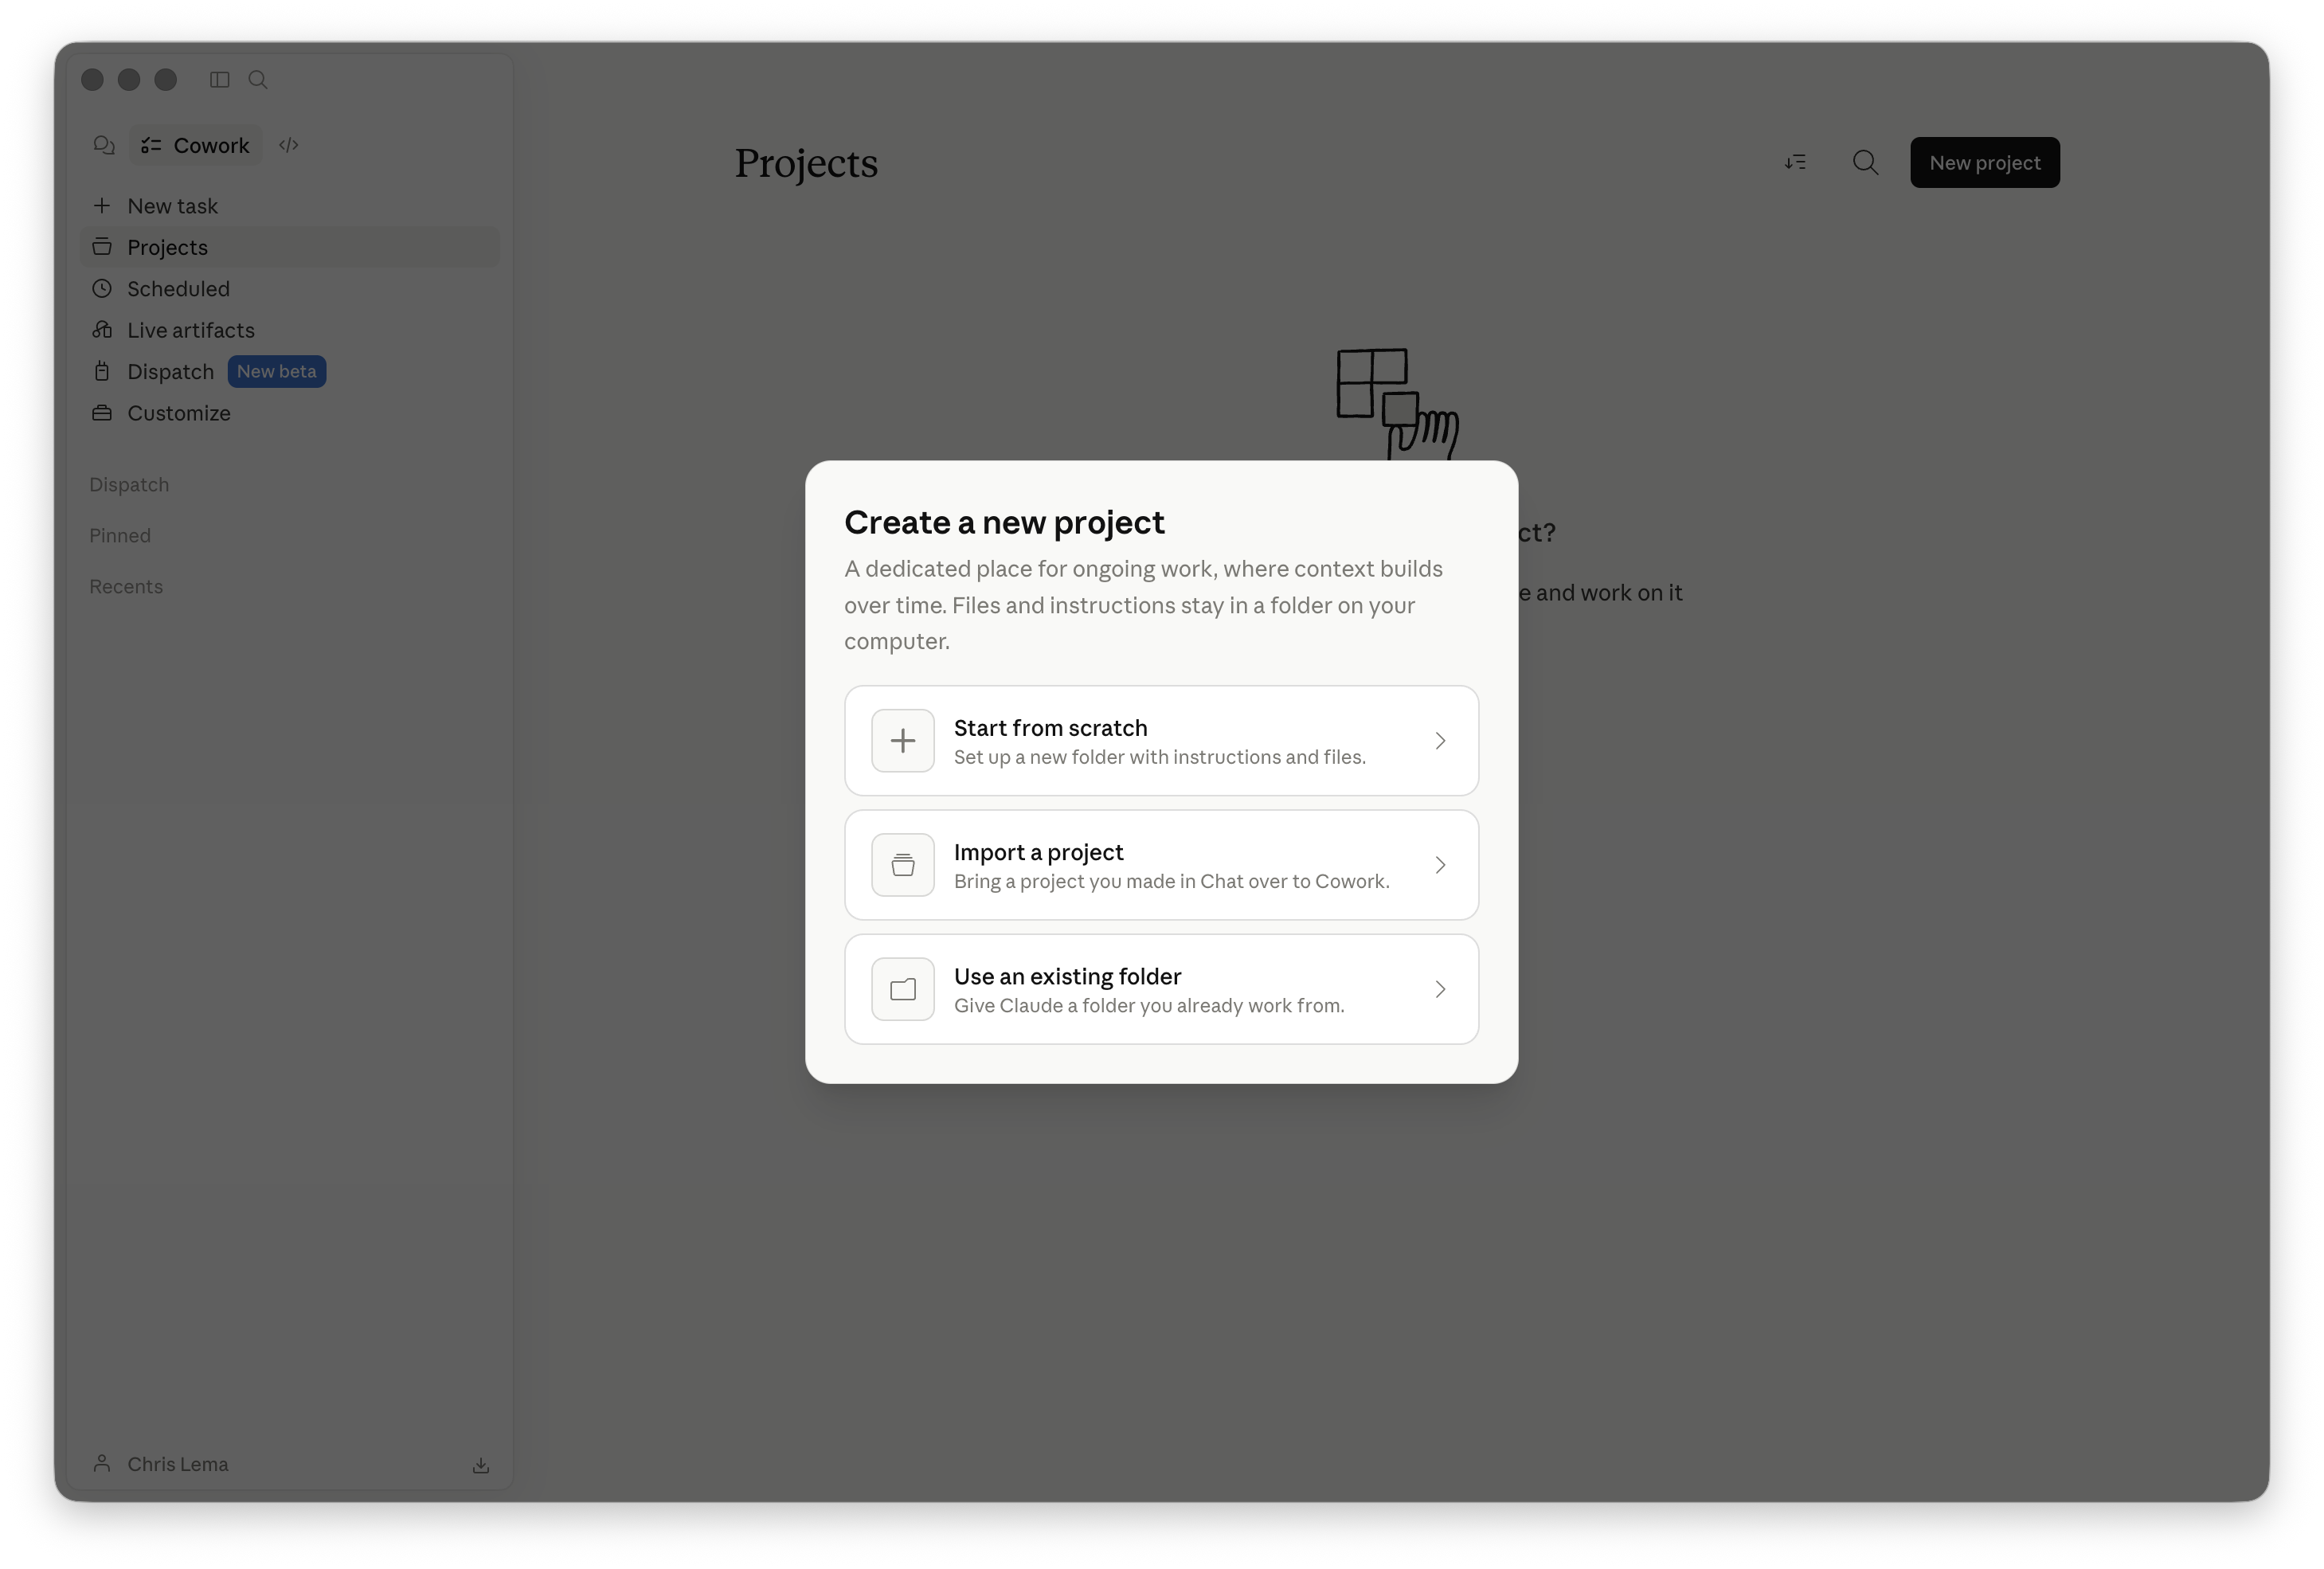
Claude offers three ways to start a project: from scratch, by importing one you made elsewhere, or by pointing it at a folder you already have on your computer.
For our purposes, go ahead and create an empty folder somewhere on your machine first — I put mine in Documents and called it sample-web-site. Then choose Use an existing folder.
Step 3 — Select your folder
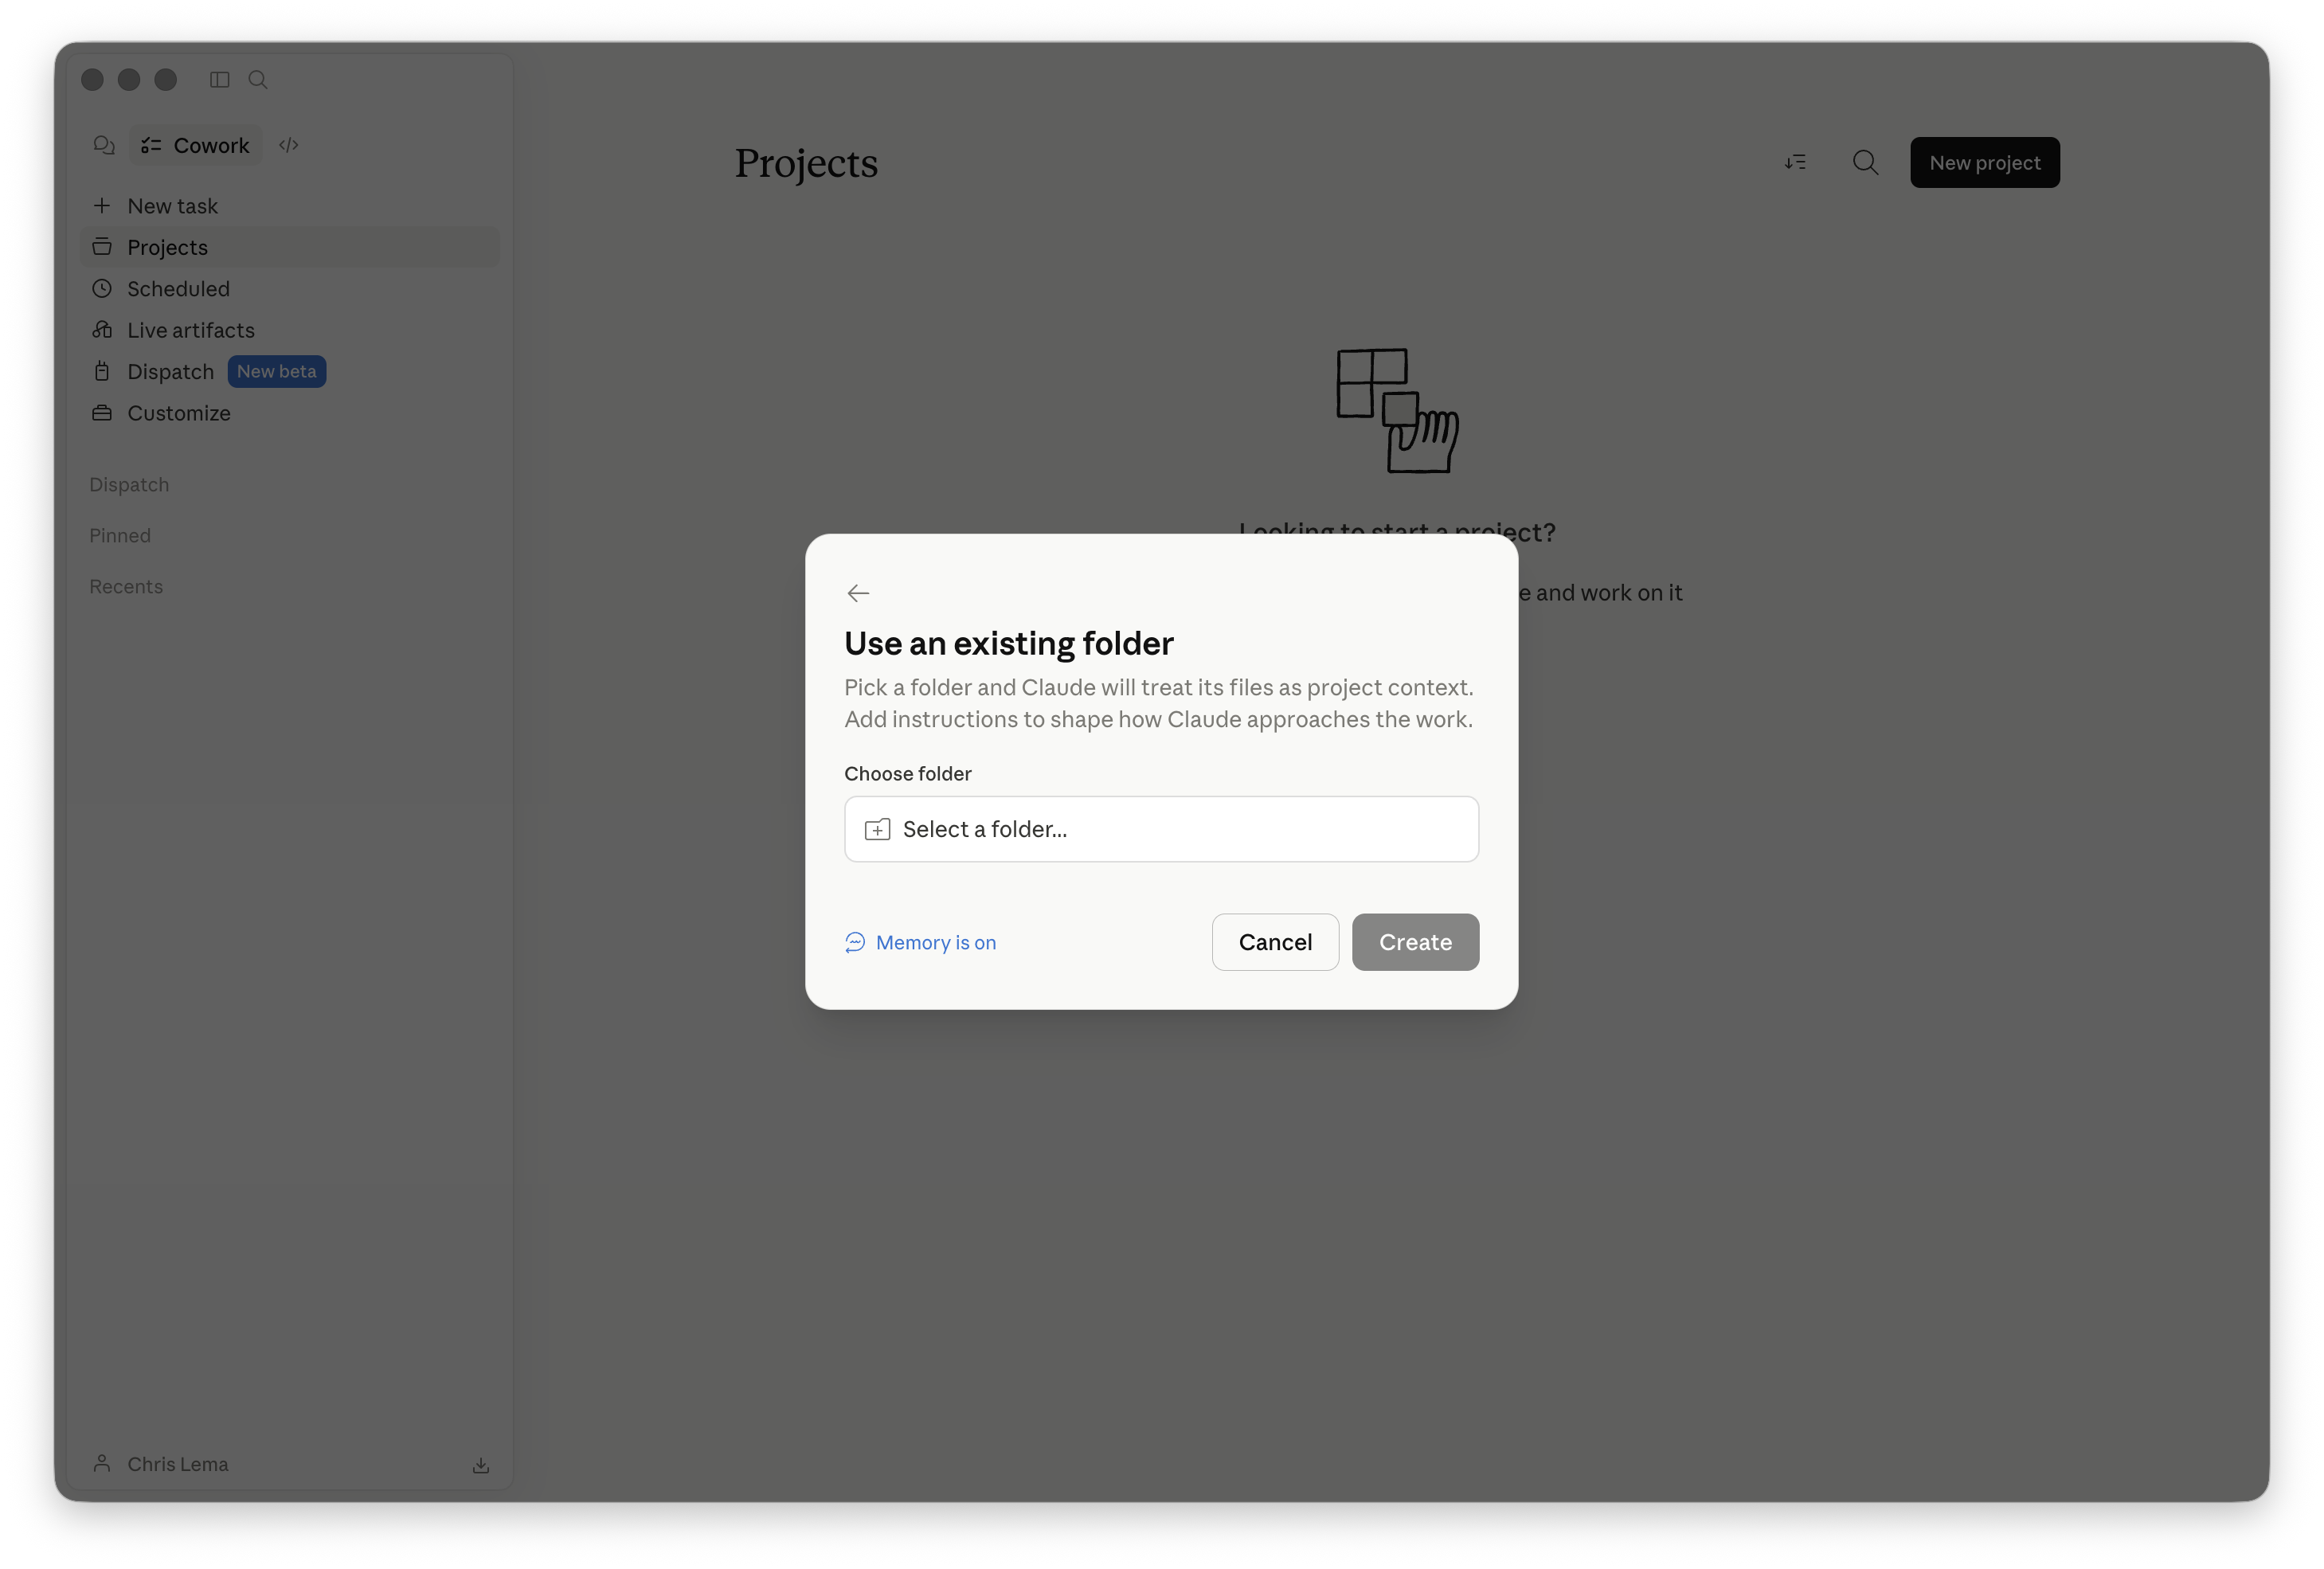
A dialog opens asking you to pick the folder. Click Select a folder... and navigate to the empty folder you just created.
Step 4 — Confirm the project name
Once you've selected the folder, Claude fills in the name automatically based on the folder name. You can leave it as is or rename it. There's also an optional Instructions field — leave that blank for now, we'll come back to it later. Click Create.

Step 5 — You now have a project
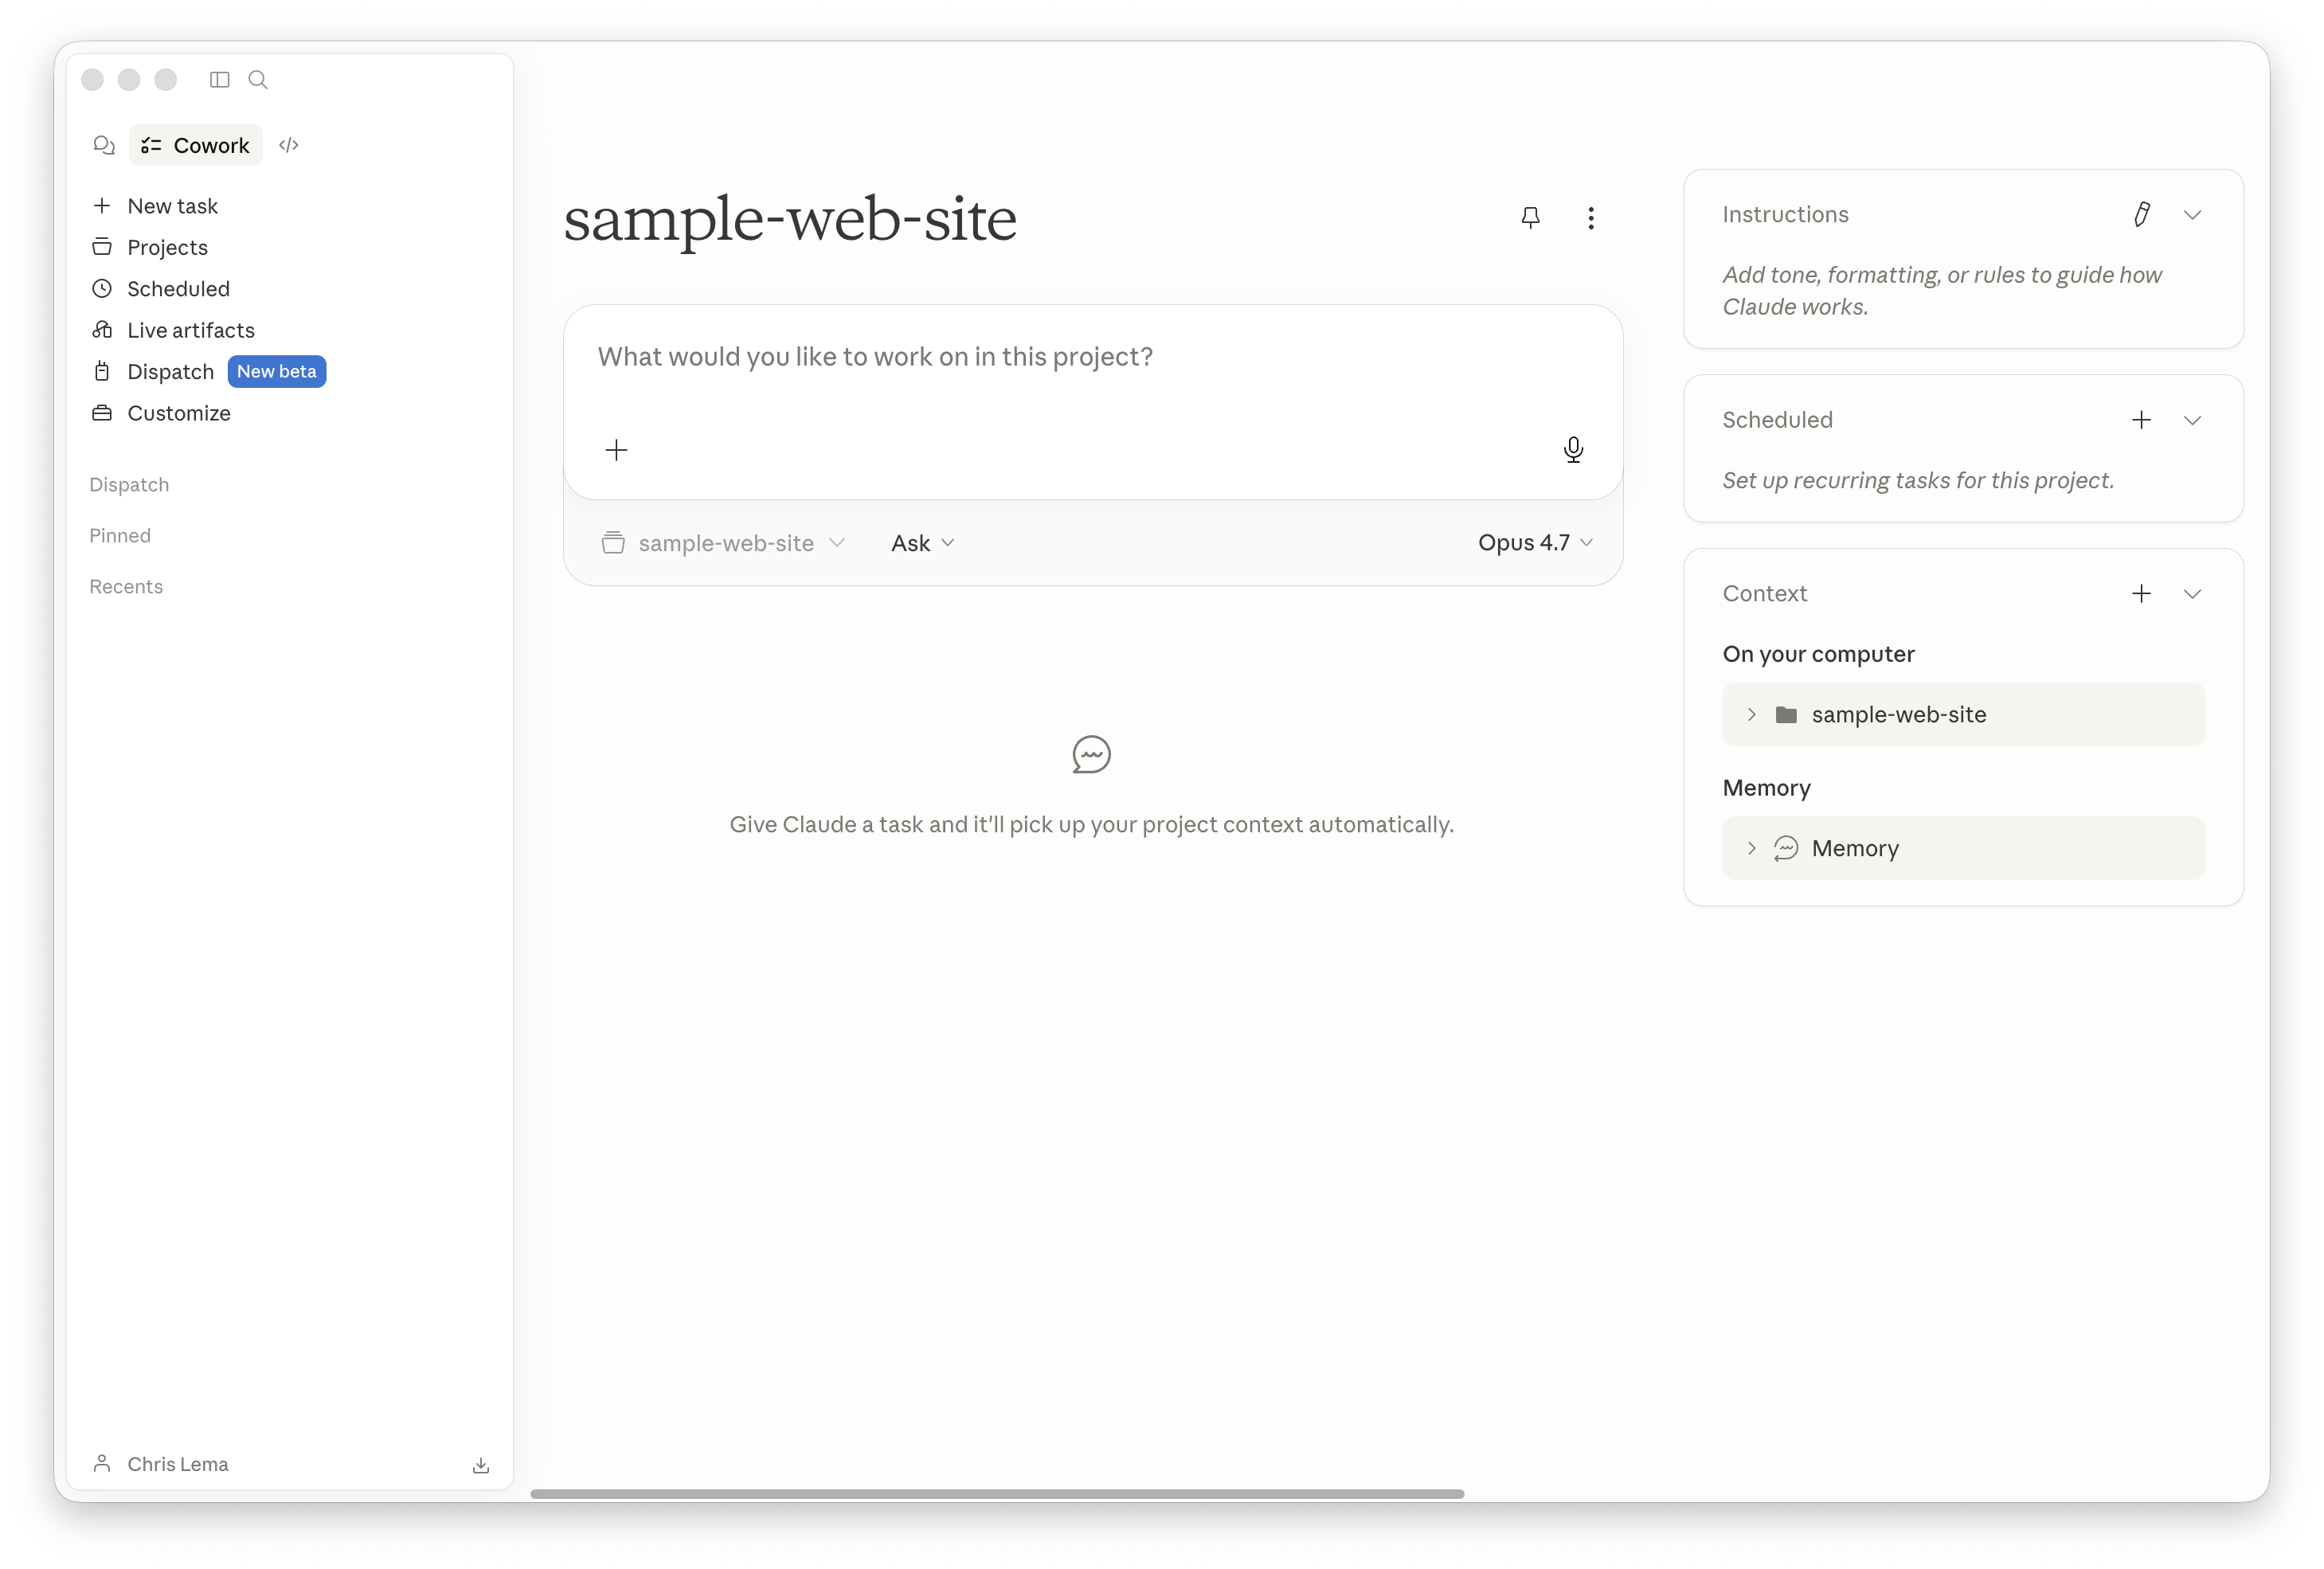
Claude drops you into the empty project view. The left side shows the chat area where you'll talk to Claude, and the right side shows your project context — the folder you selected, plus Memory.
This is your home base now. Anything you ask Claude to build inside this project will land in that folder on your computer.
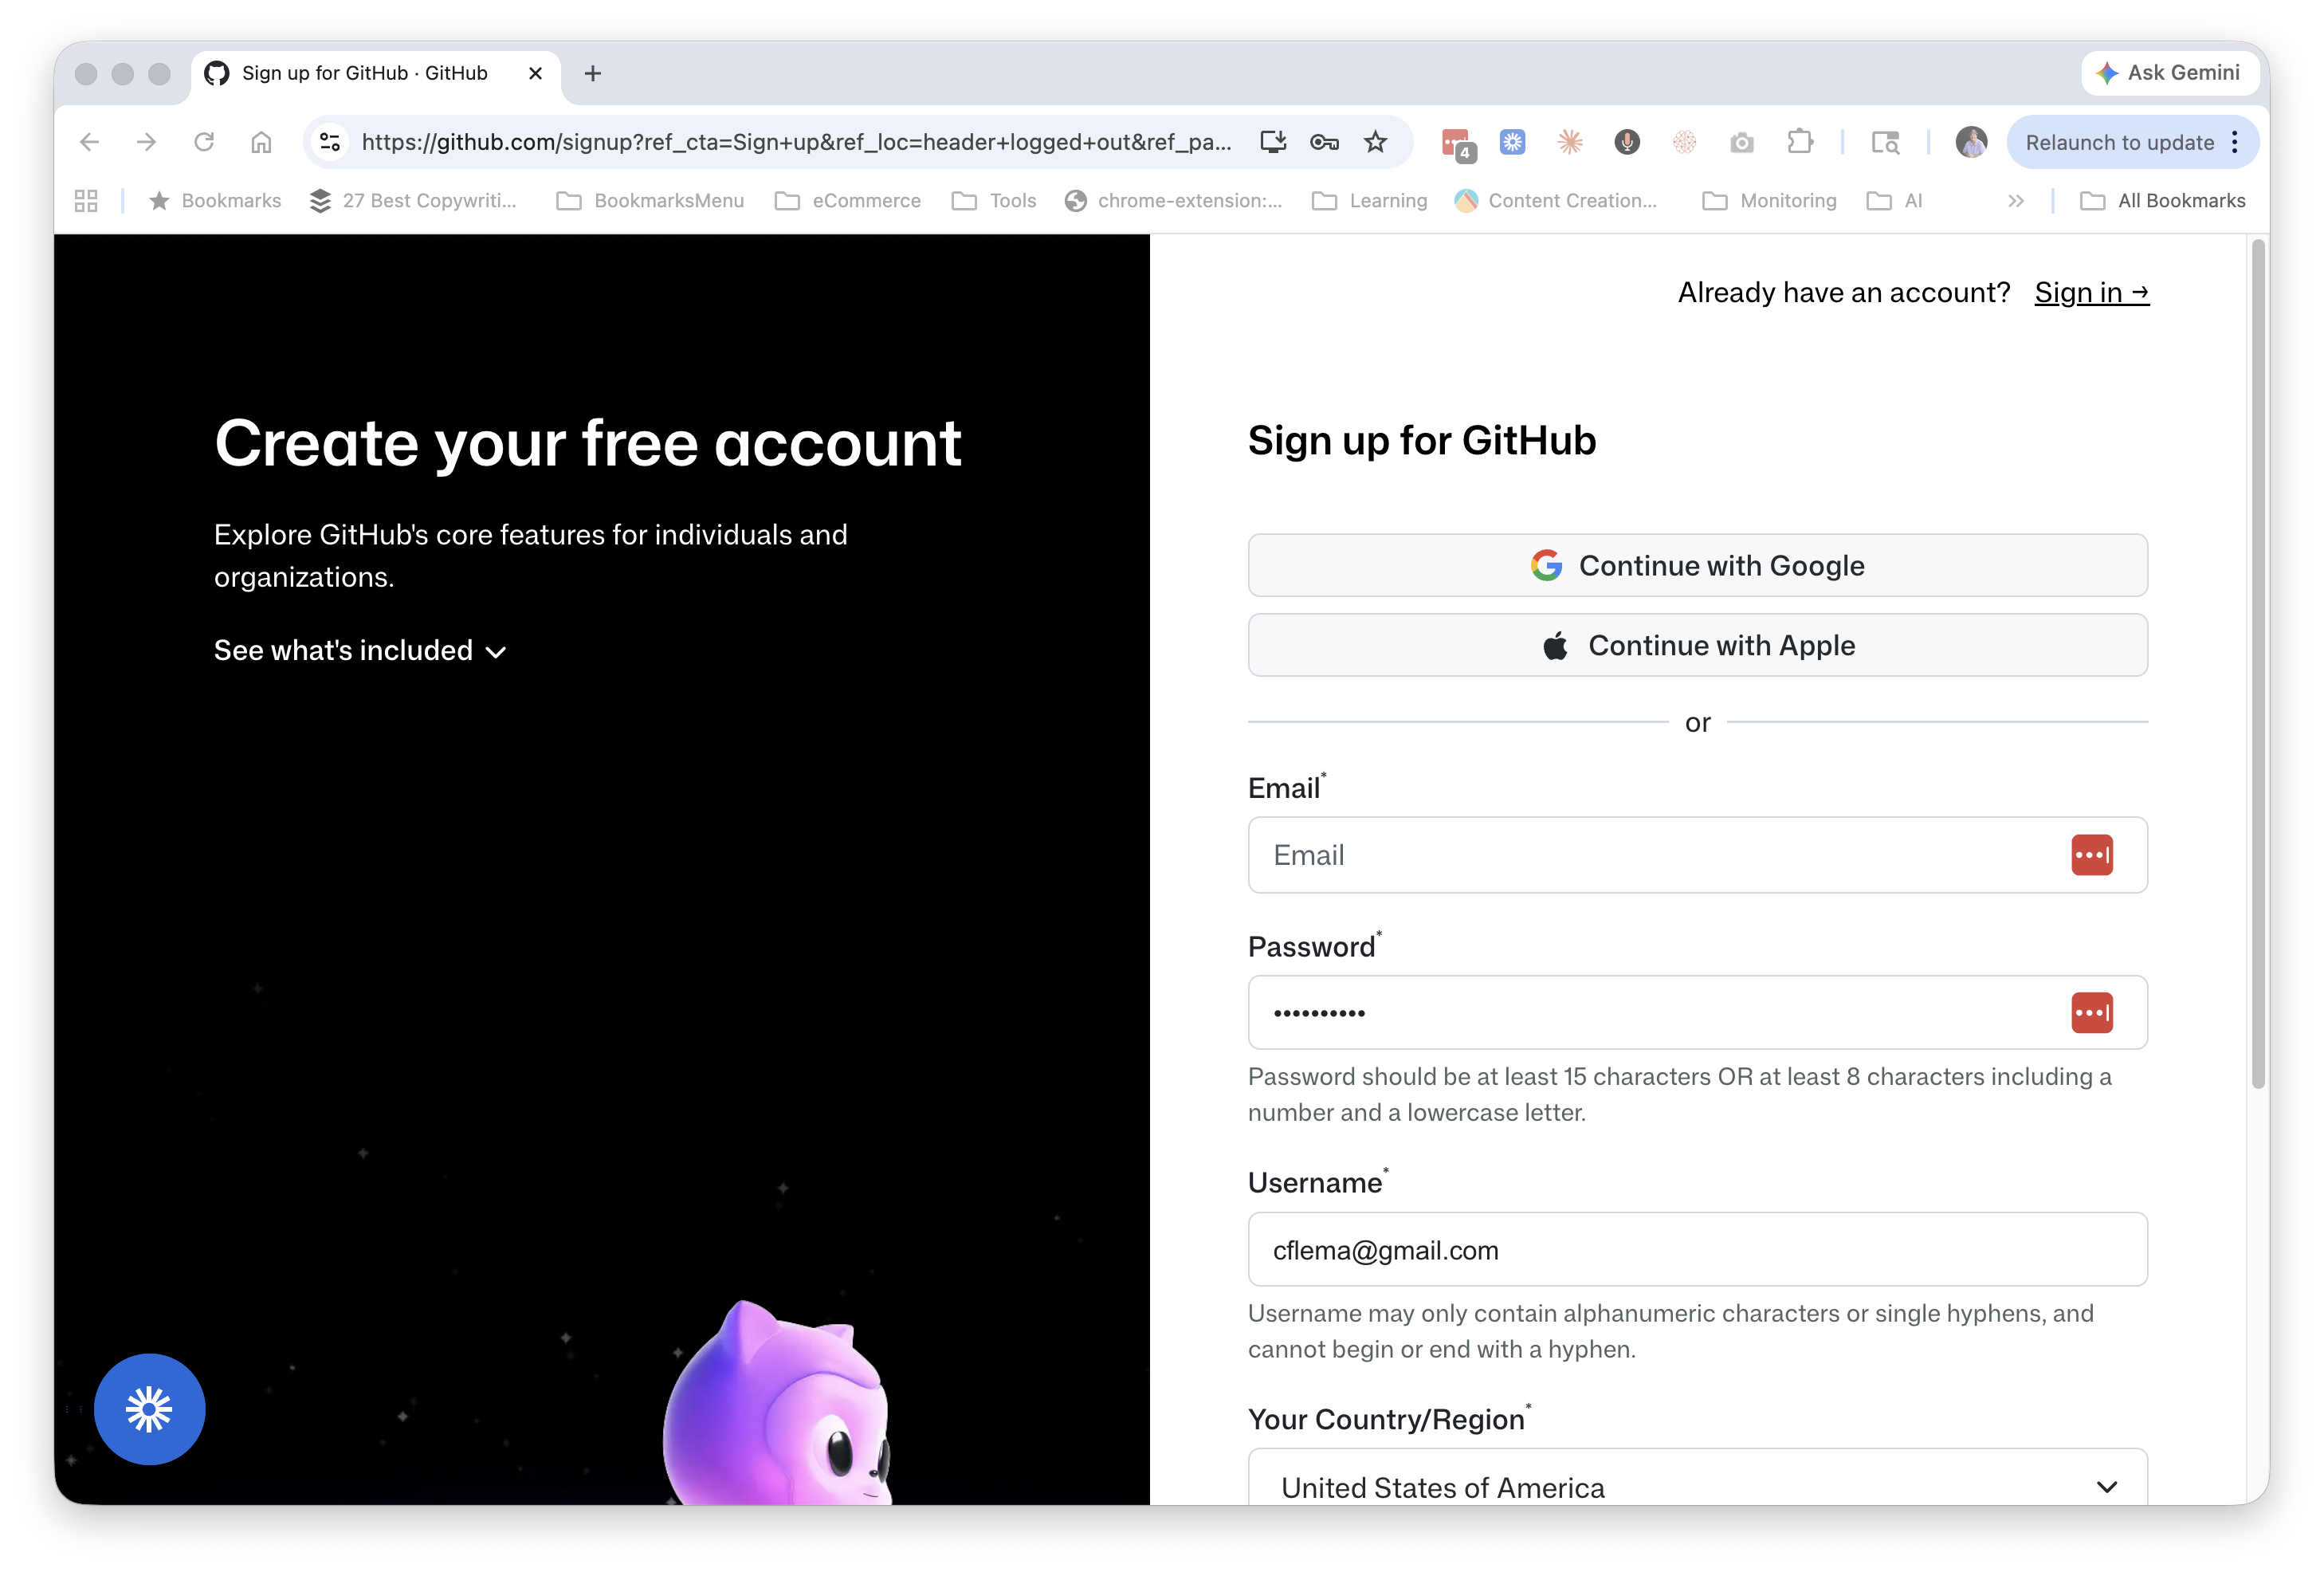
Step 6 — Create a free GitHub account
Now we leave Claude for a minute to set up GitHub. GitHub is where developers store code, but for your purposes you can think of it as a free, version-controlled cloud folder. Every time something changes, GitHub remembers exactly what changed and when.
Go to github.com/signup and create a free account. Pick a username — it becomes part of your public profile — confirm your email, and you're in.
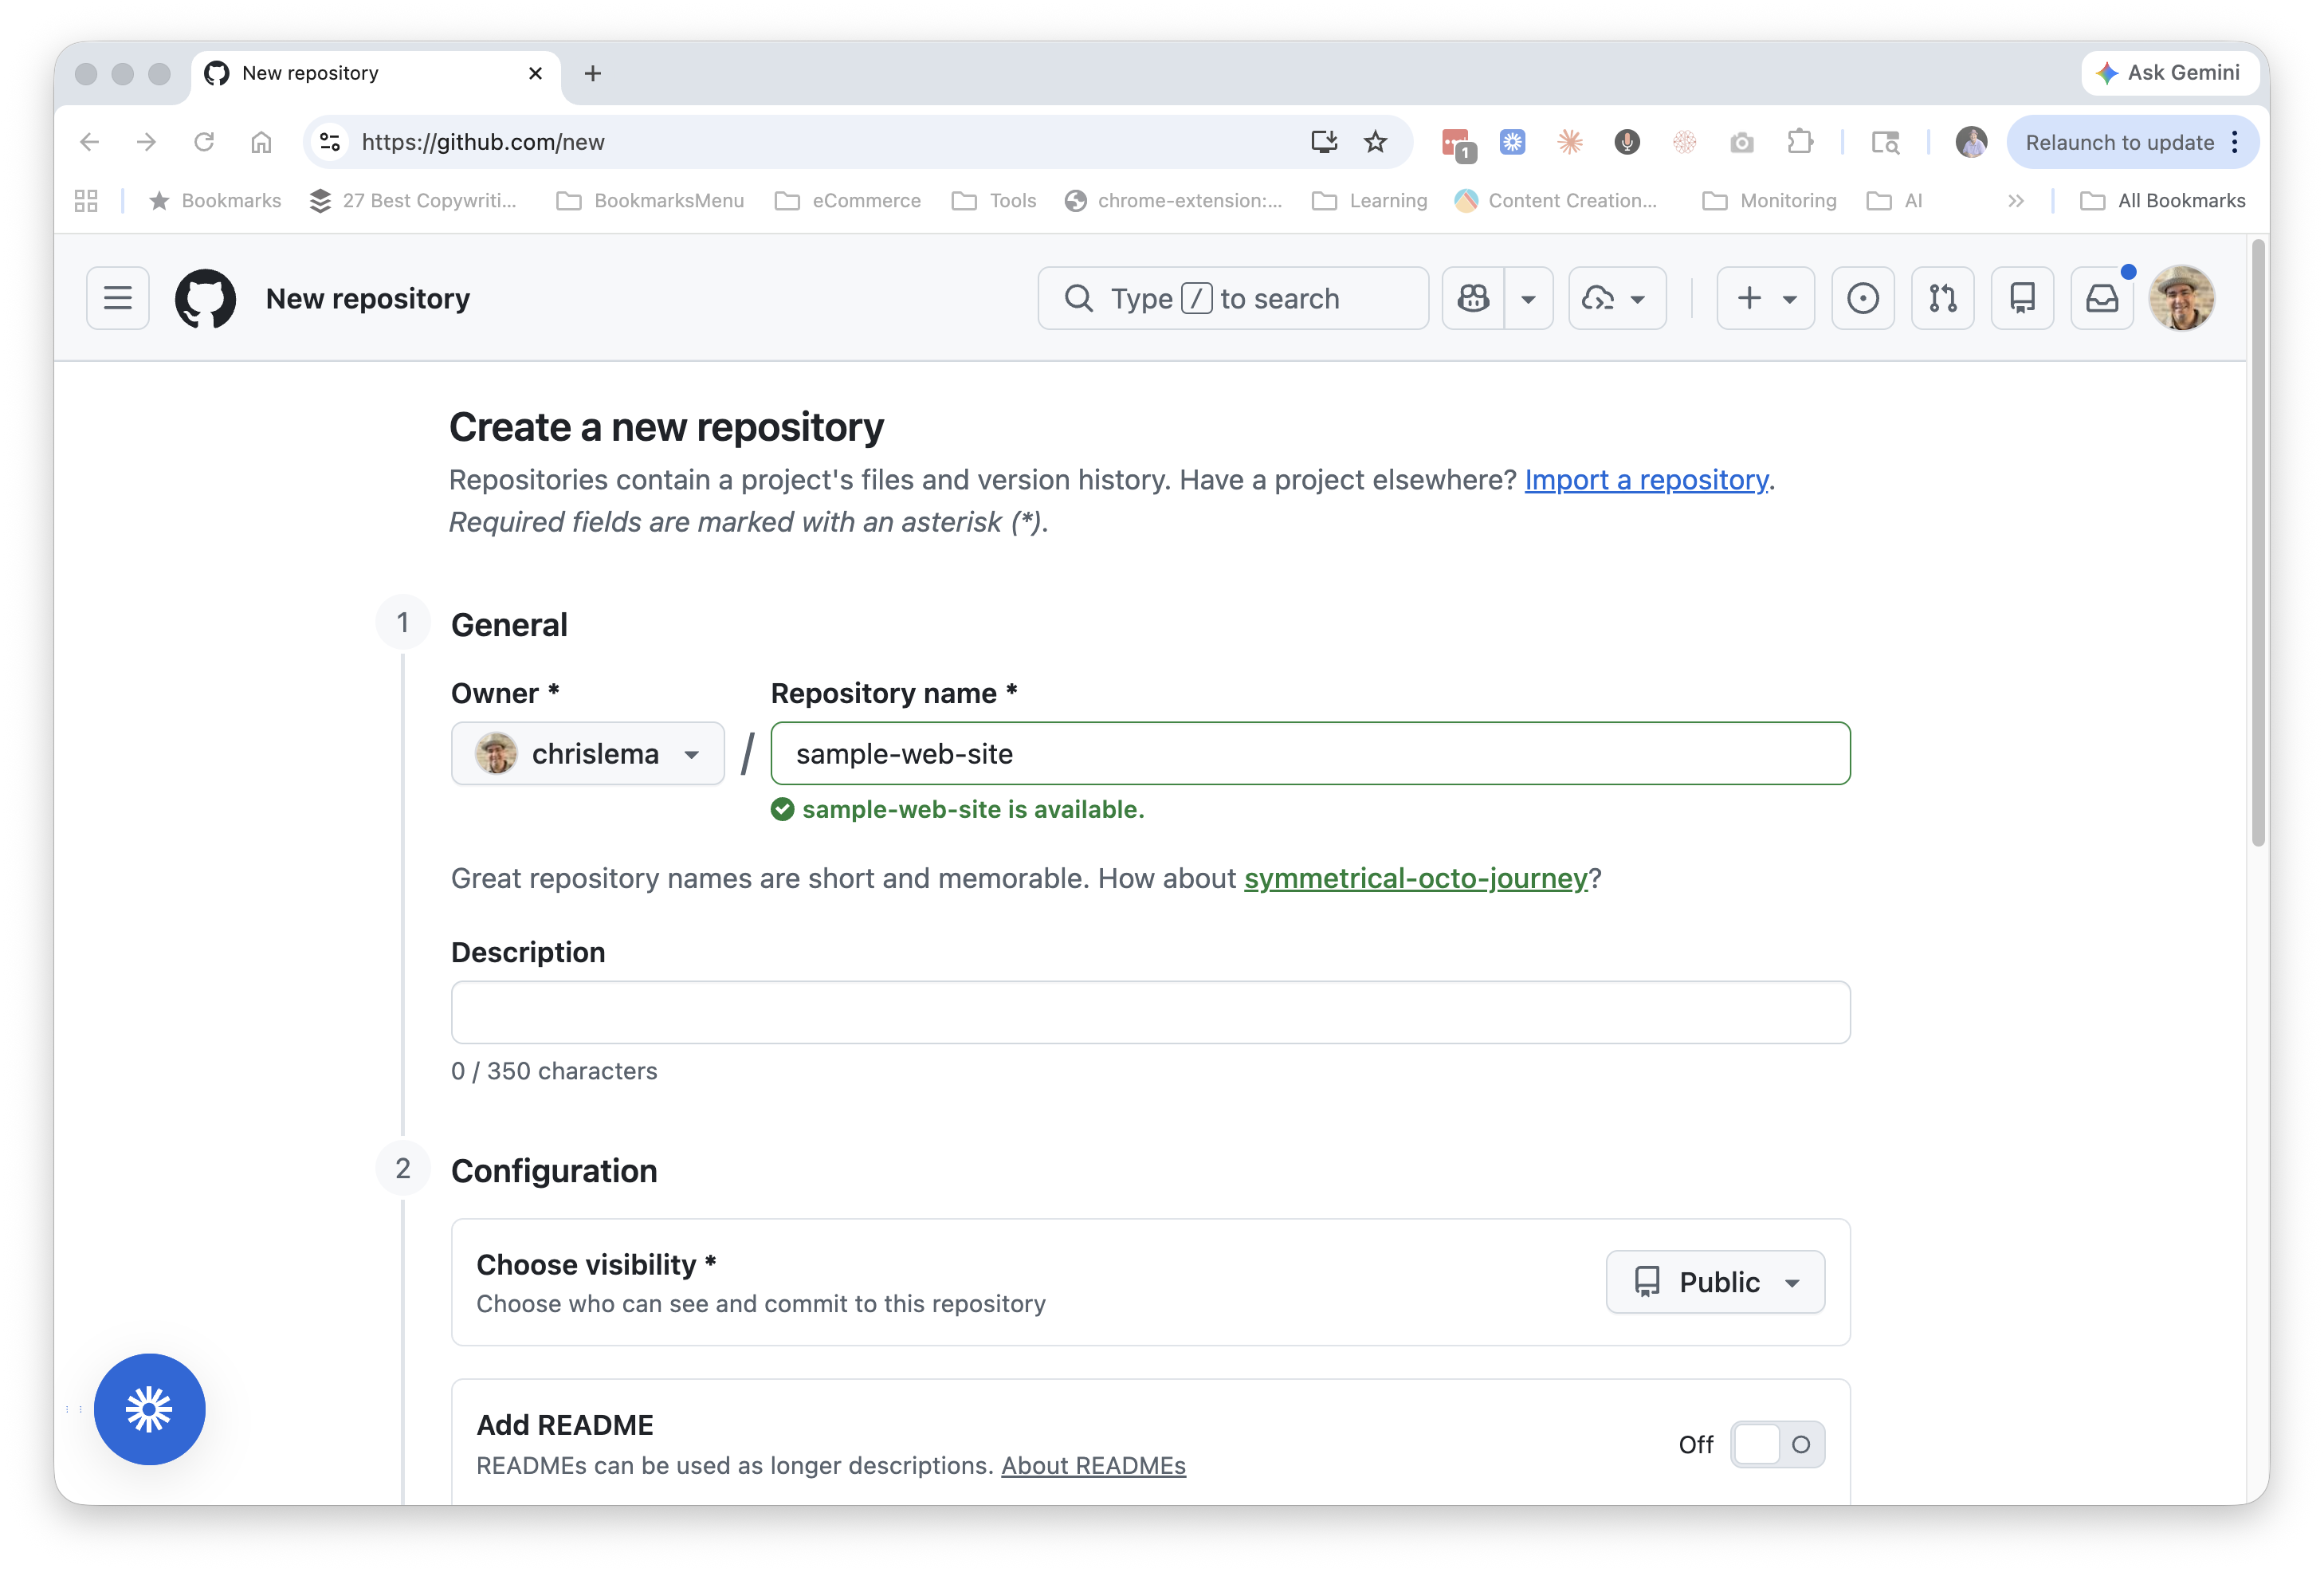
Step 7 — Create a new repository
A repository (or "repo" for short) is just a folder on GitHub. Once you're logged in, go to github.com/new.
Give it a name — I matched my local folder name and called it sample-web-site. Make it Public. Don't worry about the description.
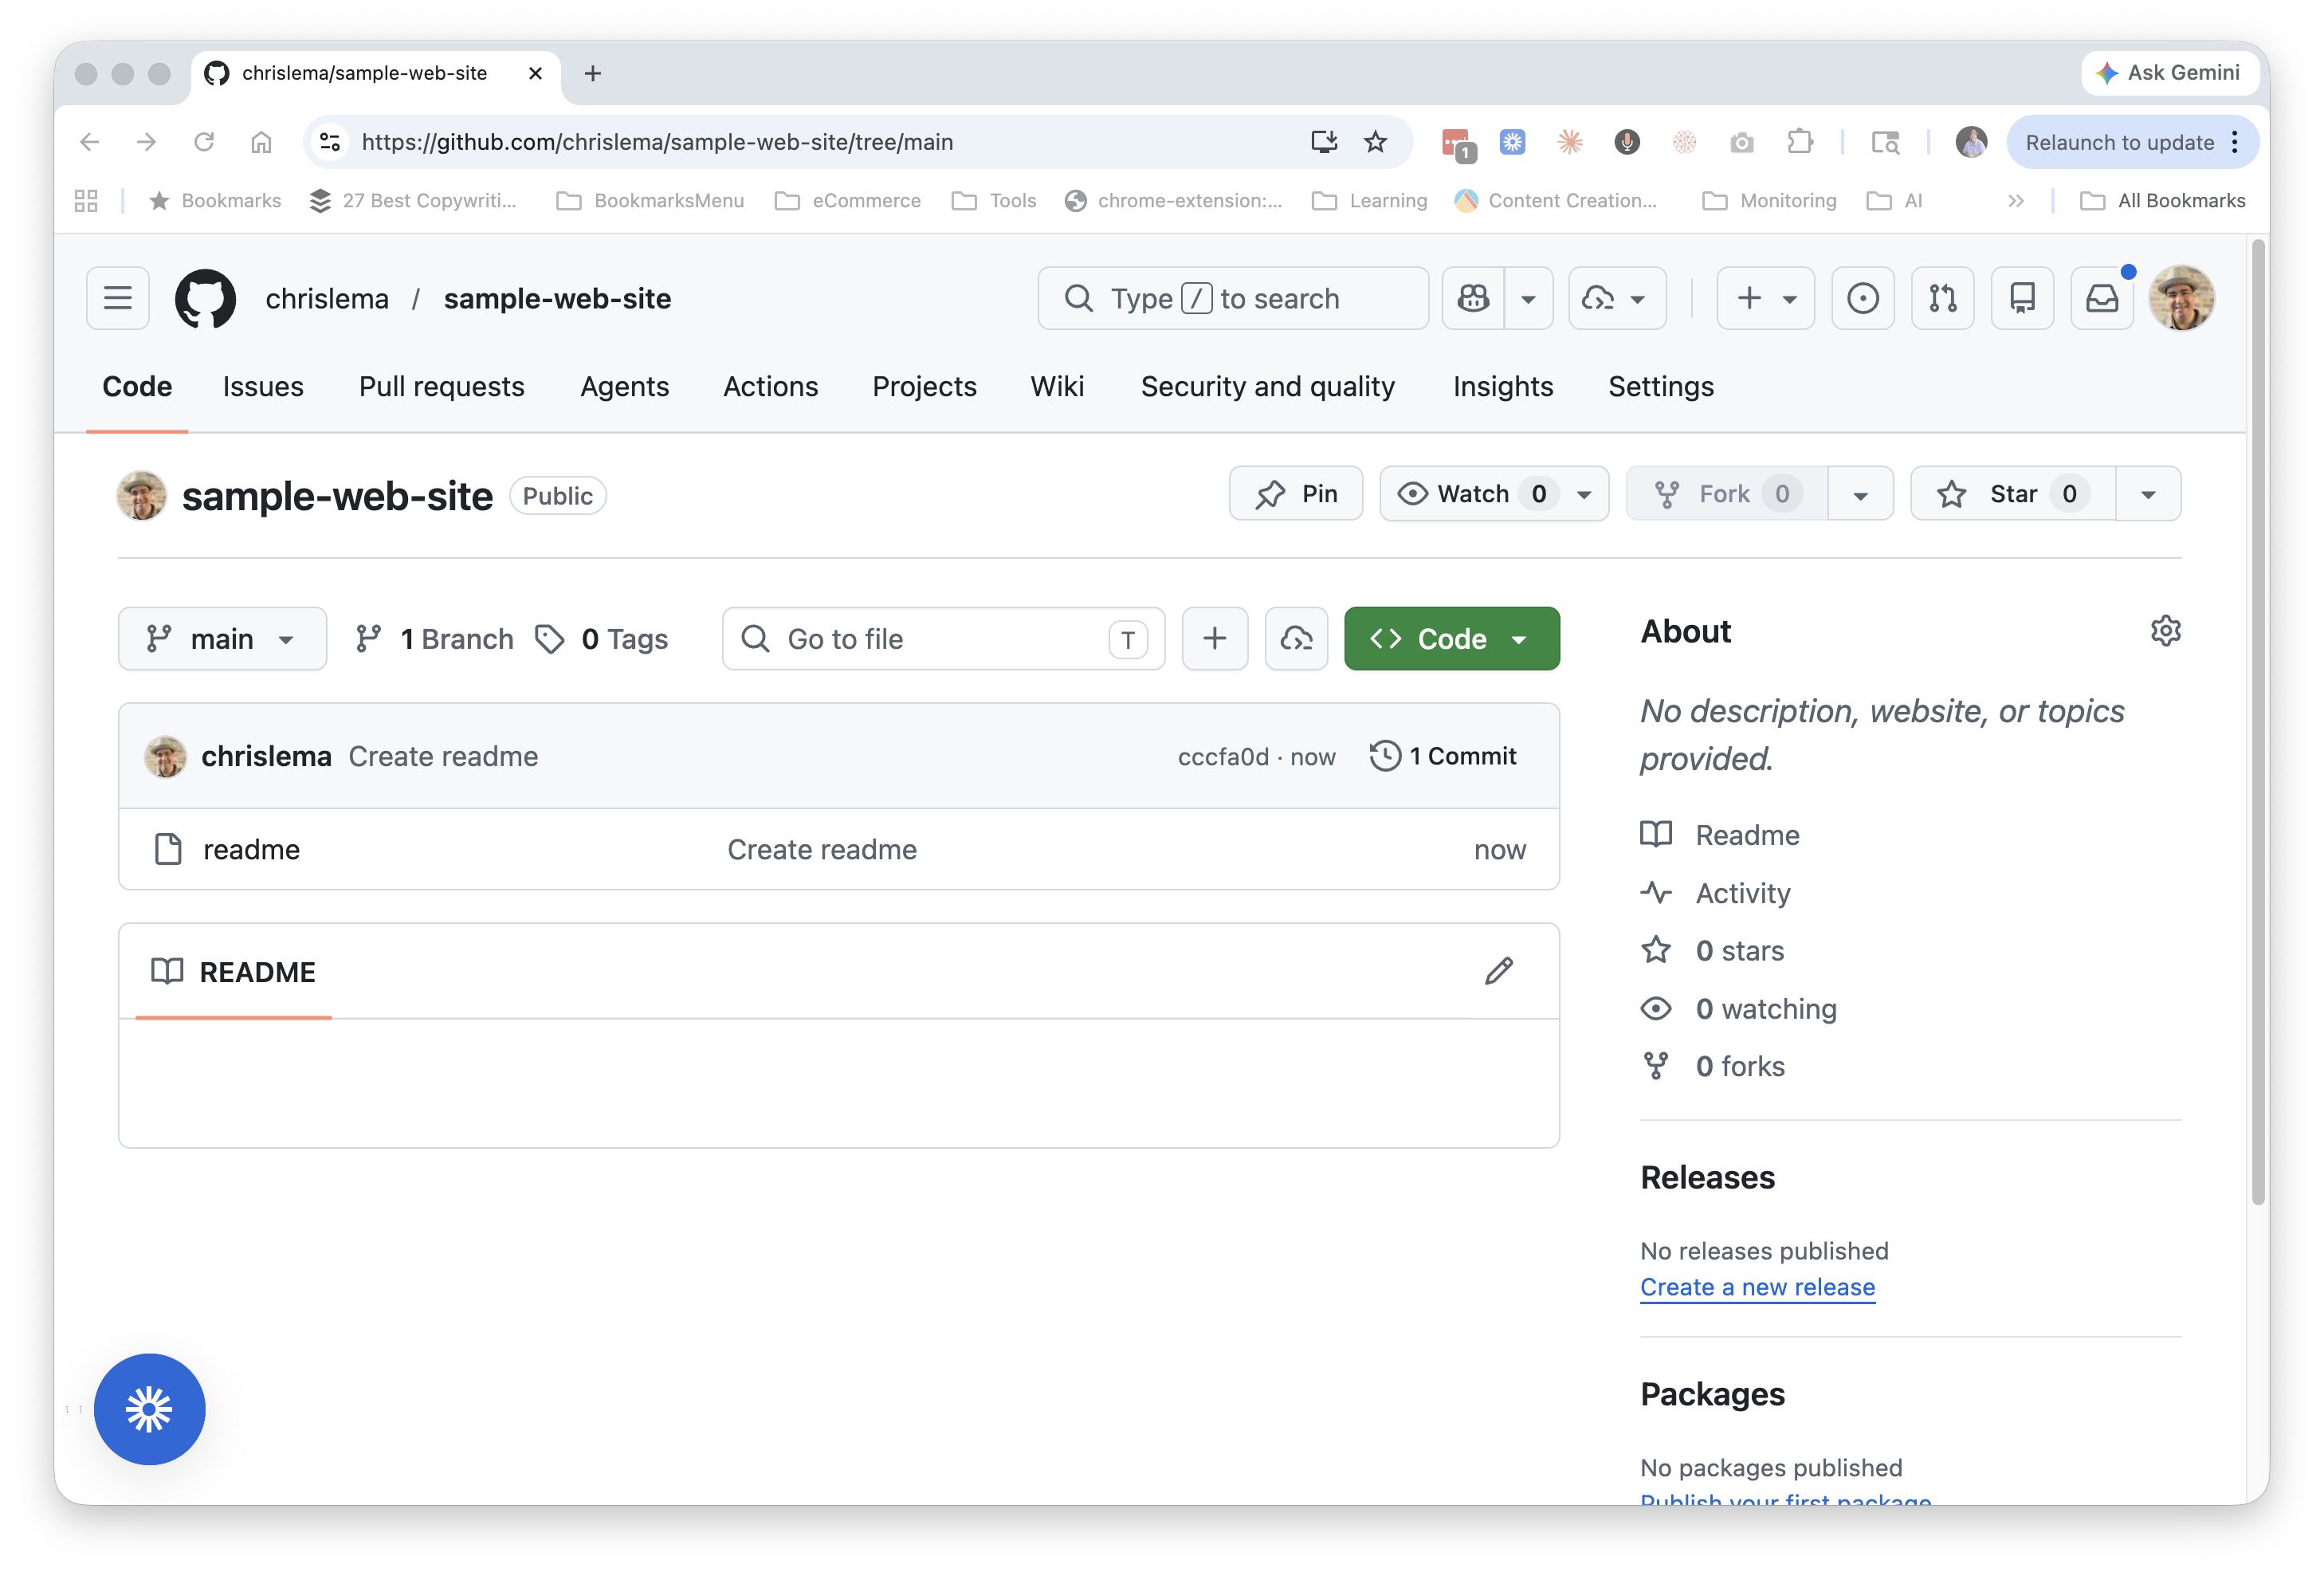
Step 8 — Add a README
When you complete that step, it will tell you that the project is empty. But it gives you a link to add a readme file. Click the link and create one (don't worry, you can leave it blank if you want).
This step is more important than it looks. The reason we add a plain README file is that it creates the main branch — the default version of your project that other services can connect to. Cloudflare Pages, which we'll set up in a few steps, needs a branch to watch for changes in order to auto-deploy your site. Without a branch, there's nothing to connect to.
We don't have to worry about the README itself — we'll replace and enhance the contents of this folder with our actual index.html shortly. Right now we're just creating the connection point.
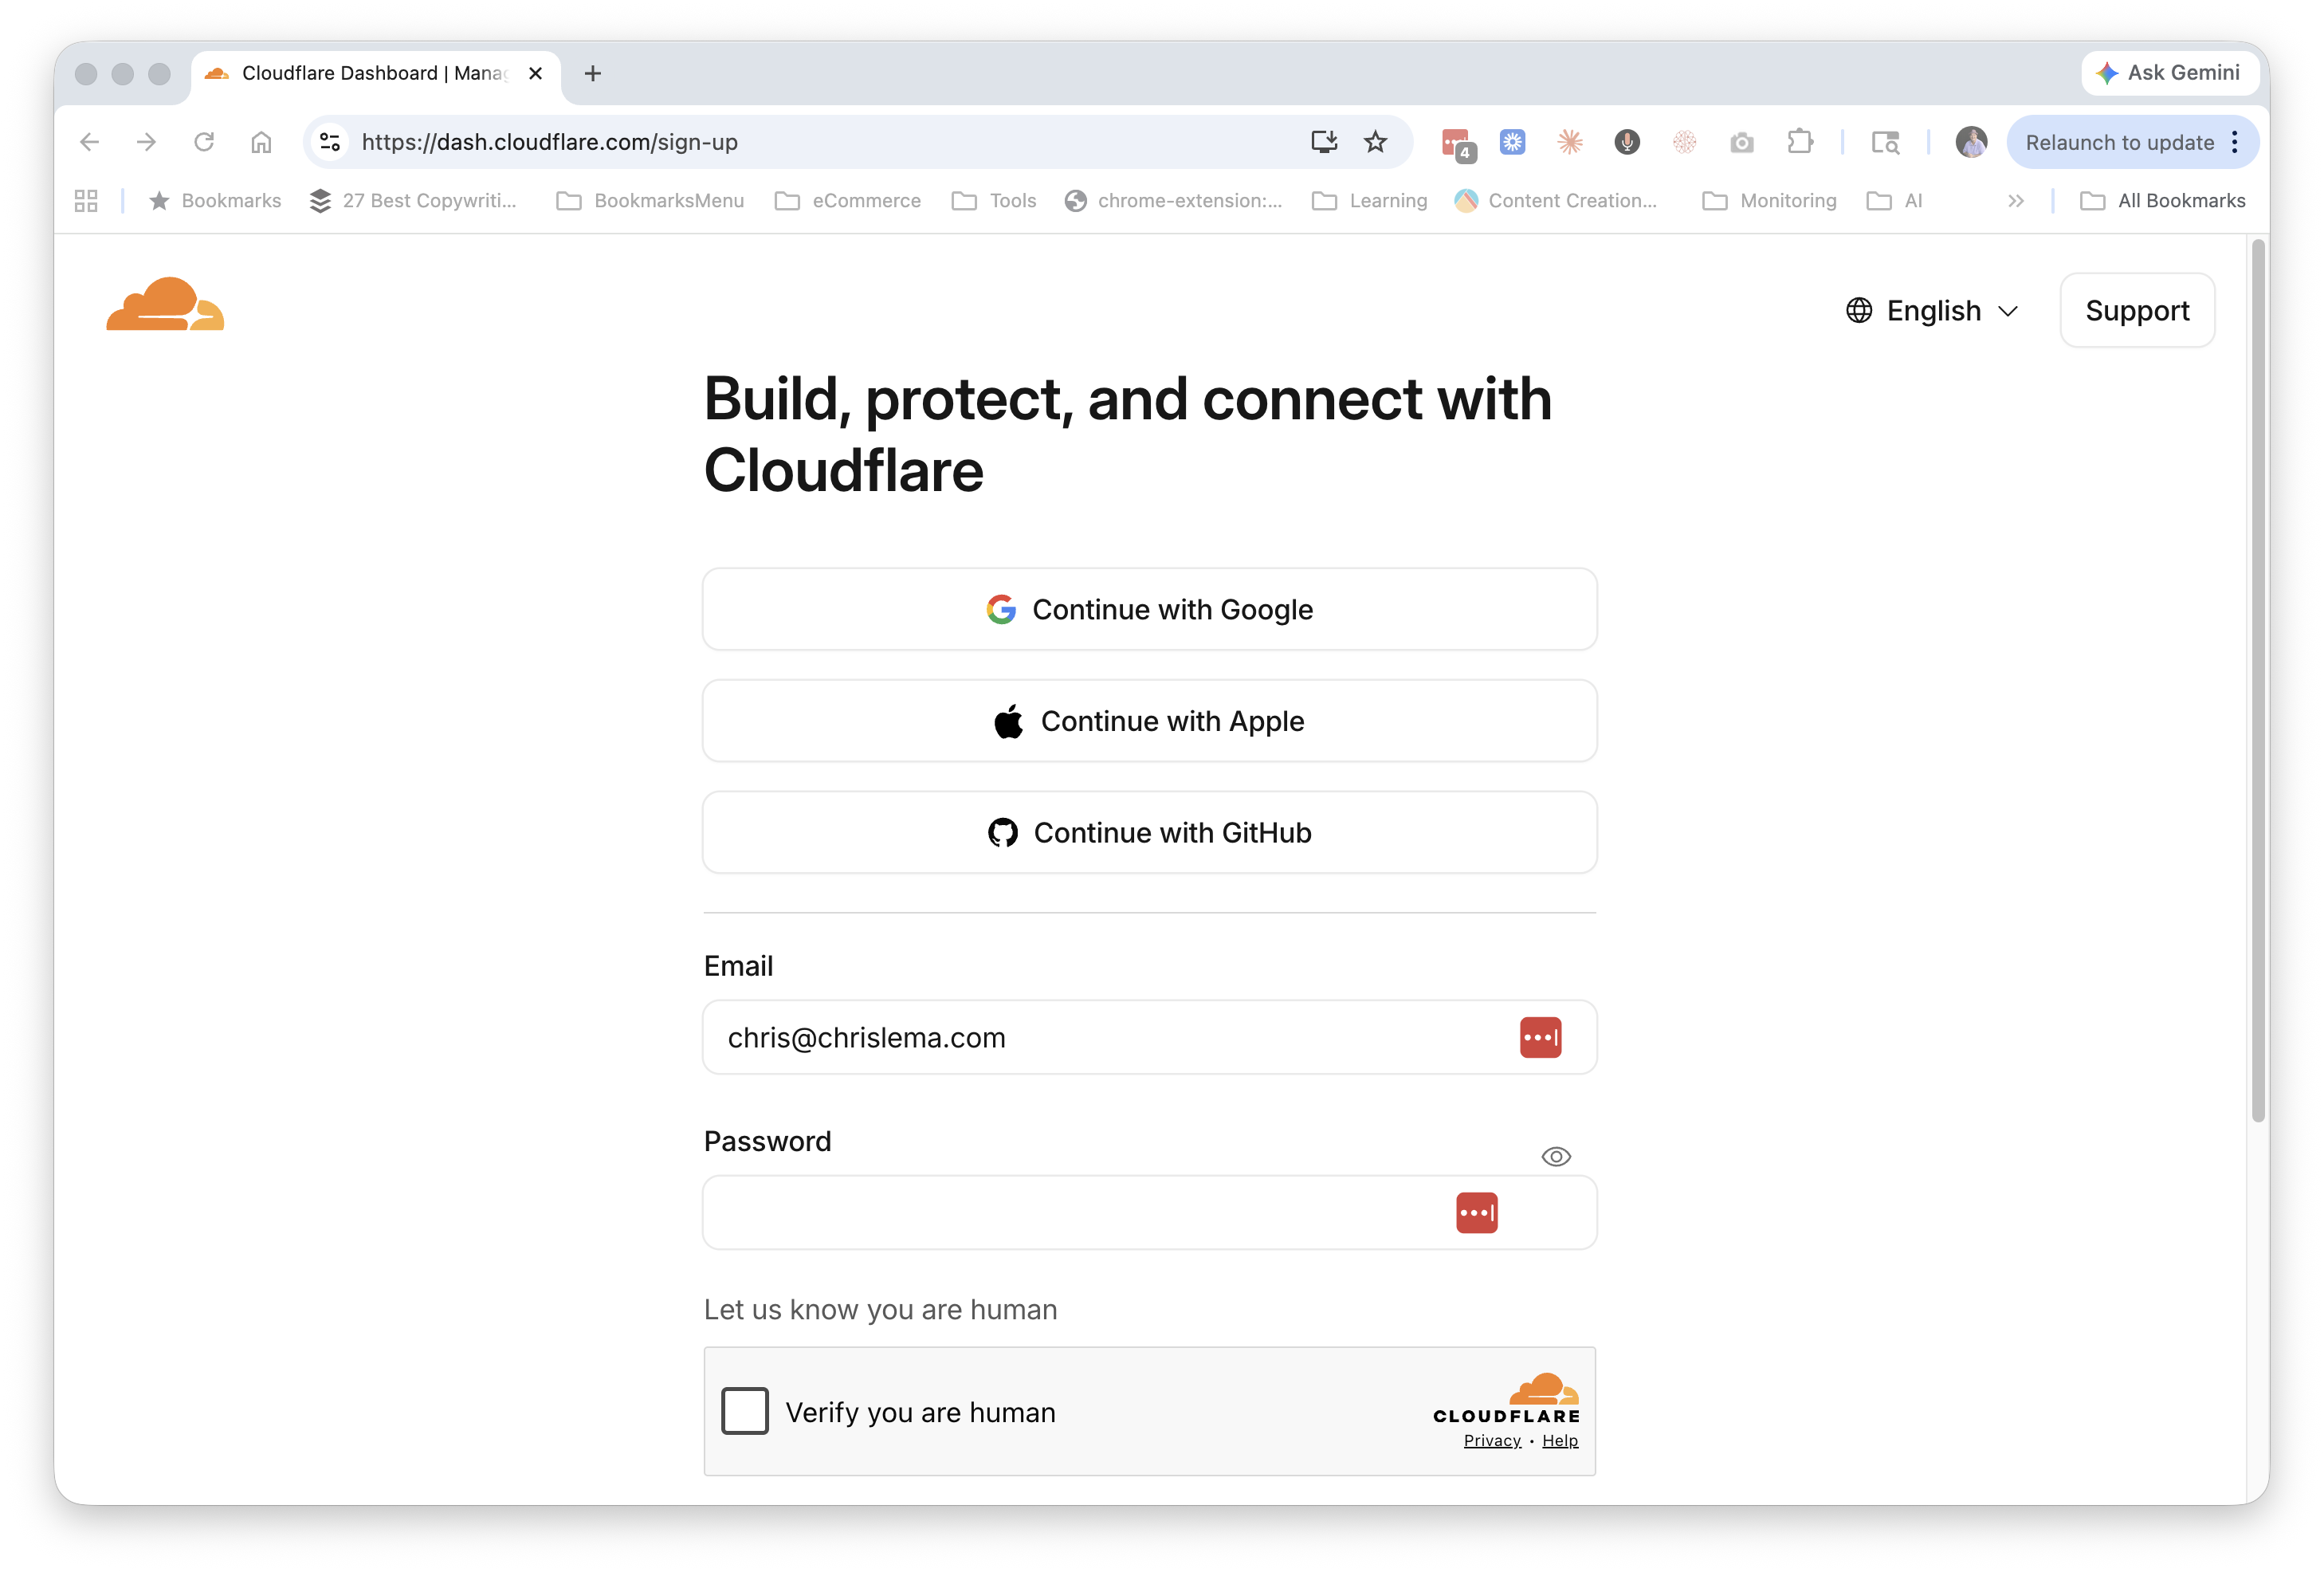
Step 9 — Sign up for Cloudflare
Cloudflare is the service that takes the files in your GitHub repo and turns them into a real website at a real web address.
Go to dash.cloudflare.com/sign-up. You can sign up with Google, Apple, GitHub, or with email and password. Verify you're human, confirm your email, and you're in.
Step 10 — Choose Pages deployment
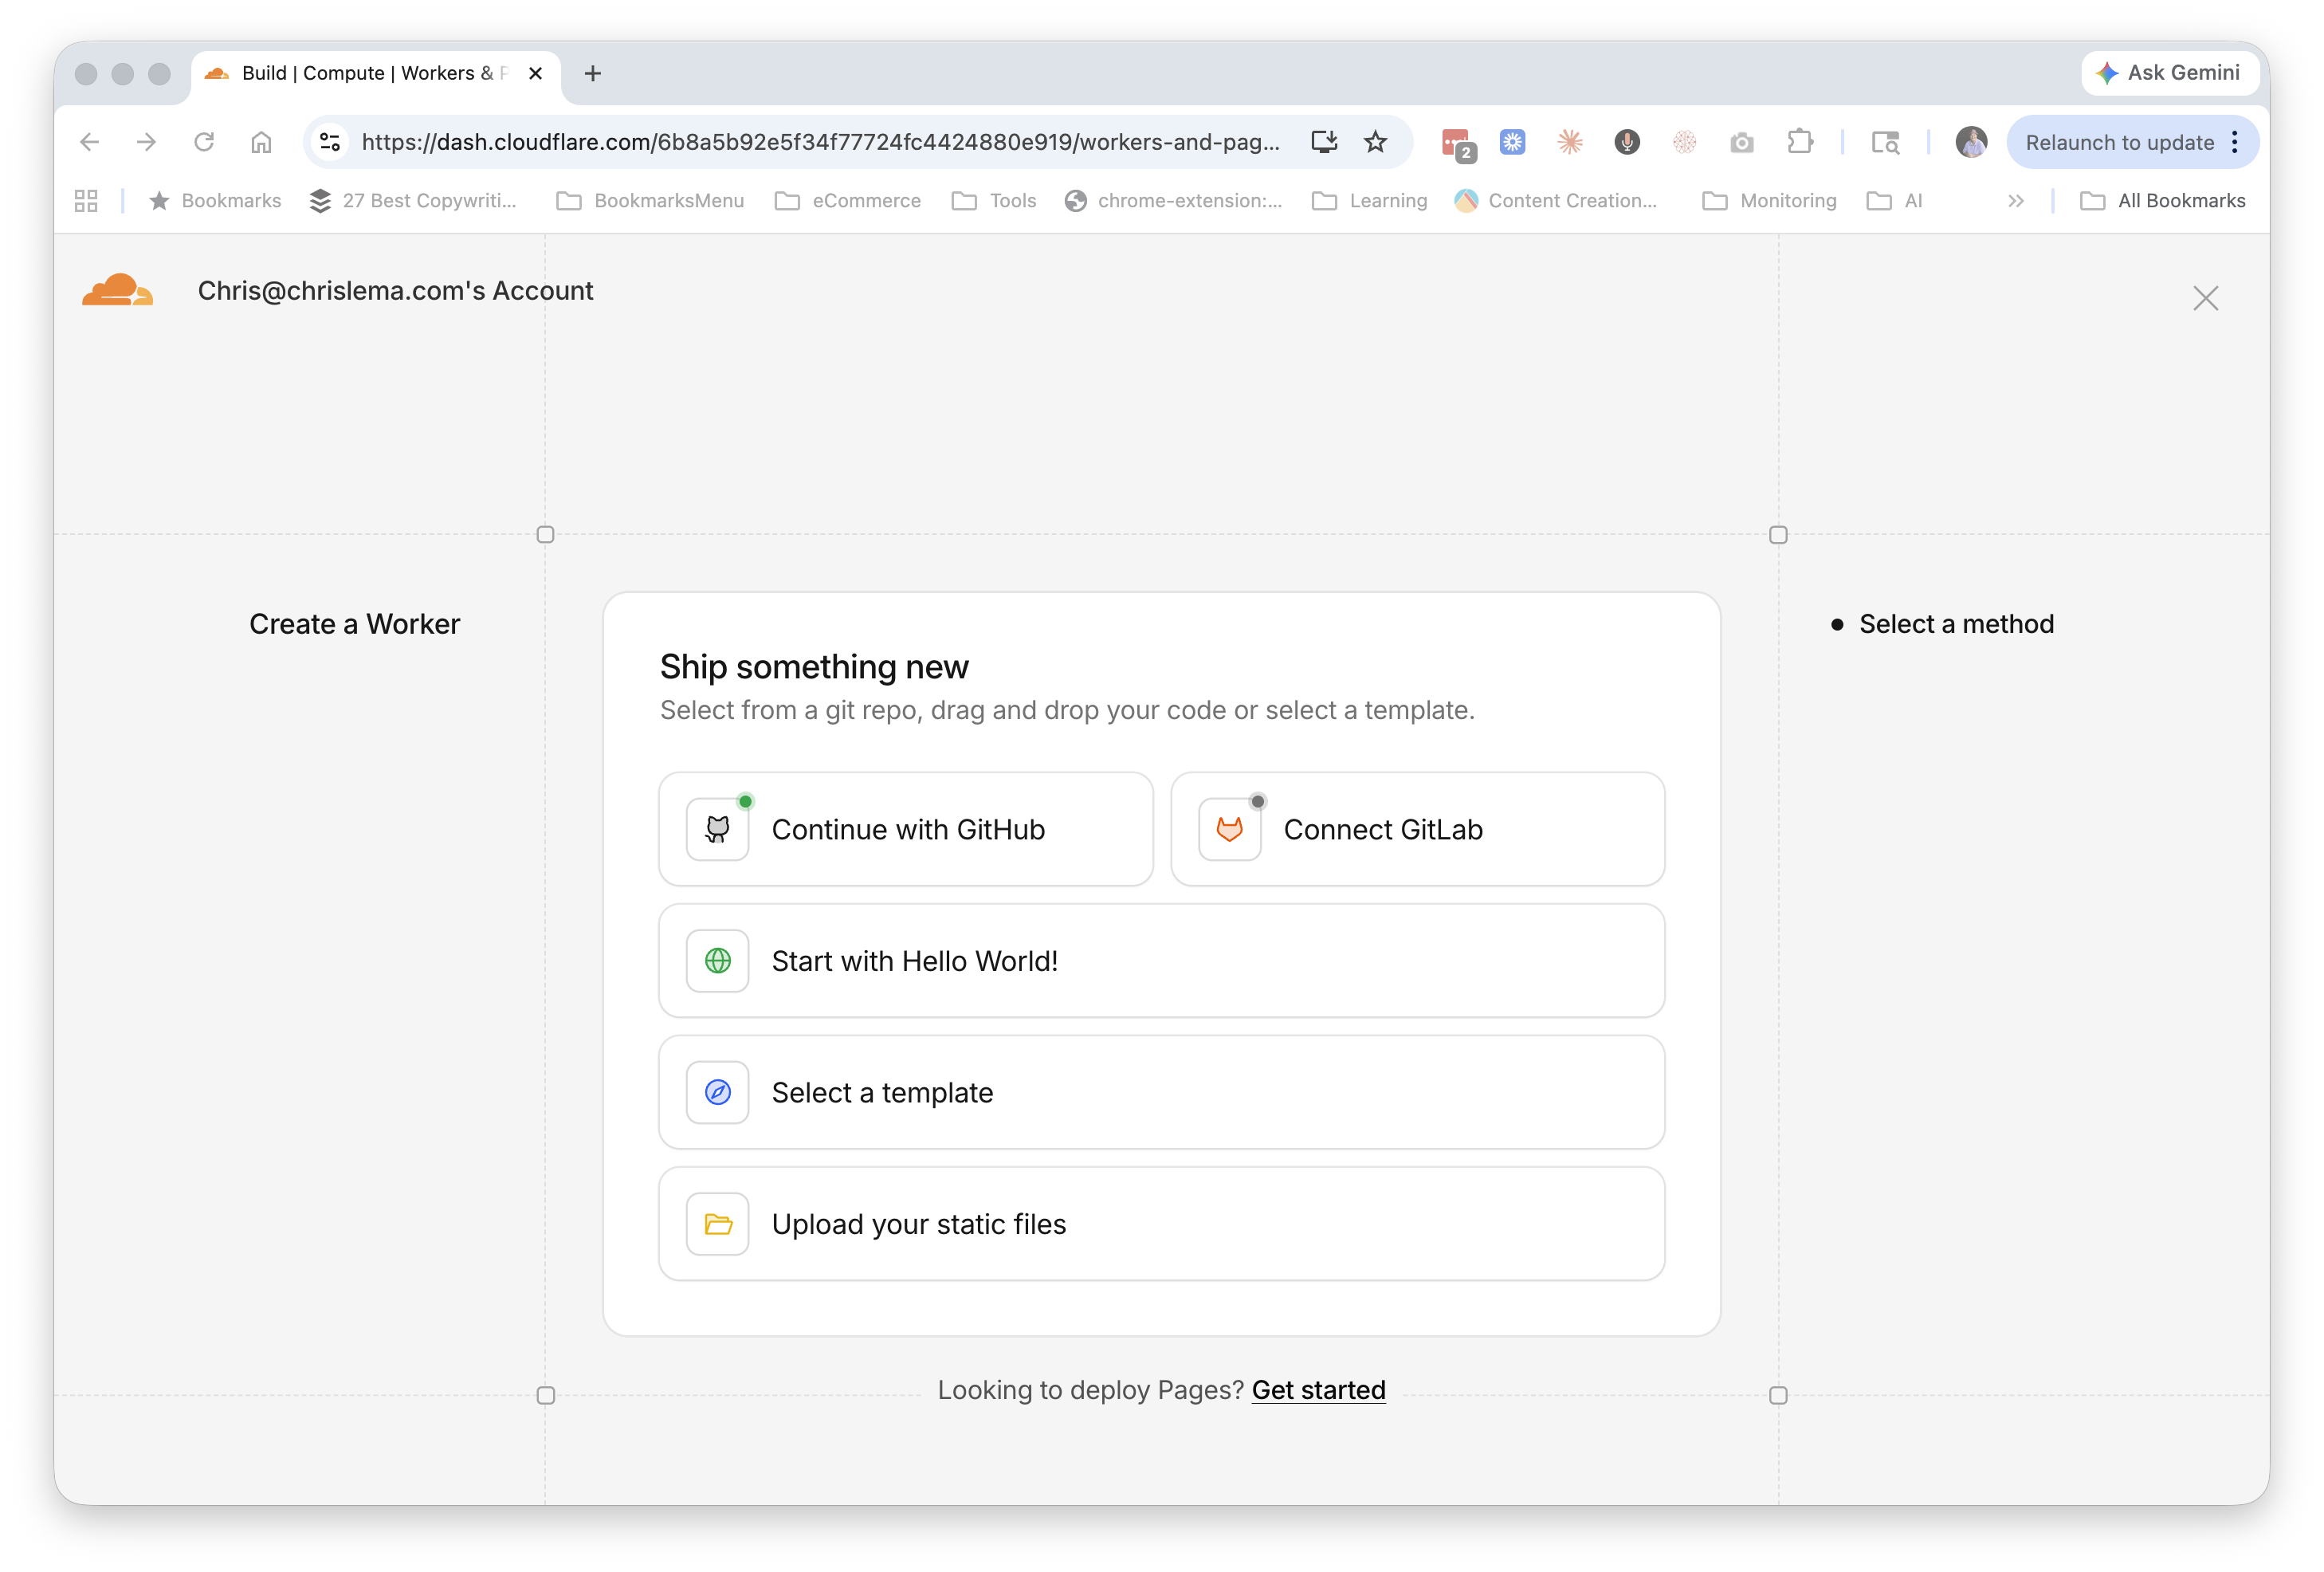
Once inside the Cloudflare dashboard, look in the left sidebar under Build for Workers & Pages. Click it.
You'll see a screen titled "Ship something new" with several options. At the bottom of that card, click the small link that says Looking to deploy Pages? Get started.
Step 11 — Connect to Git
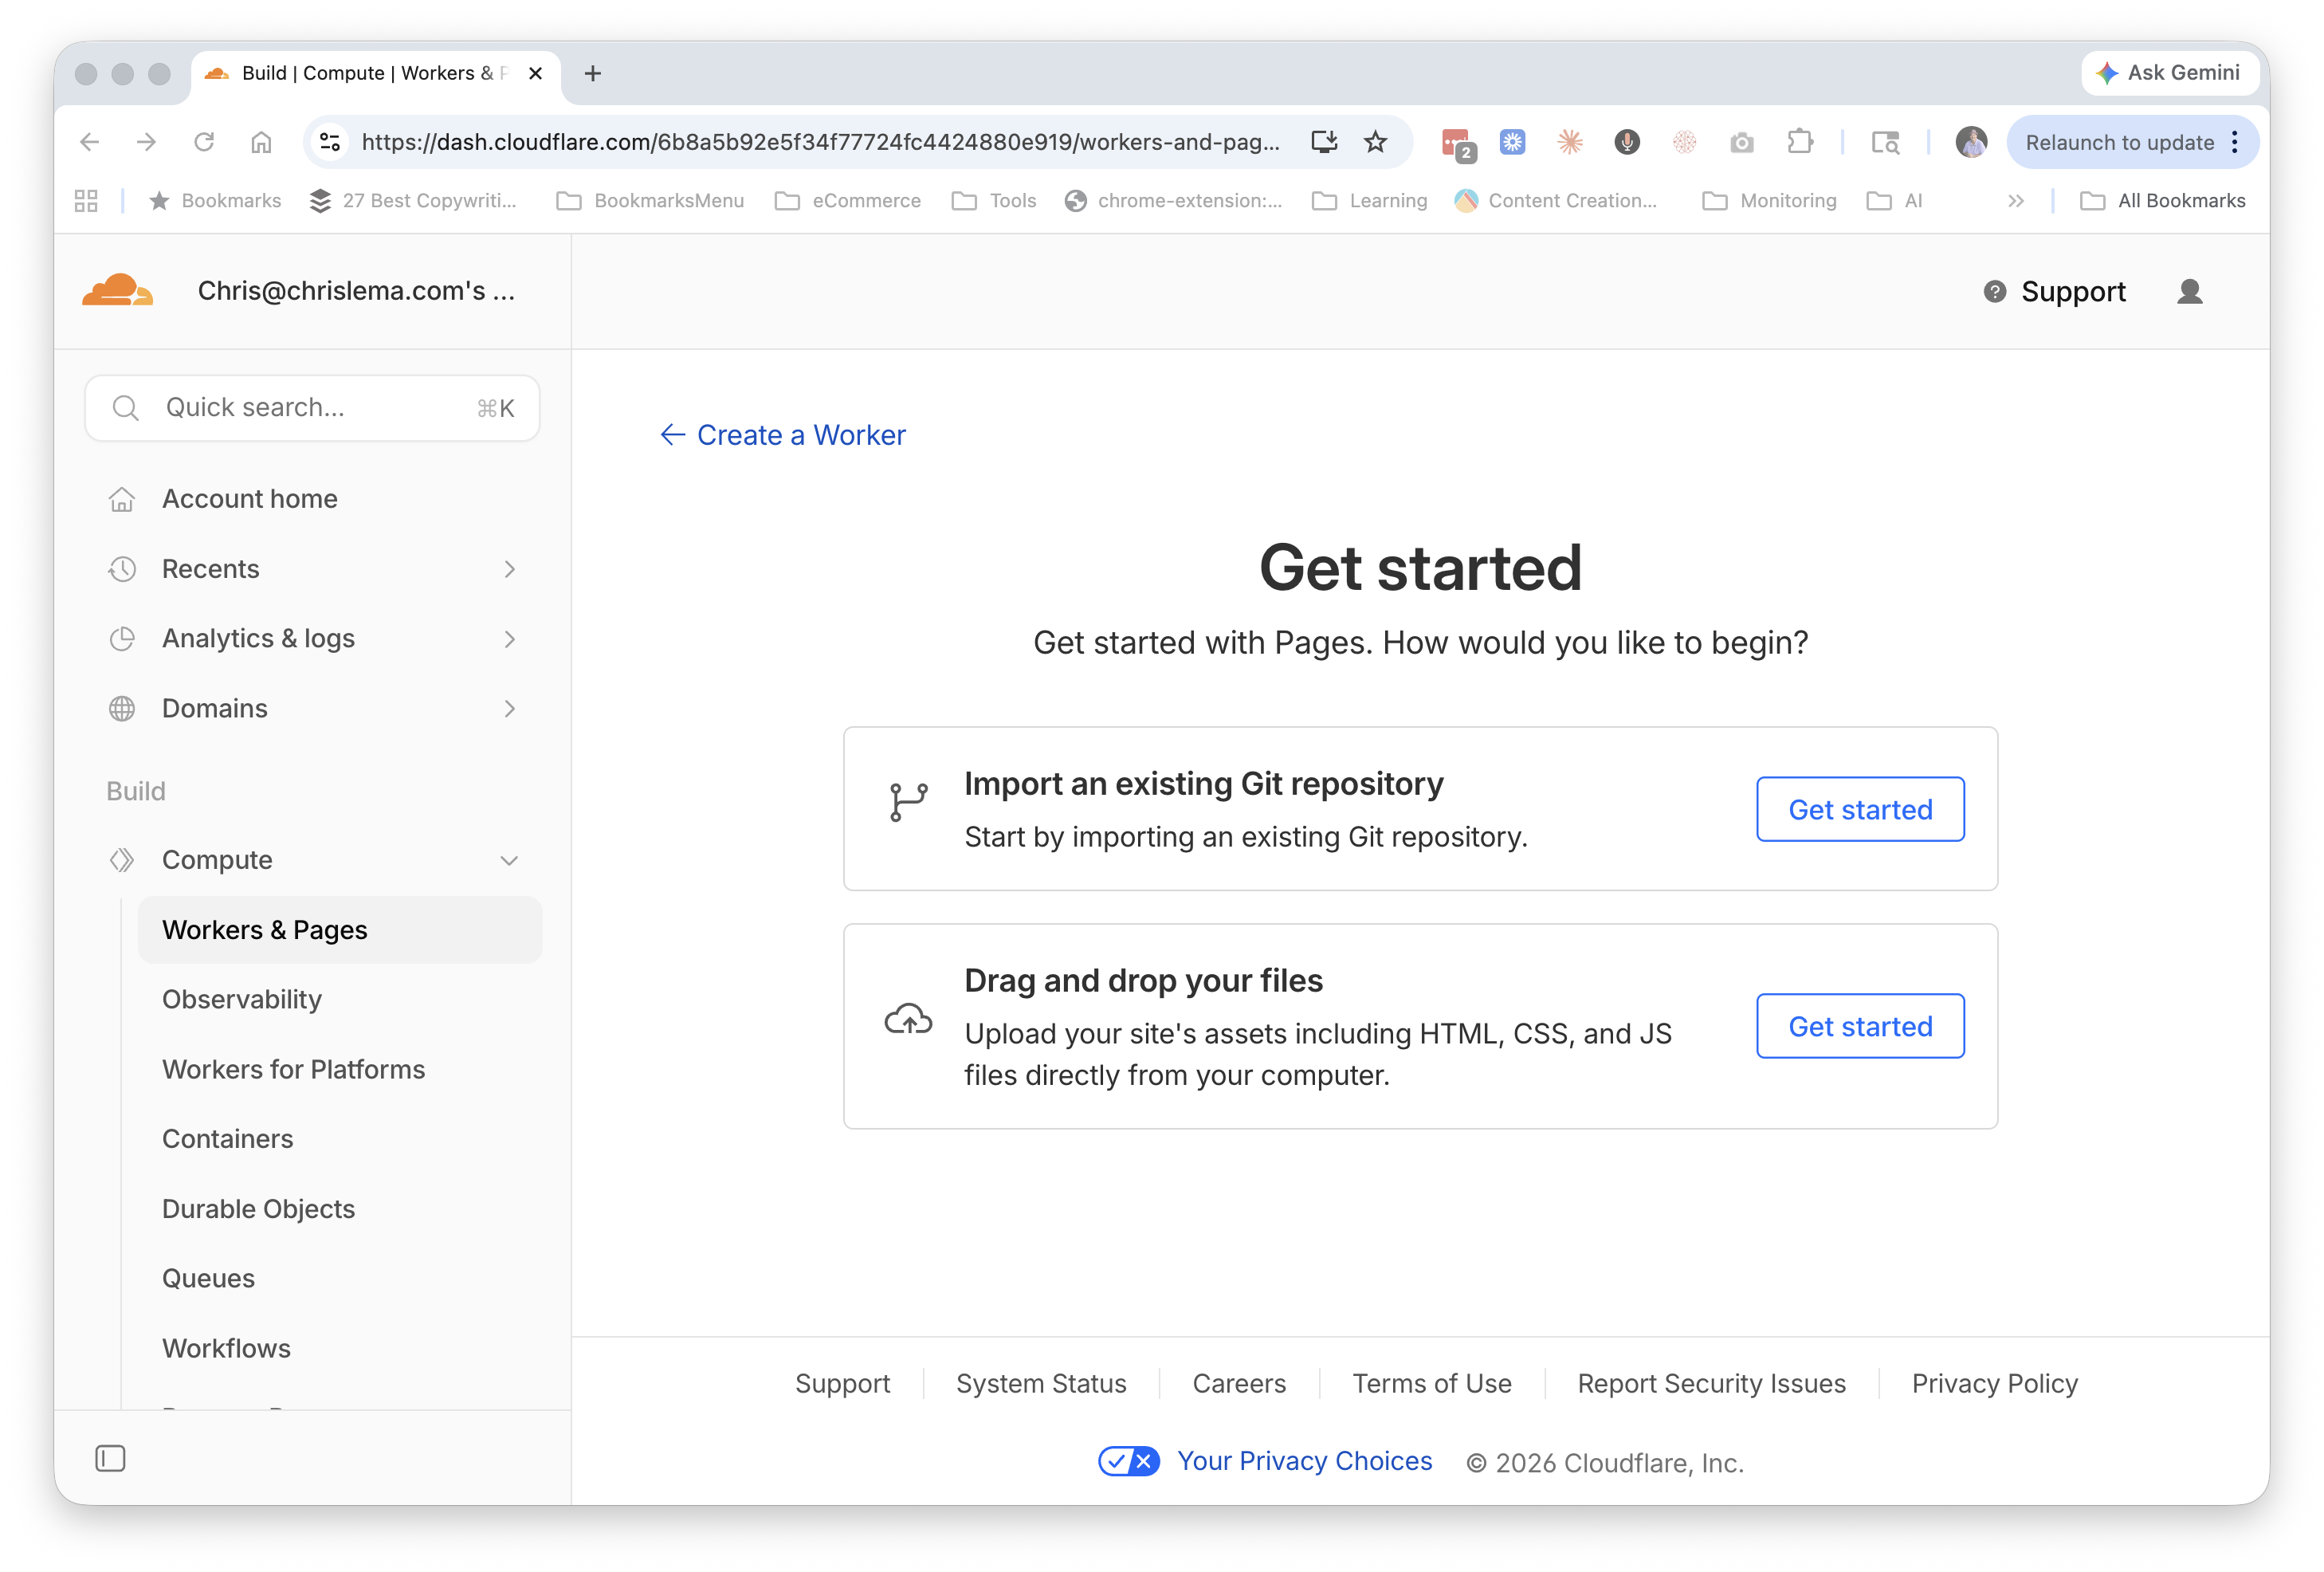
Cloudflare offers two ways to deploy: importing an existing Git repository or dragging and dropping files. We're going with the Git option, because it's what makes the whole "edit and auto-publish" magic work later.
Click Get started next to "Import an existing Git repository."
Step 12 — Choose your GitHub account
Cloudflare asks which Git provider you want to connect — pick the GitHub tab. You'll be sent through GitHub's authorization flow, where you grant Cloudflare permission to see your repositories. You can grant access to all repos or just specific ones.
When you come back, your GitHub account appears in the dropdown. Confirm it's the right one.

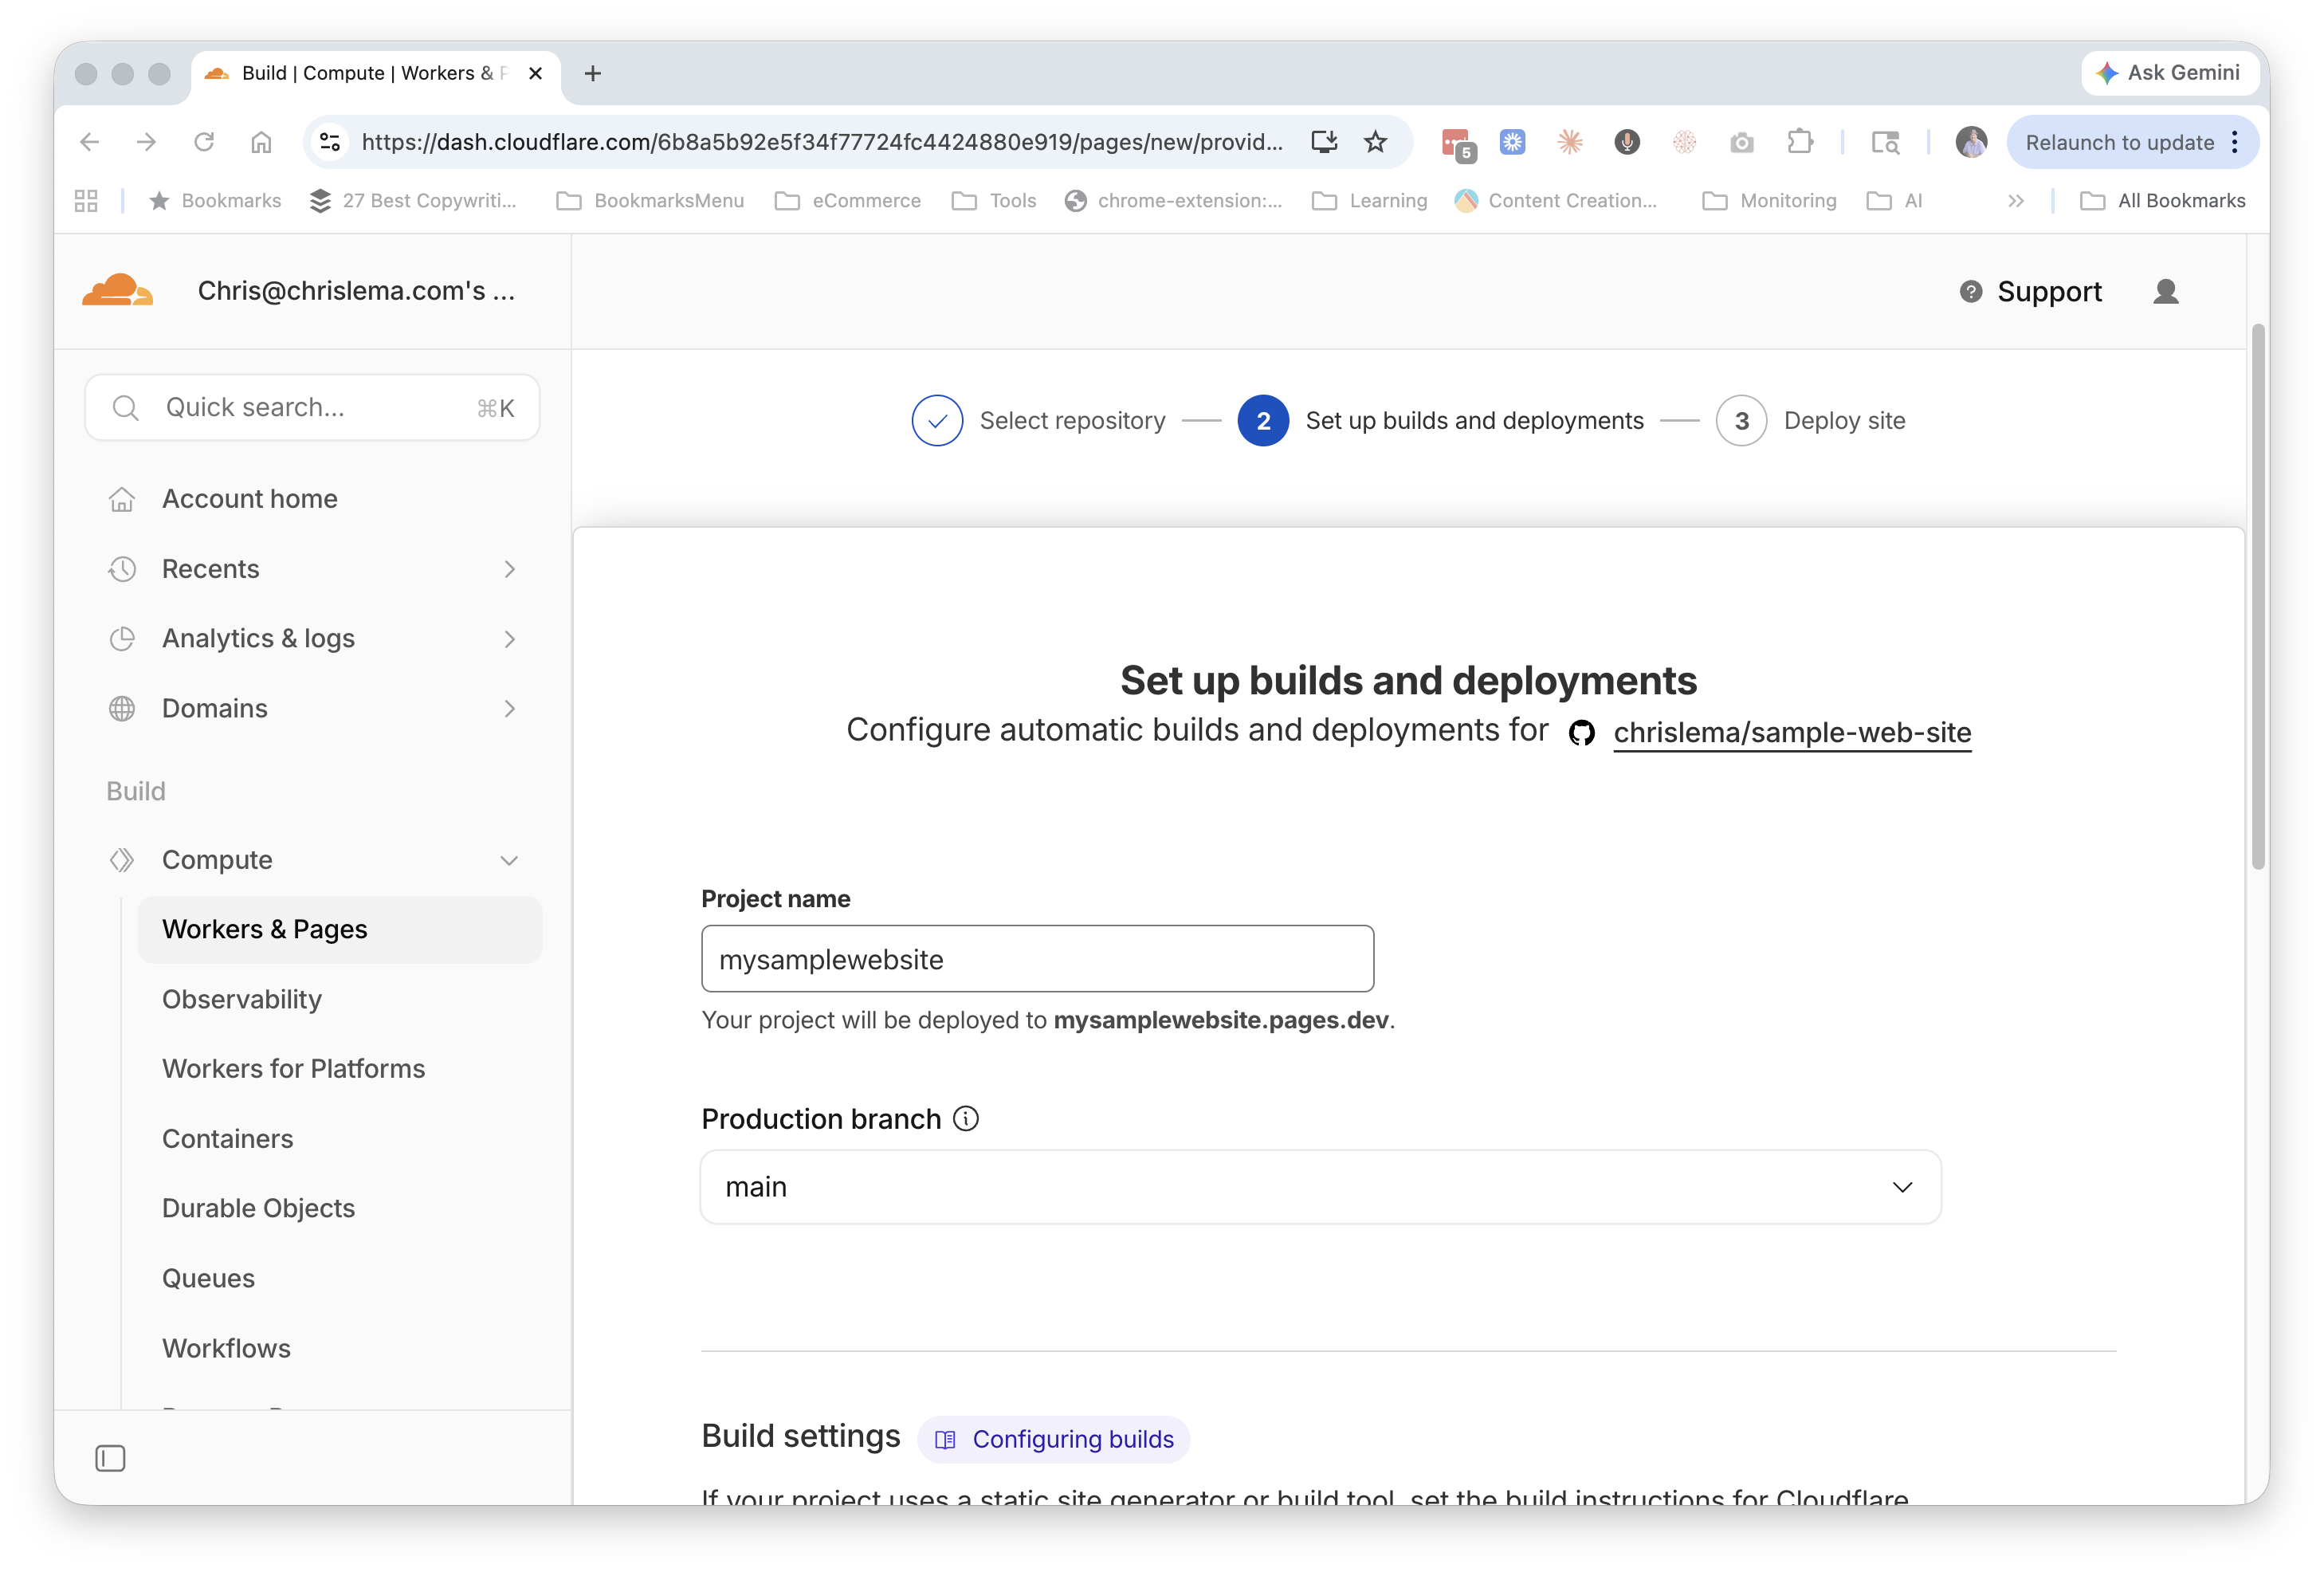
Step 13 — Set up the build
Now Cloudflare asks you to configure the deployment. The two important fields:
Project name — this becomes part of your website's address. I called mine mysamplewebsite, which means the site will be reachable at mysamplewebsite.pages.dev.
Production branch — leave this as main. This is the branch Cloudflare will watch for changes.
Because our site is plain HTML with no fancy build process, we don't need to touch the build settings below. Scroll down and click Save and Deploy.
Step 14 — Deploy
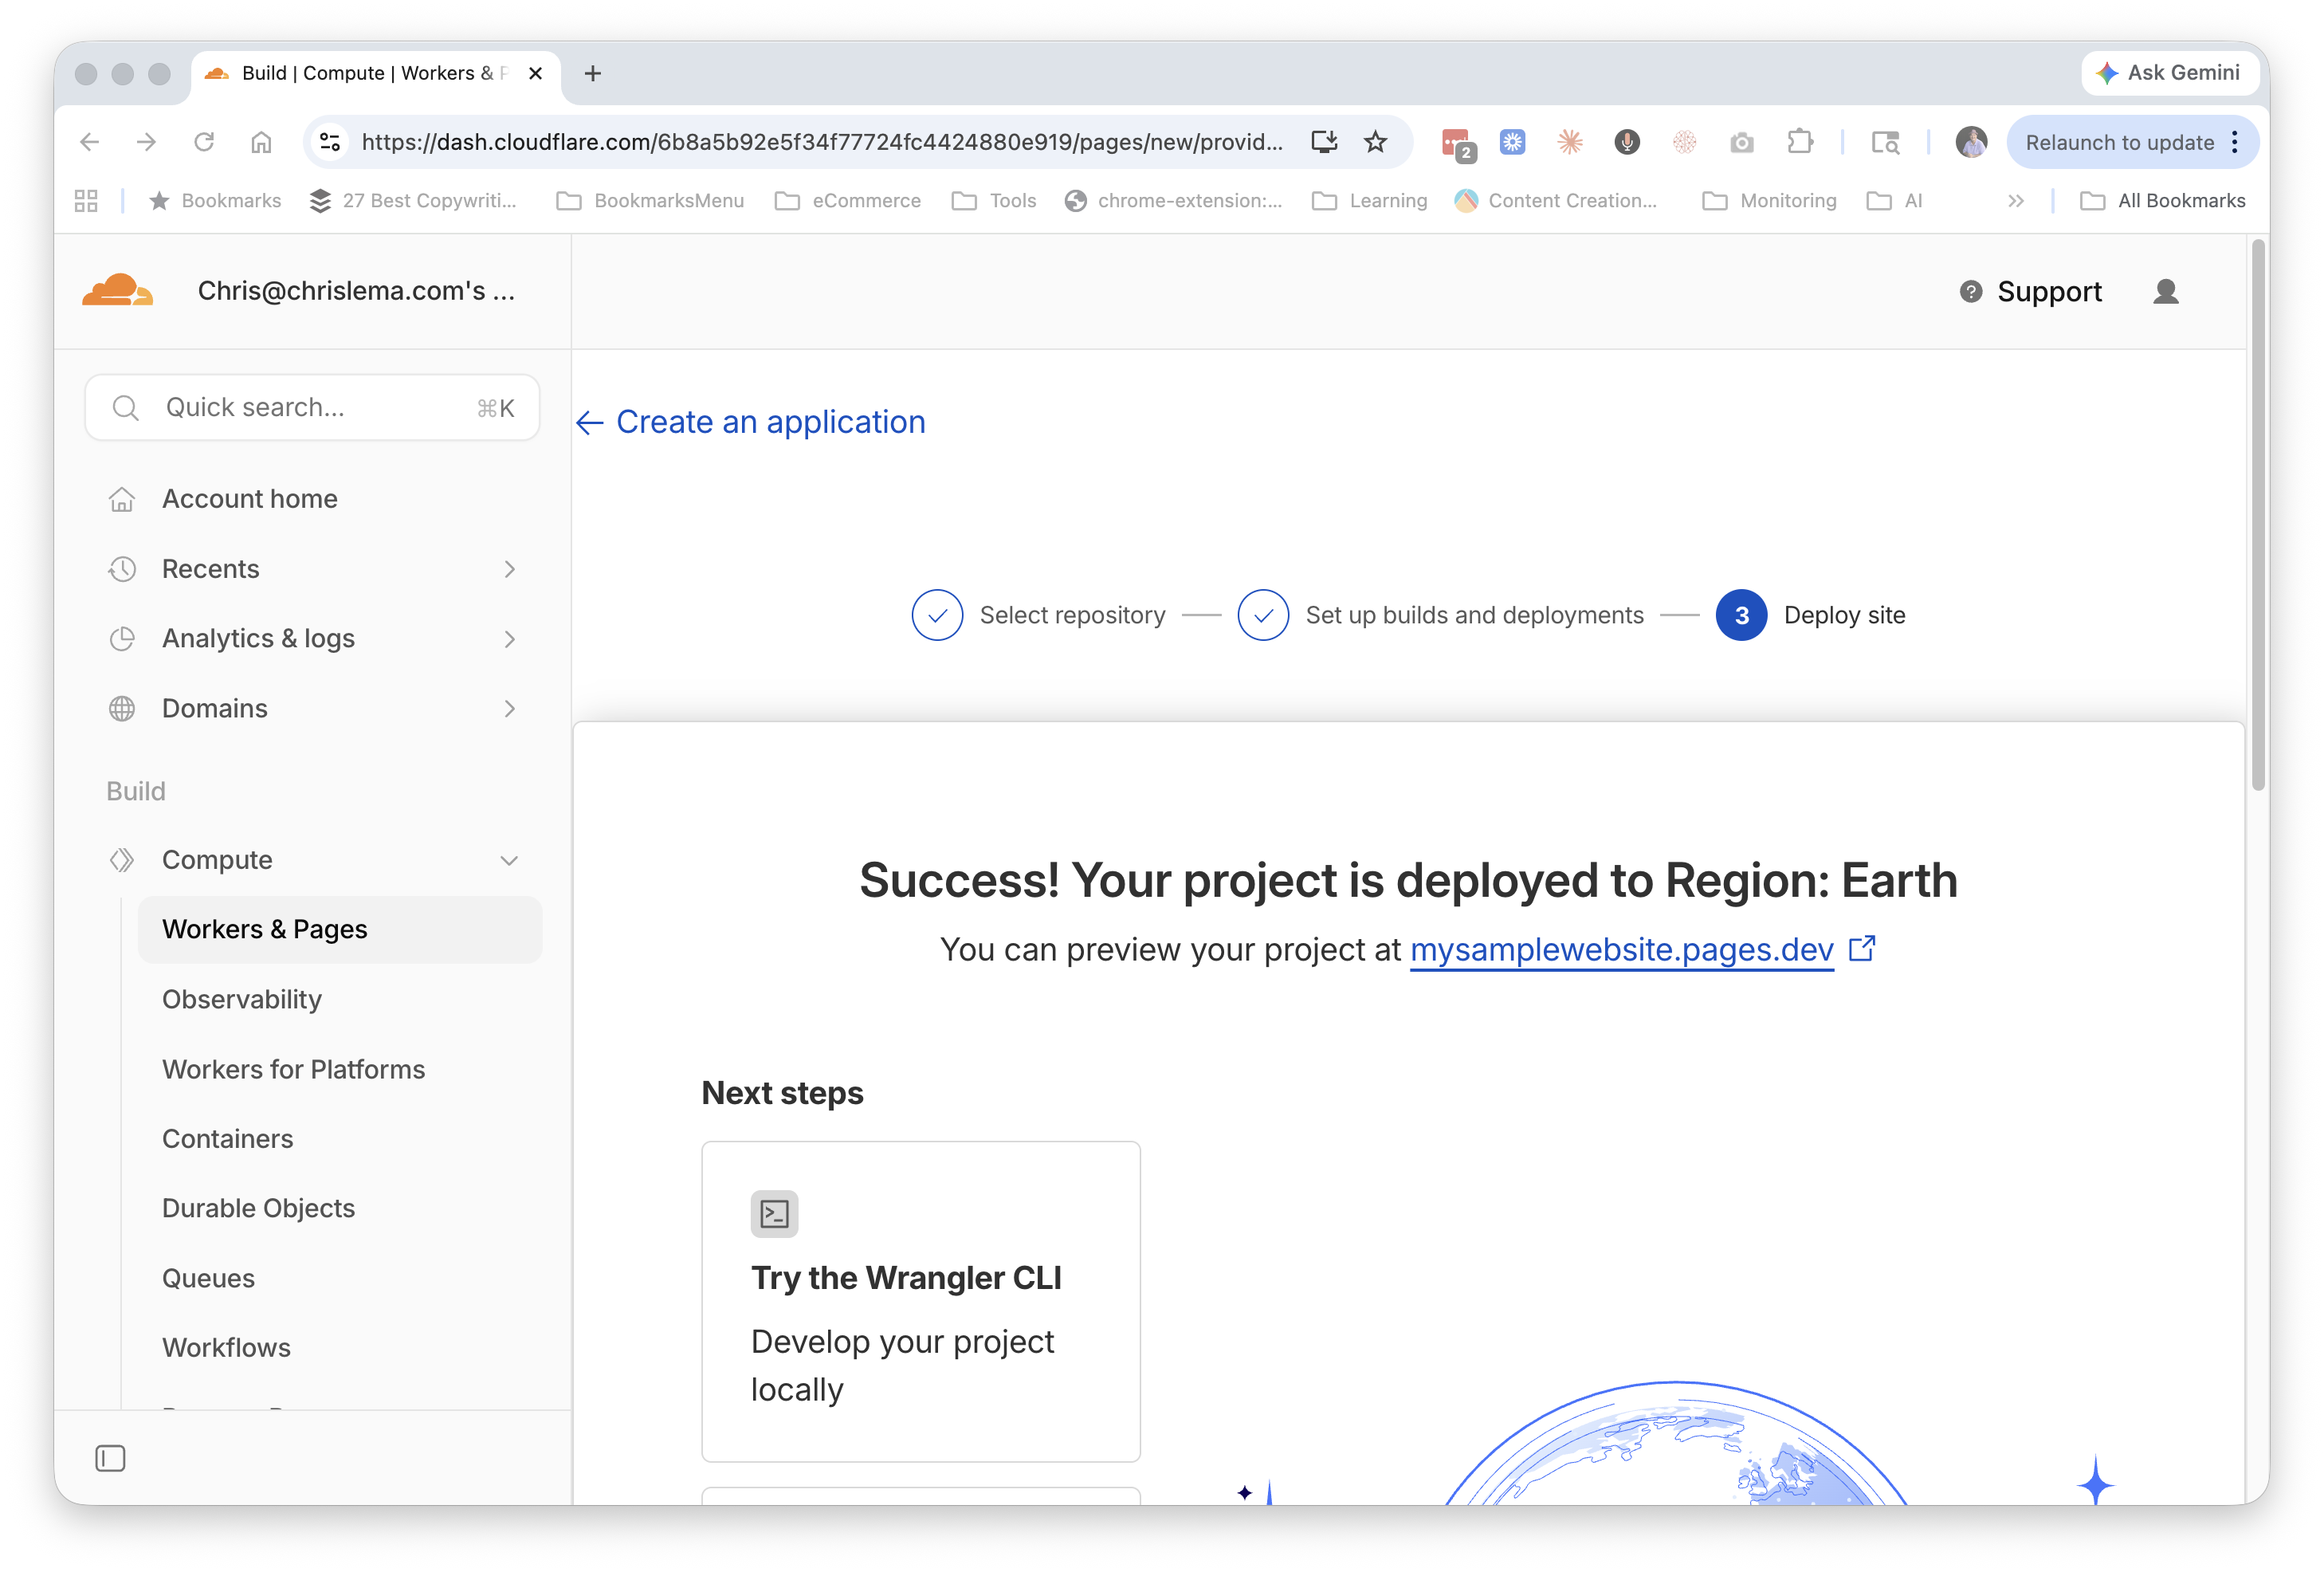
Cloudflare goes to work. About thirty seconds later: "Success! Your project is deployed to Region: Earth."
You can click the preview link at the top — mysamplewebsite.pages.dev in my case — and you'll see your site is technically live. There's nothing on it yet (just a blank page or a default README rendering, depending), but the pipeline is now wired up. Every future change you push to GitHub will automatically rebuild and republish the site.
Step 15 — Connect GitHub to Claude
Now we go back to Claude and connect it to GitHub, so Claude can push files to your repository for you without you ever needing to touch a terminal or learn Git commands.
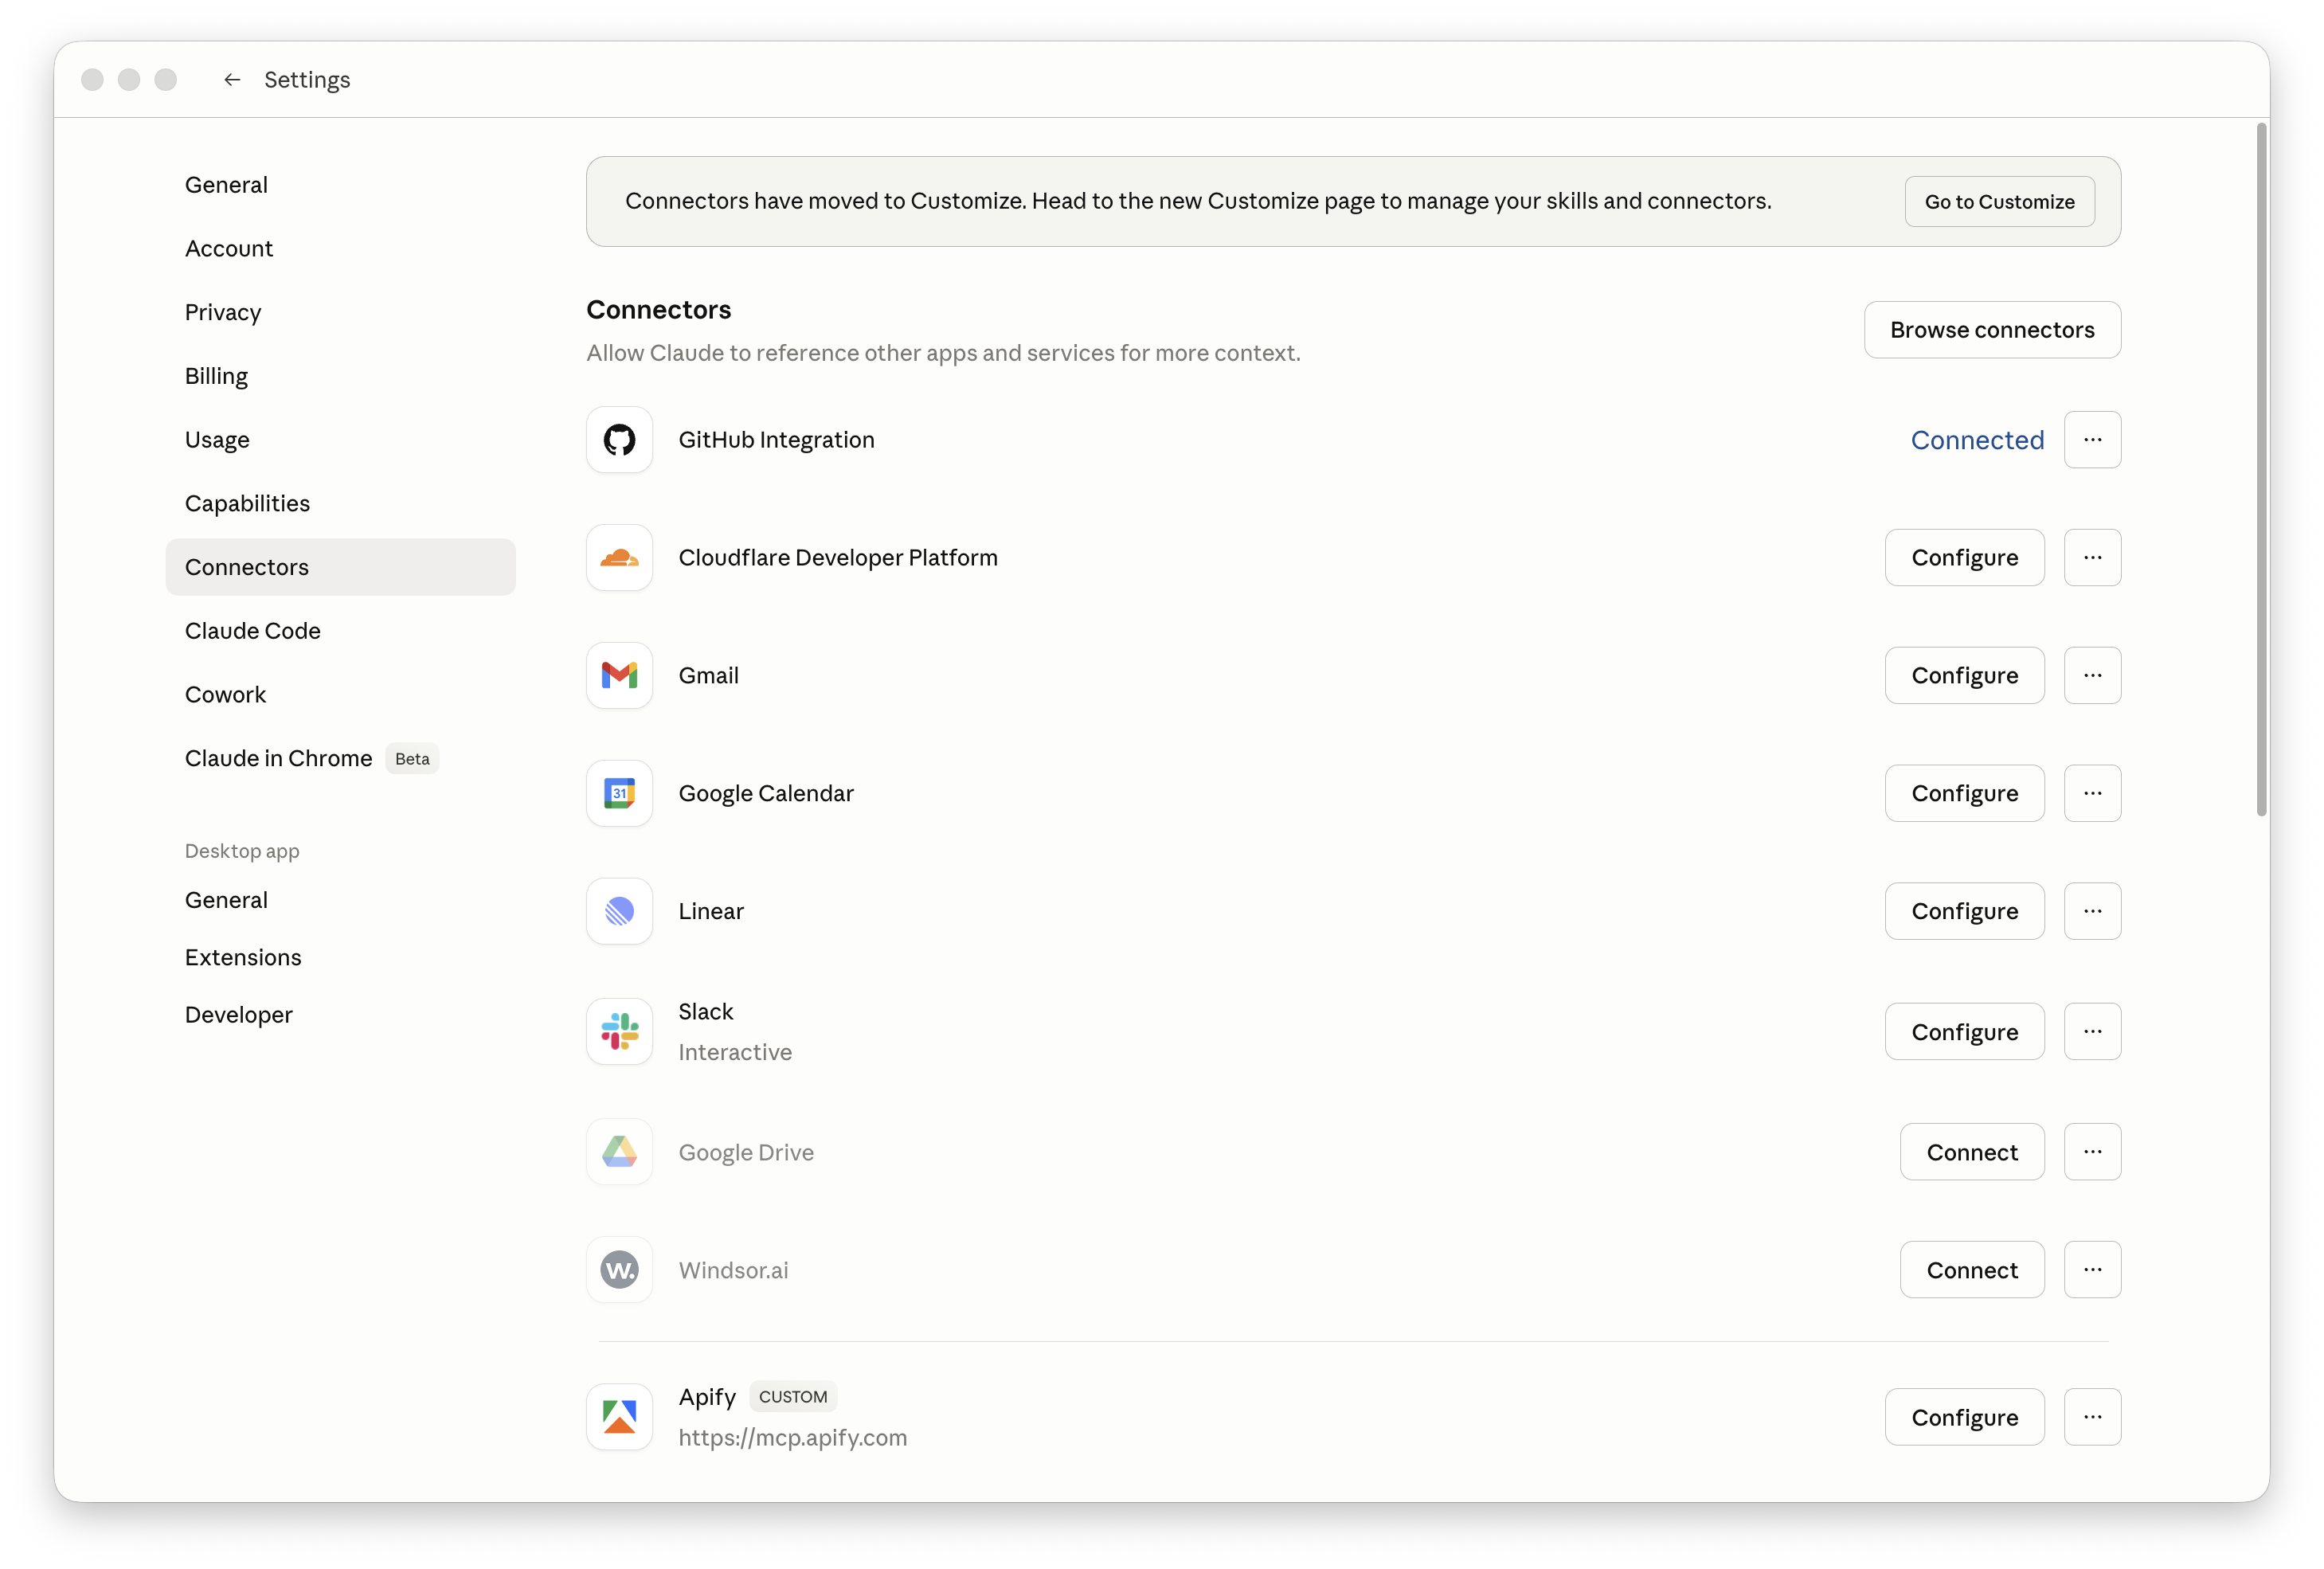
In Claude, open Settings → Connectors. Find GitHub Integration in the list and click Connect. You'll be sent through a short authorization flow on GitHub's side. When you come back, GitHub will show as Connected.
Step 16 — Create a design system
Before we ask Claude to build the actual website, we're going to give it a visual rulebook to work from. This is called a design system — your colors, your fonts, your buttons, your spacing. Once it exists, every design Claude makes for you will follow those rules automatically.
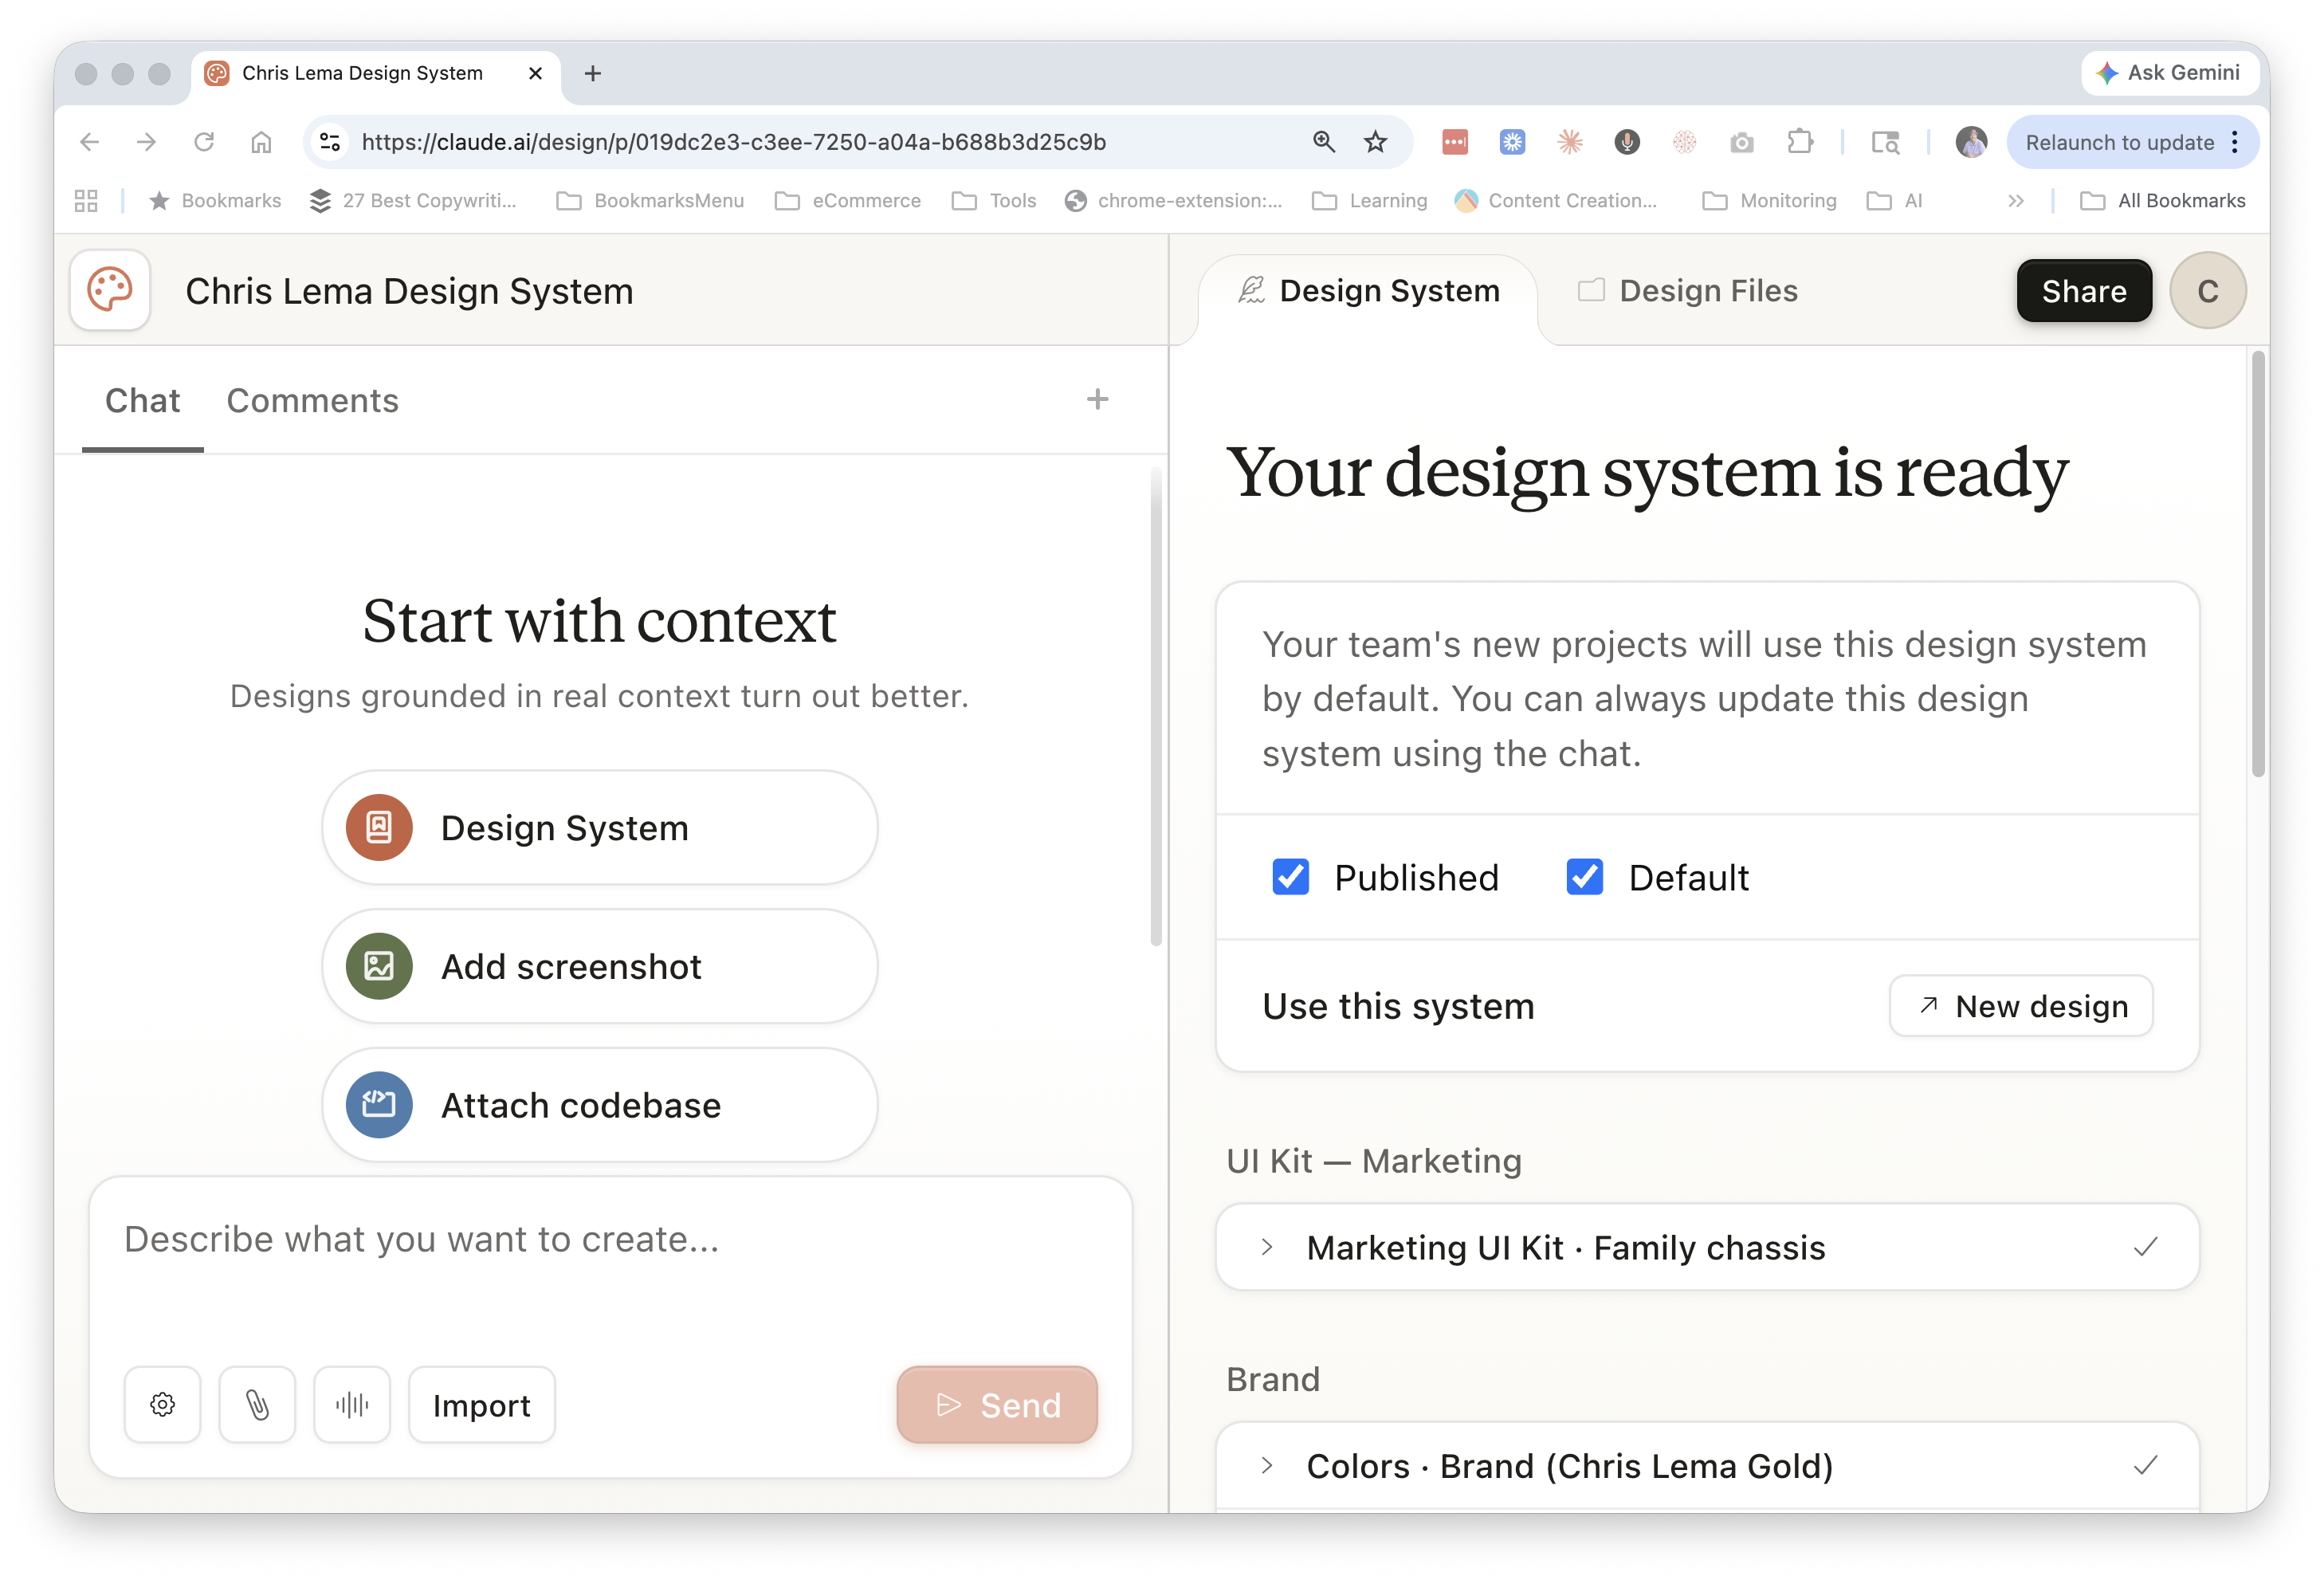
Go to claude.ai/design and start a new design system. The "Your design system is ready" view shows what gets generated: a UI Kit, brand colors, type styles. Mark it as Published and Default so any new design Claude creates will reach for these rules first.
Step 17 — Set up your design system
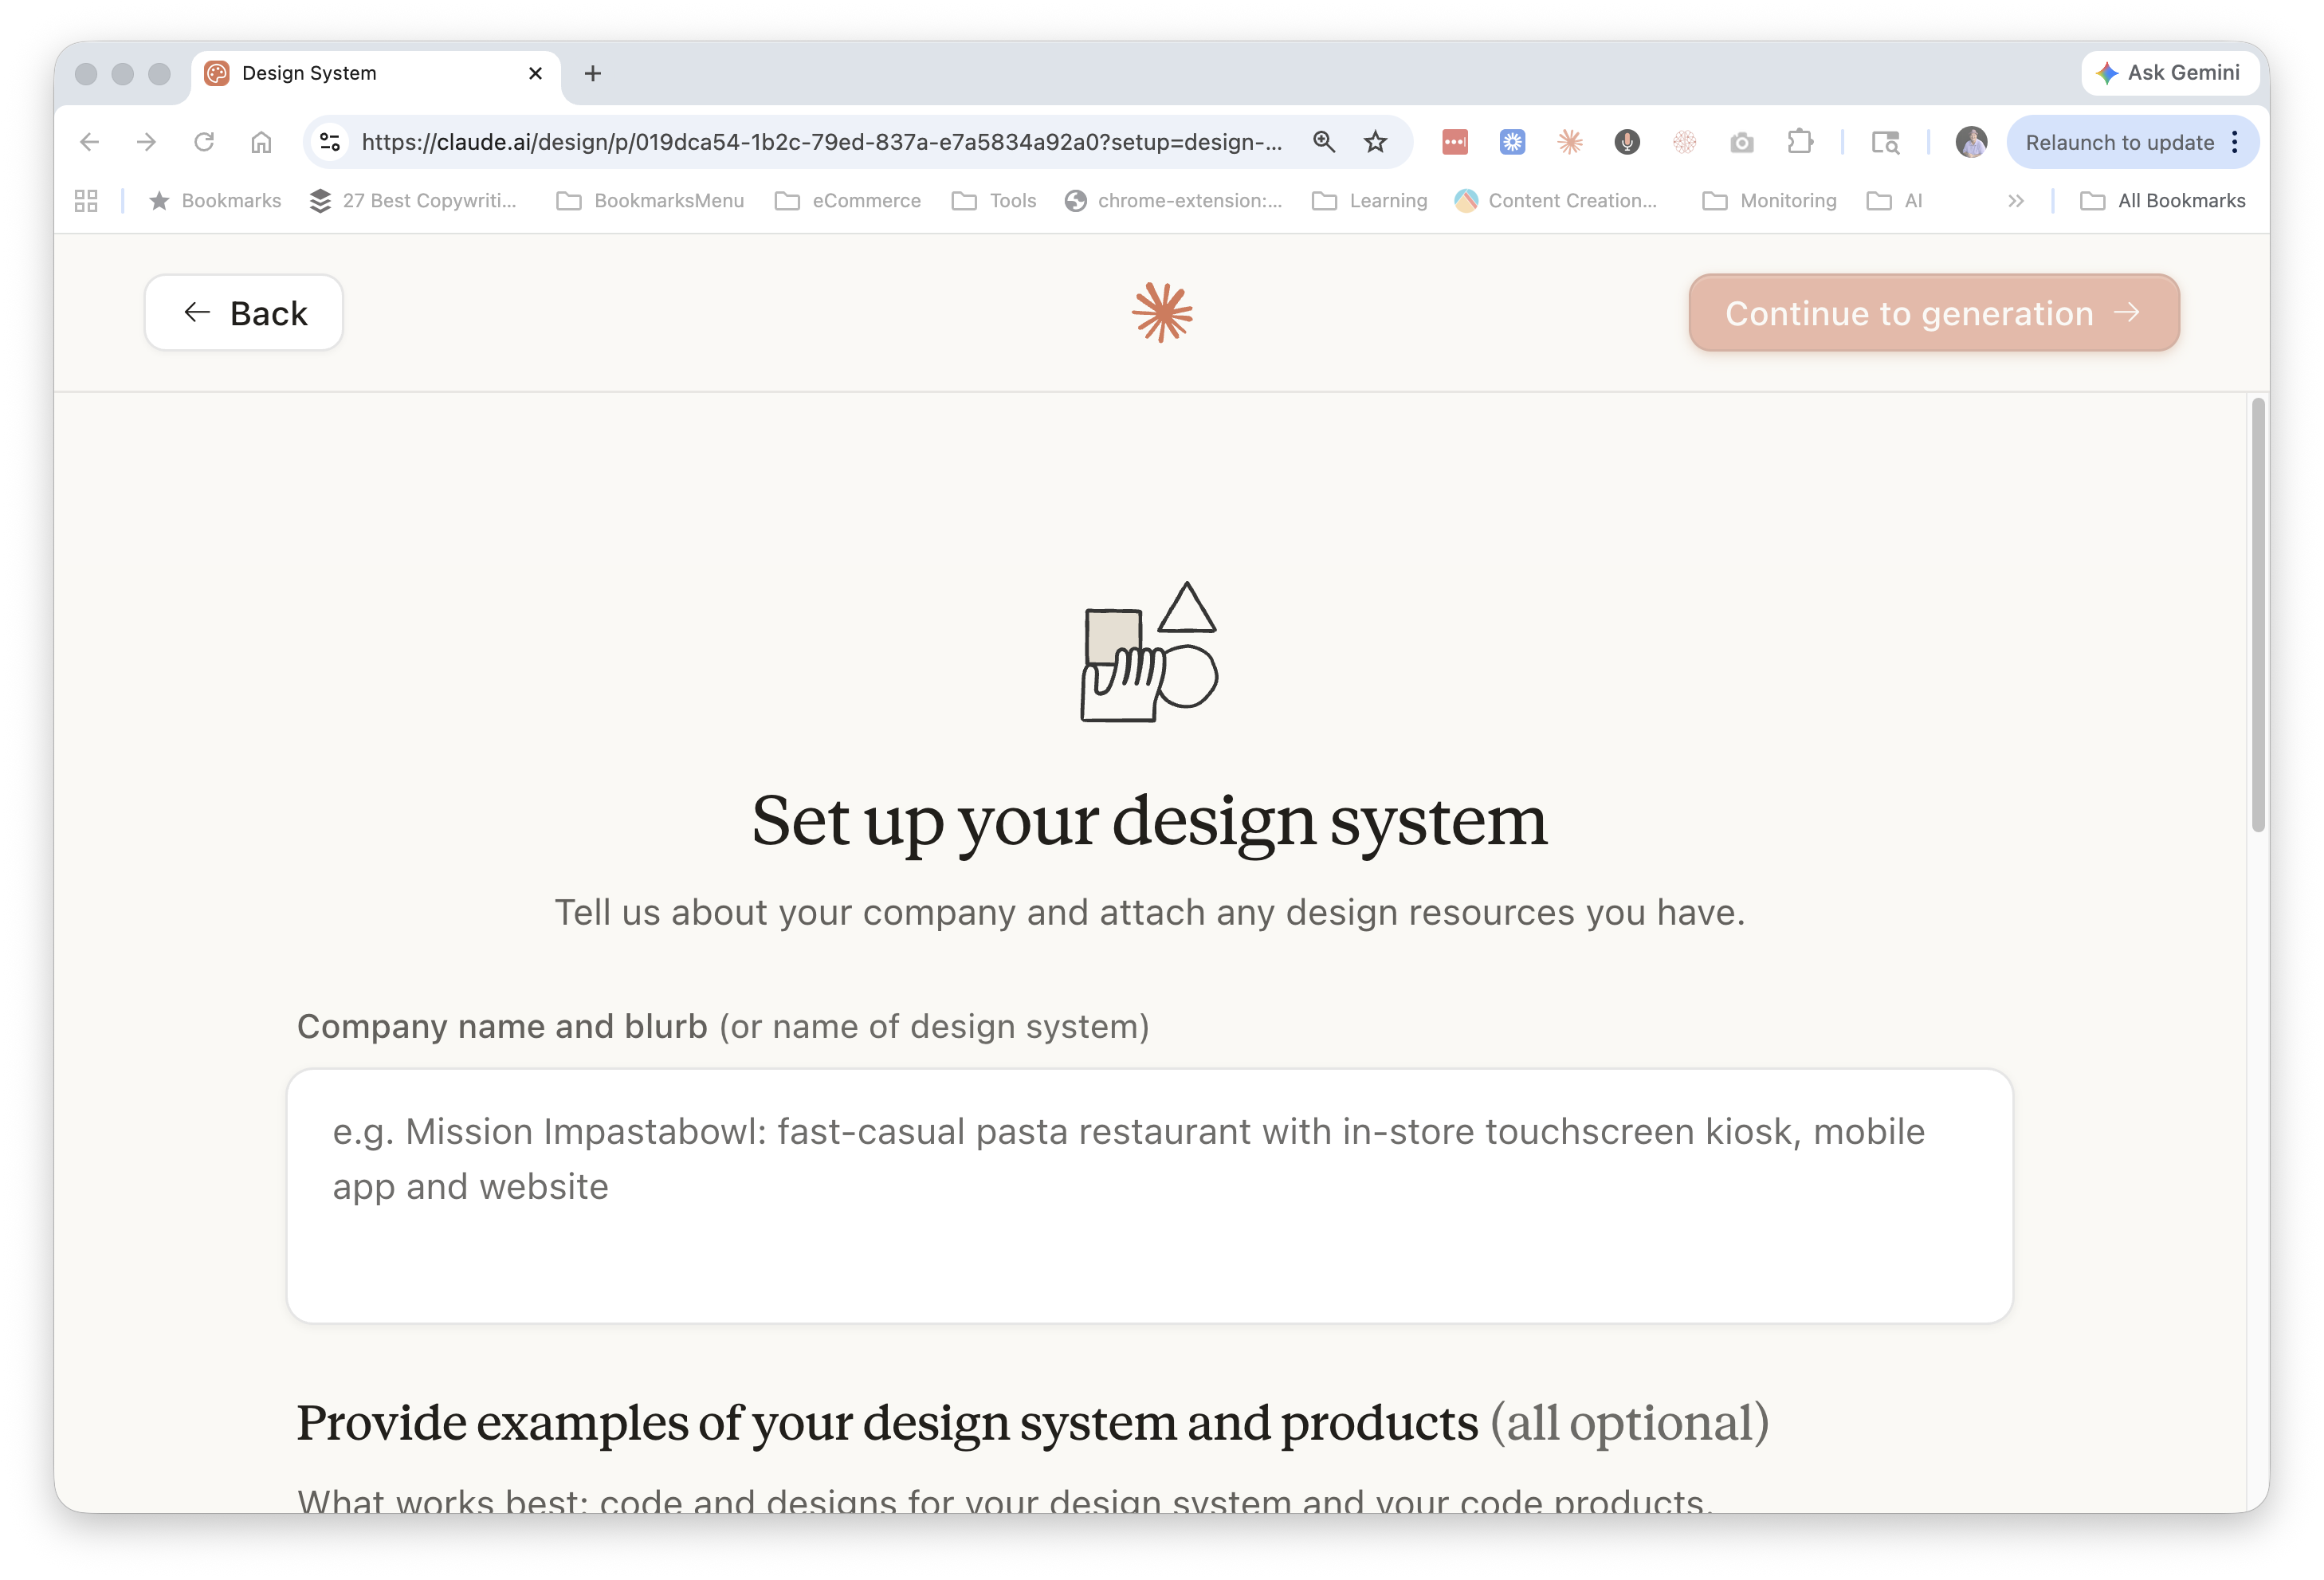
When you create a new design system, Claude asks you to fill in some basics. The main field is Company name and blurb — a short description of who you are. There are also optional fields where you can attach existing design resources: a logo, screenshots of sites you like, color preferences, even a codebase if you have one.
Give it whatever you have, then click Continue to generation. Claude builds the design system for you in a few minutes.
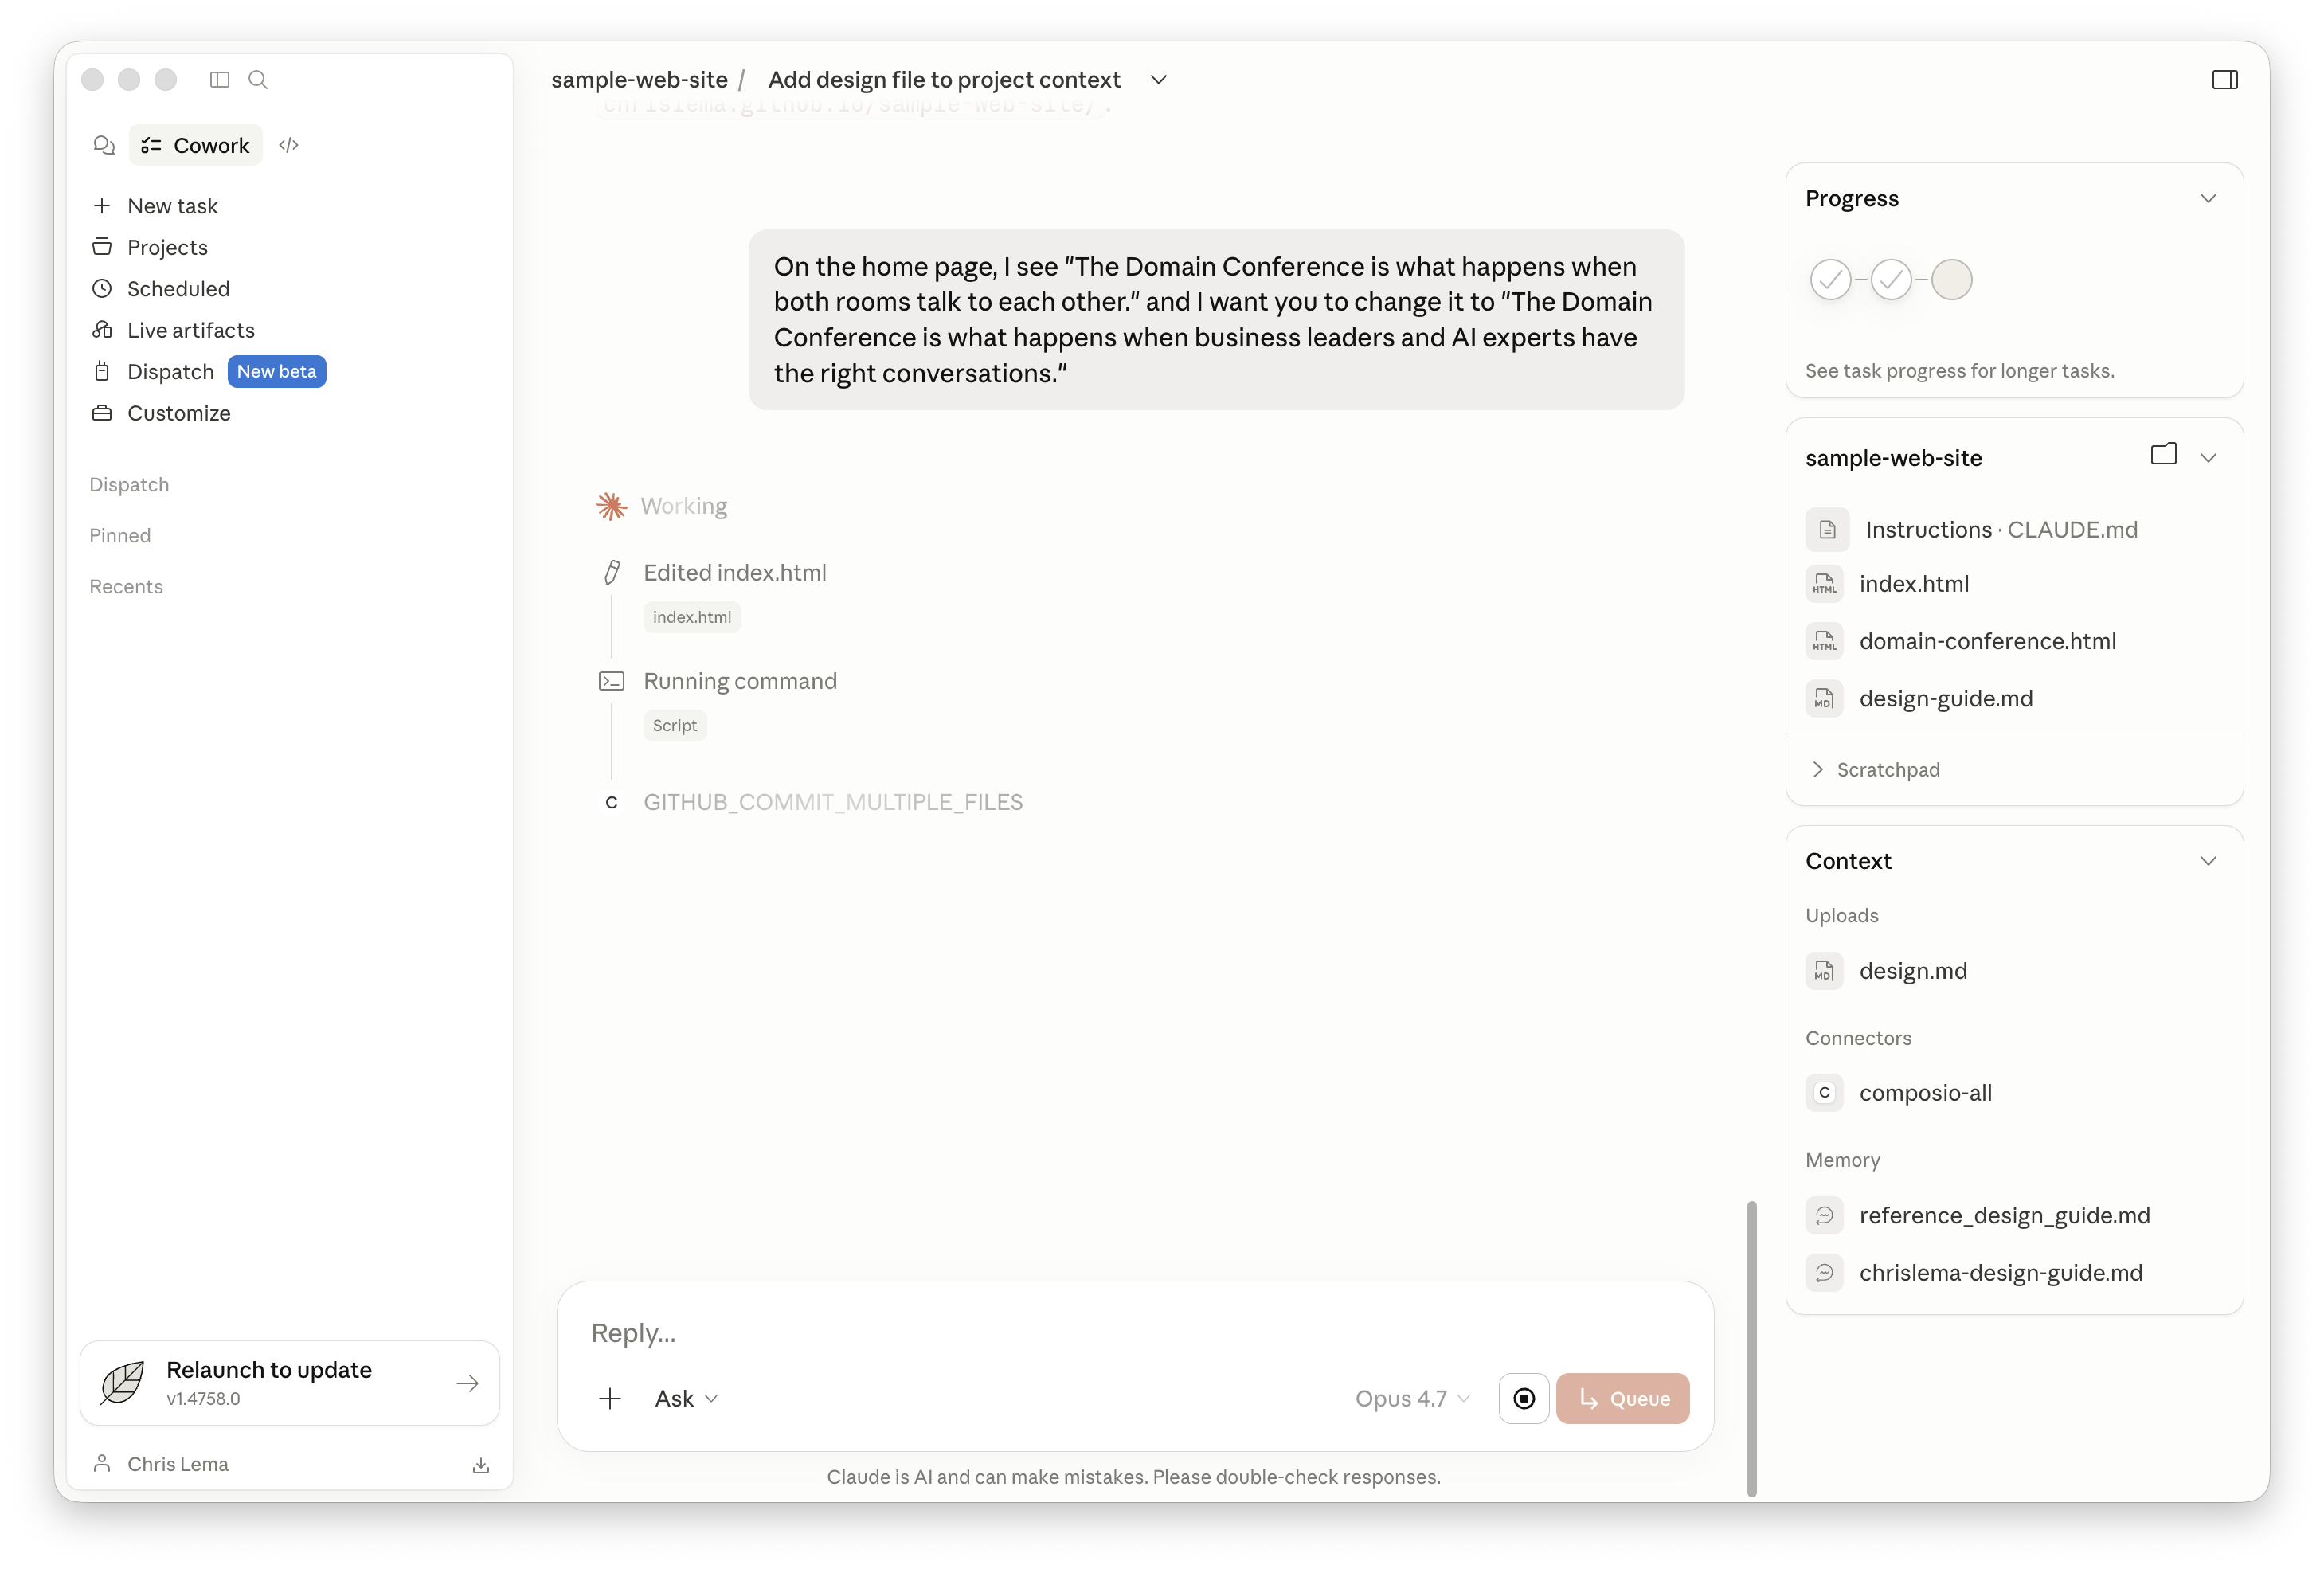
Step 18 — Add the design file to your project
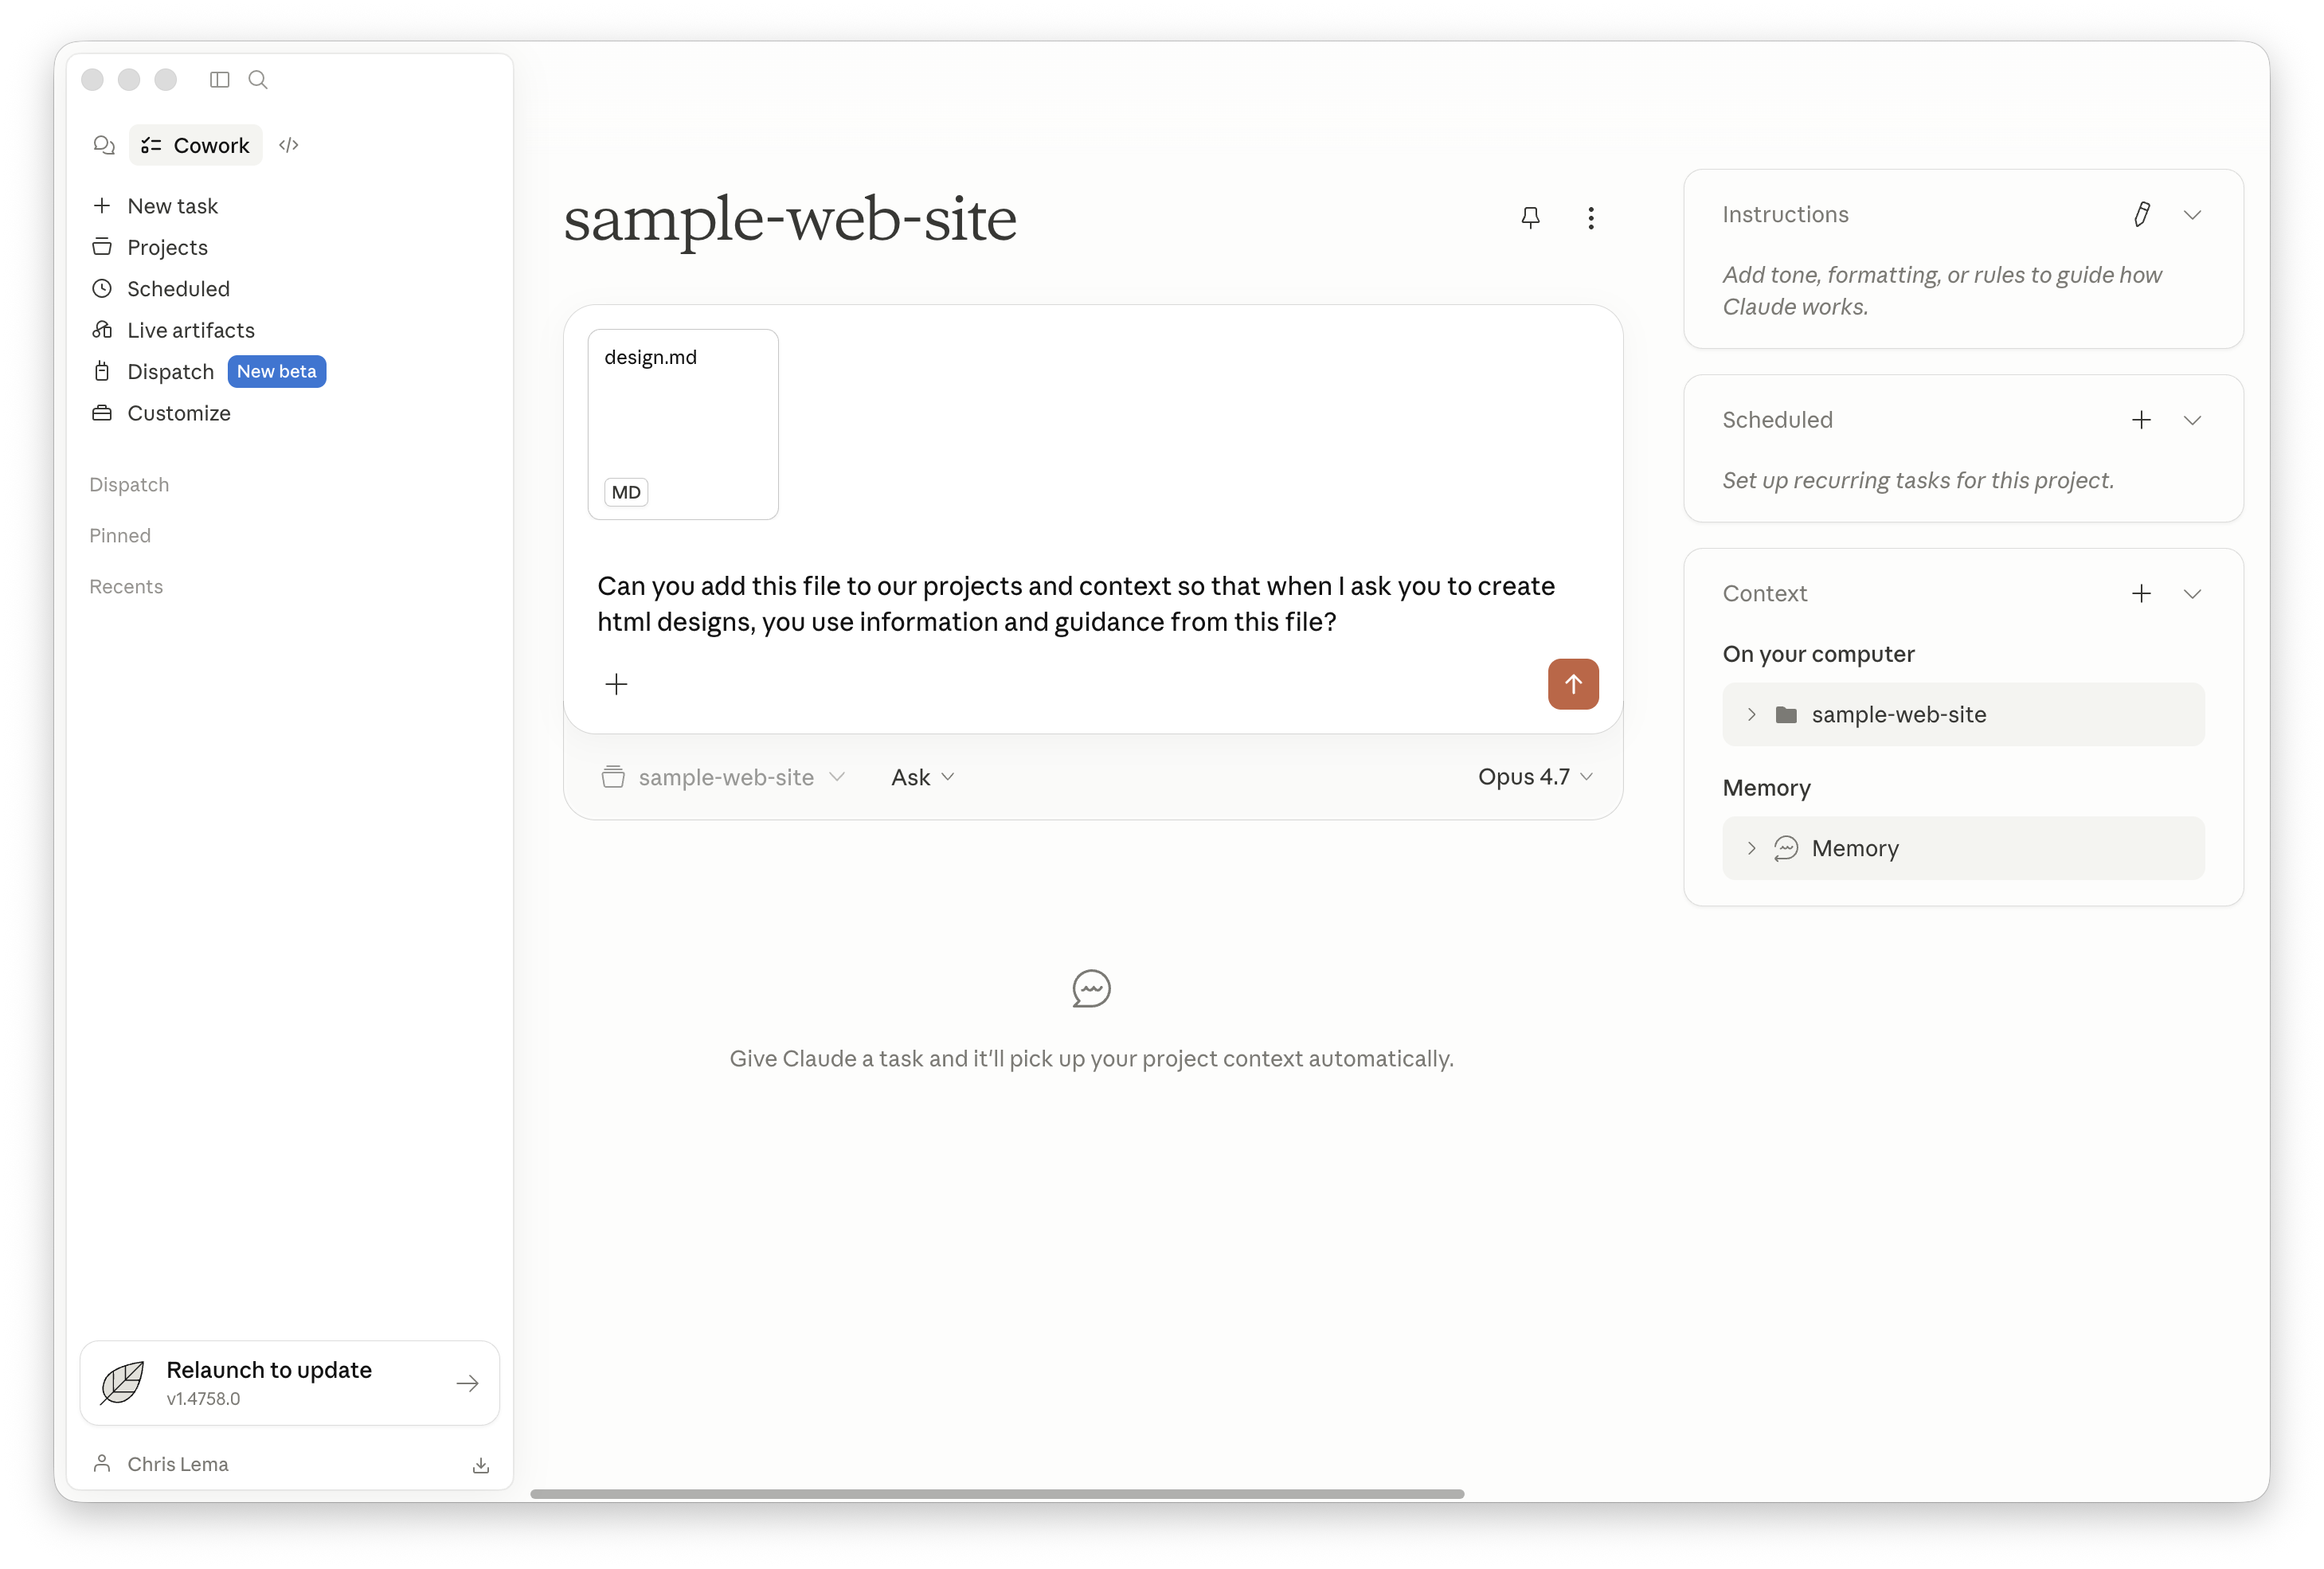
Once your design system is ready, Claude lets you export it as a markdown file — a plain-text version of the rules. Download that file (mine was named design.md) and drag it into the Cowork project you set up back in Step 5.
In the chat box, ask Claude something like:
Can you add this file to our projects and context so that when I ask you to create HTML designs, you use information and guidance from this file?
Claude saves the design guide into project memory. From now on, every page it builds will pull from those rules. You only have to do this part once.
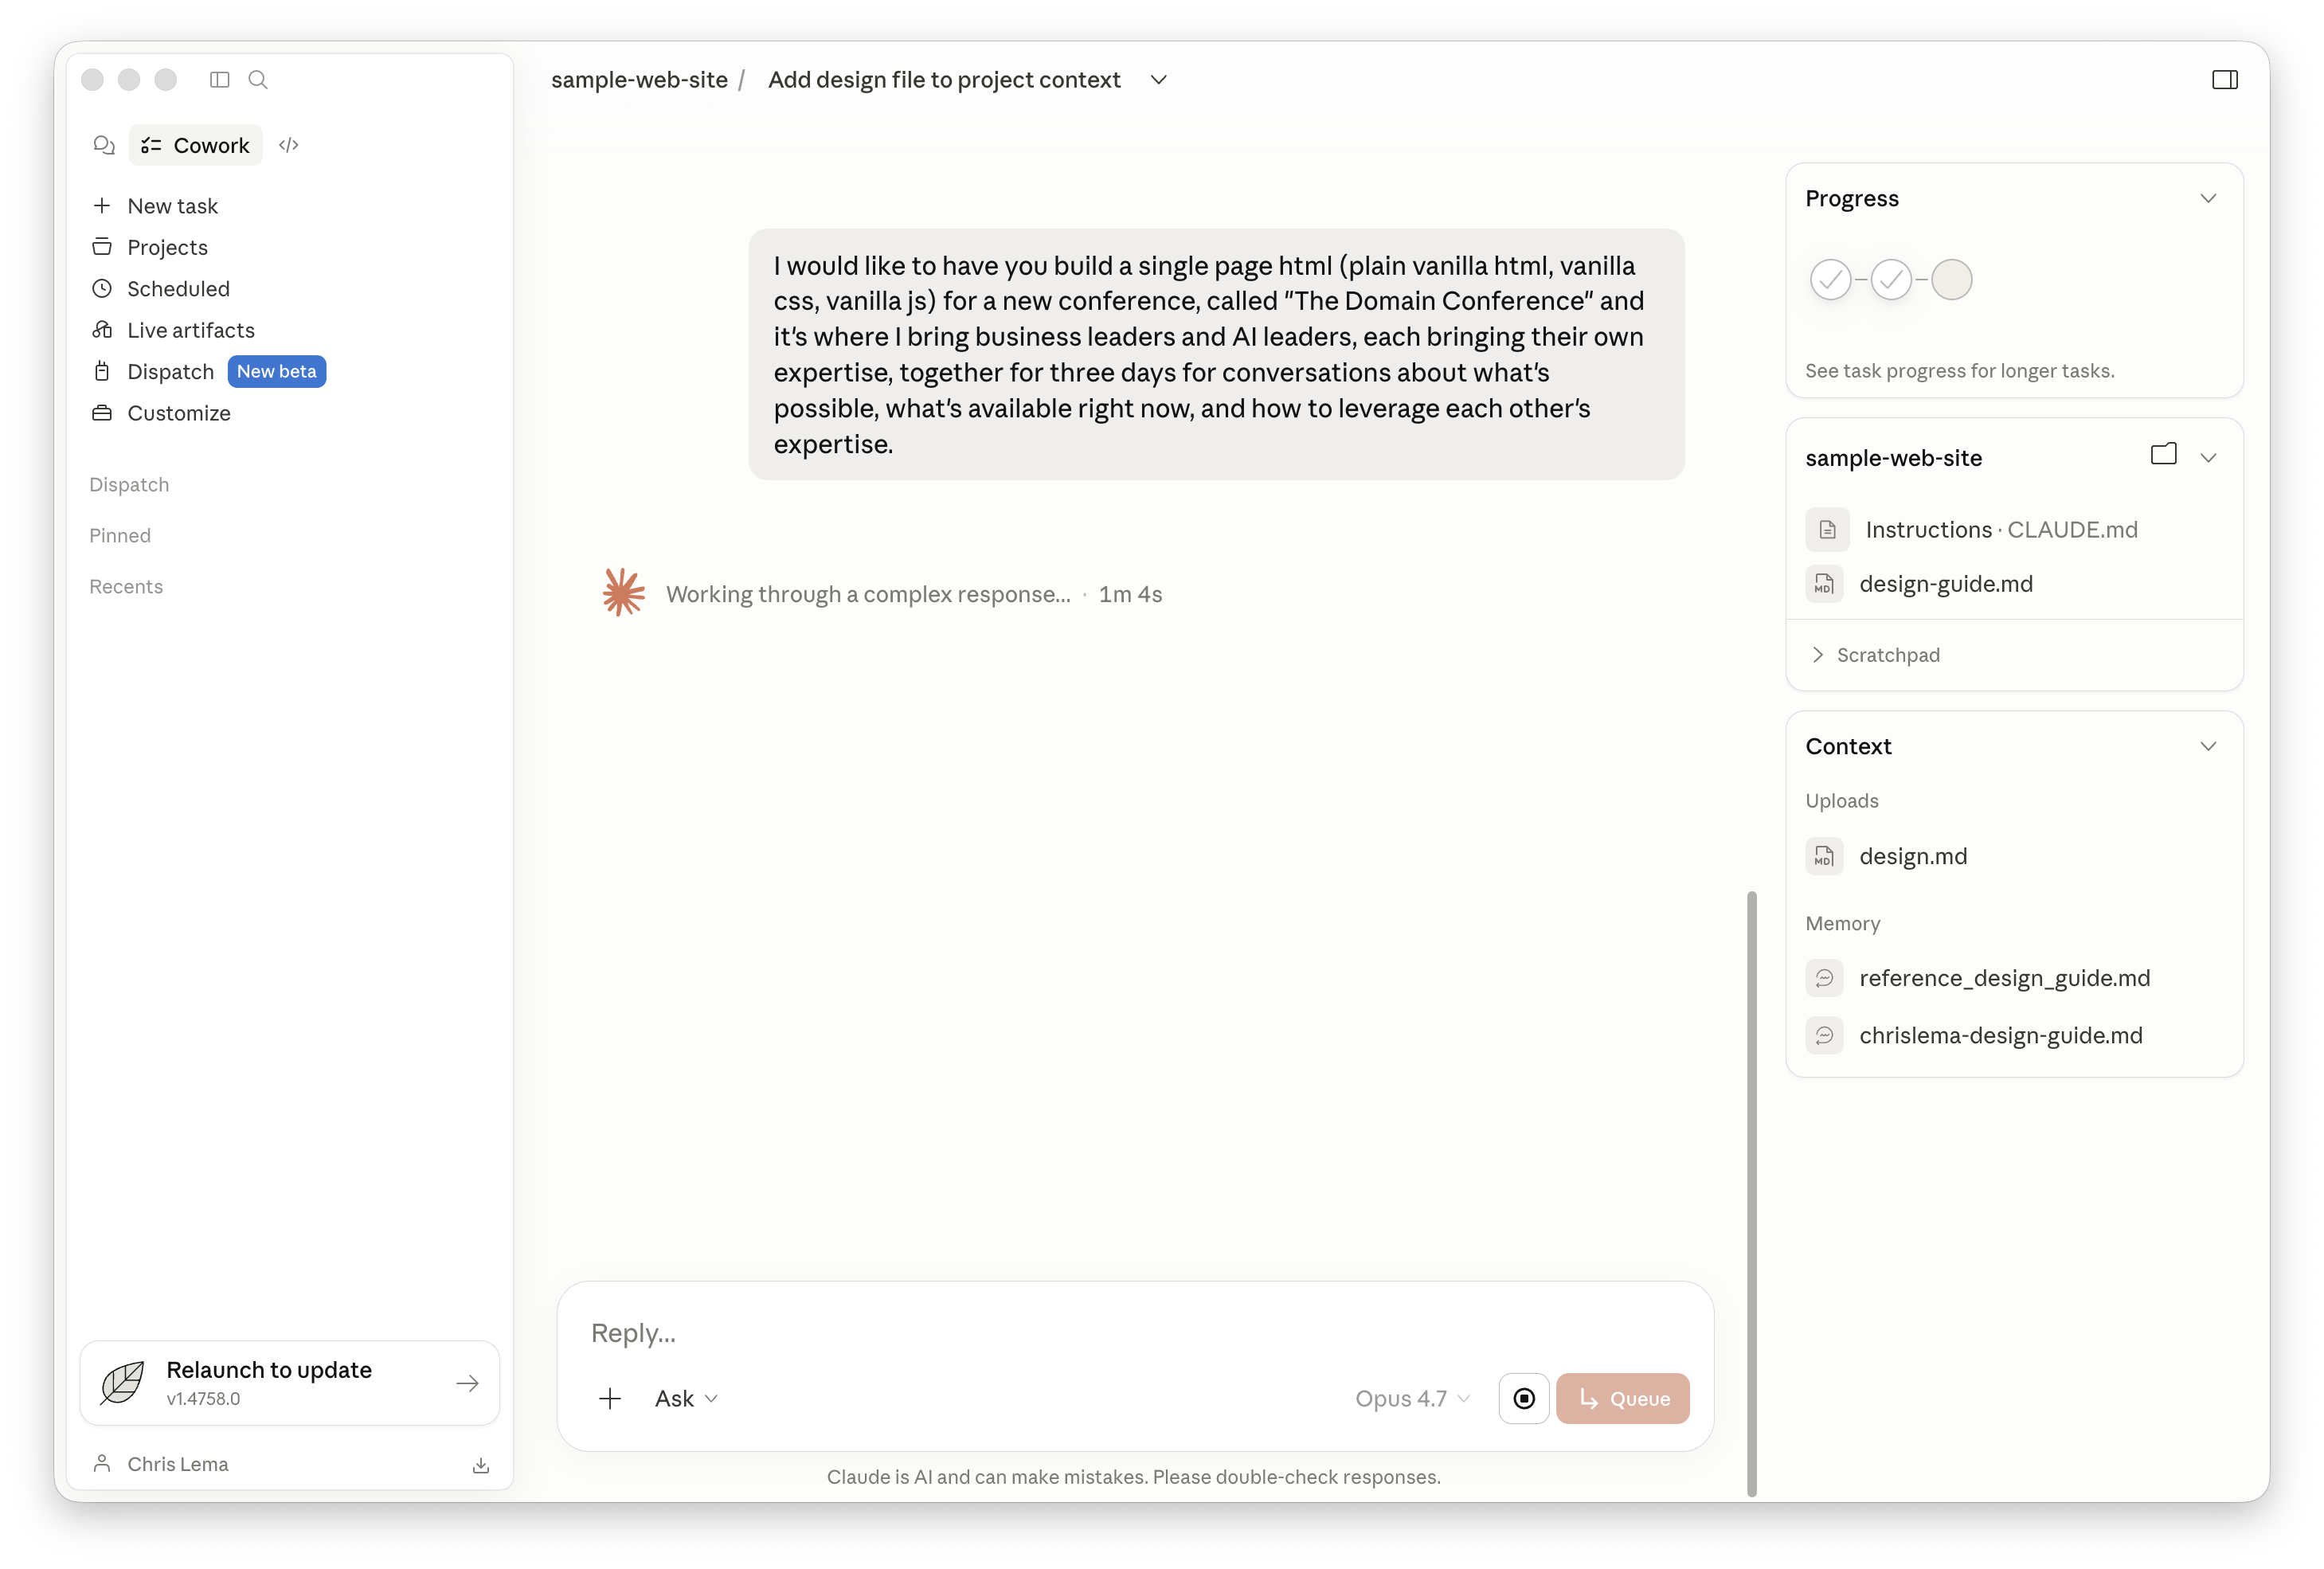
Step 19 — Ask Claude to build the website
This is the moment that still feels like magic to me. In the same Cowork project, type out what you want. I asked:
I would like you to build a single page HTML (plain vanilla HTML, vanilla CSS, vanilla JS) for a new conference called "The Domain Conference" — it's where I bring business leaders and AI leaders, each bringing their own expertise, together for three days for conversations about what's possible, what's available right now, and how to leverage each other's expertise.
Claude goes to work. It thinks through the structure, pulls from the design guide you just added, and produces a single HTML file with all the styling baked in. A few minutes later, you have a working webpage saved into your folder.
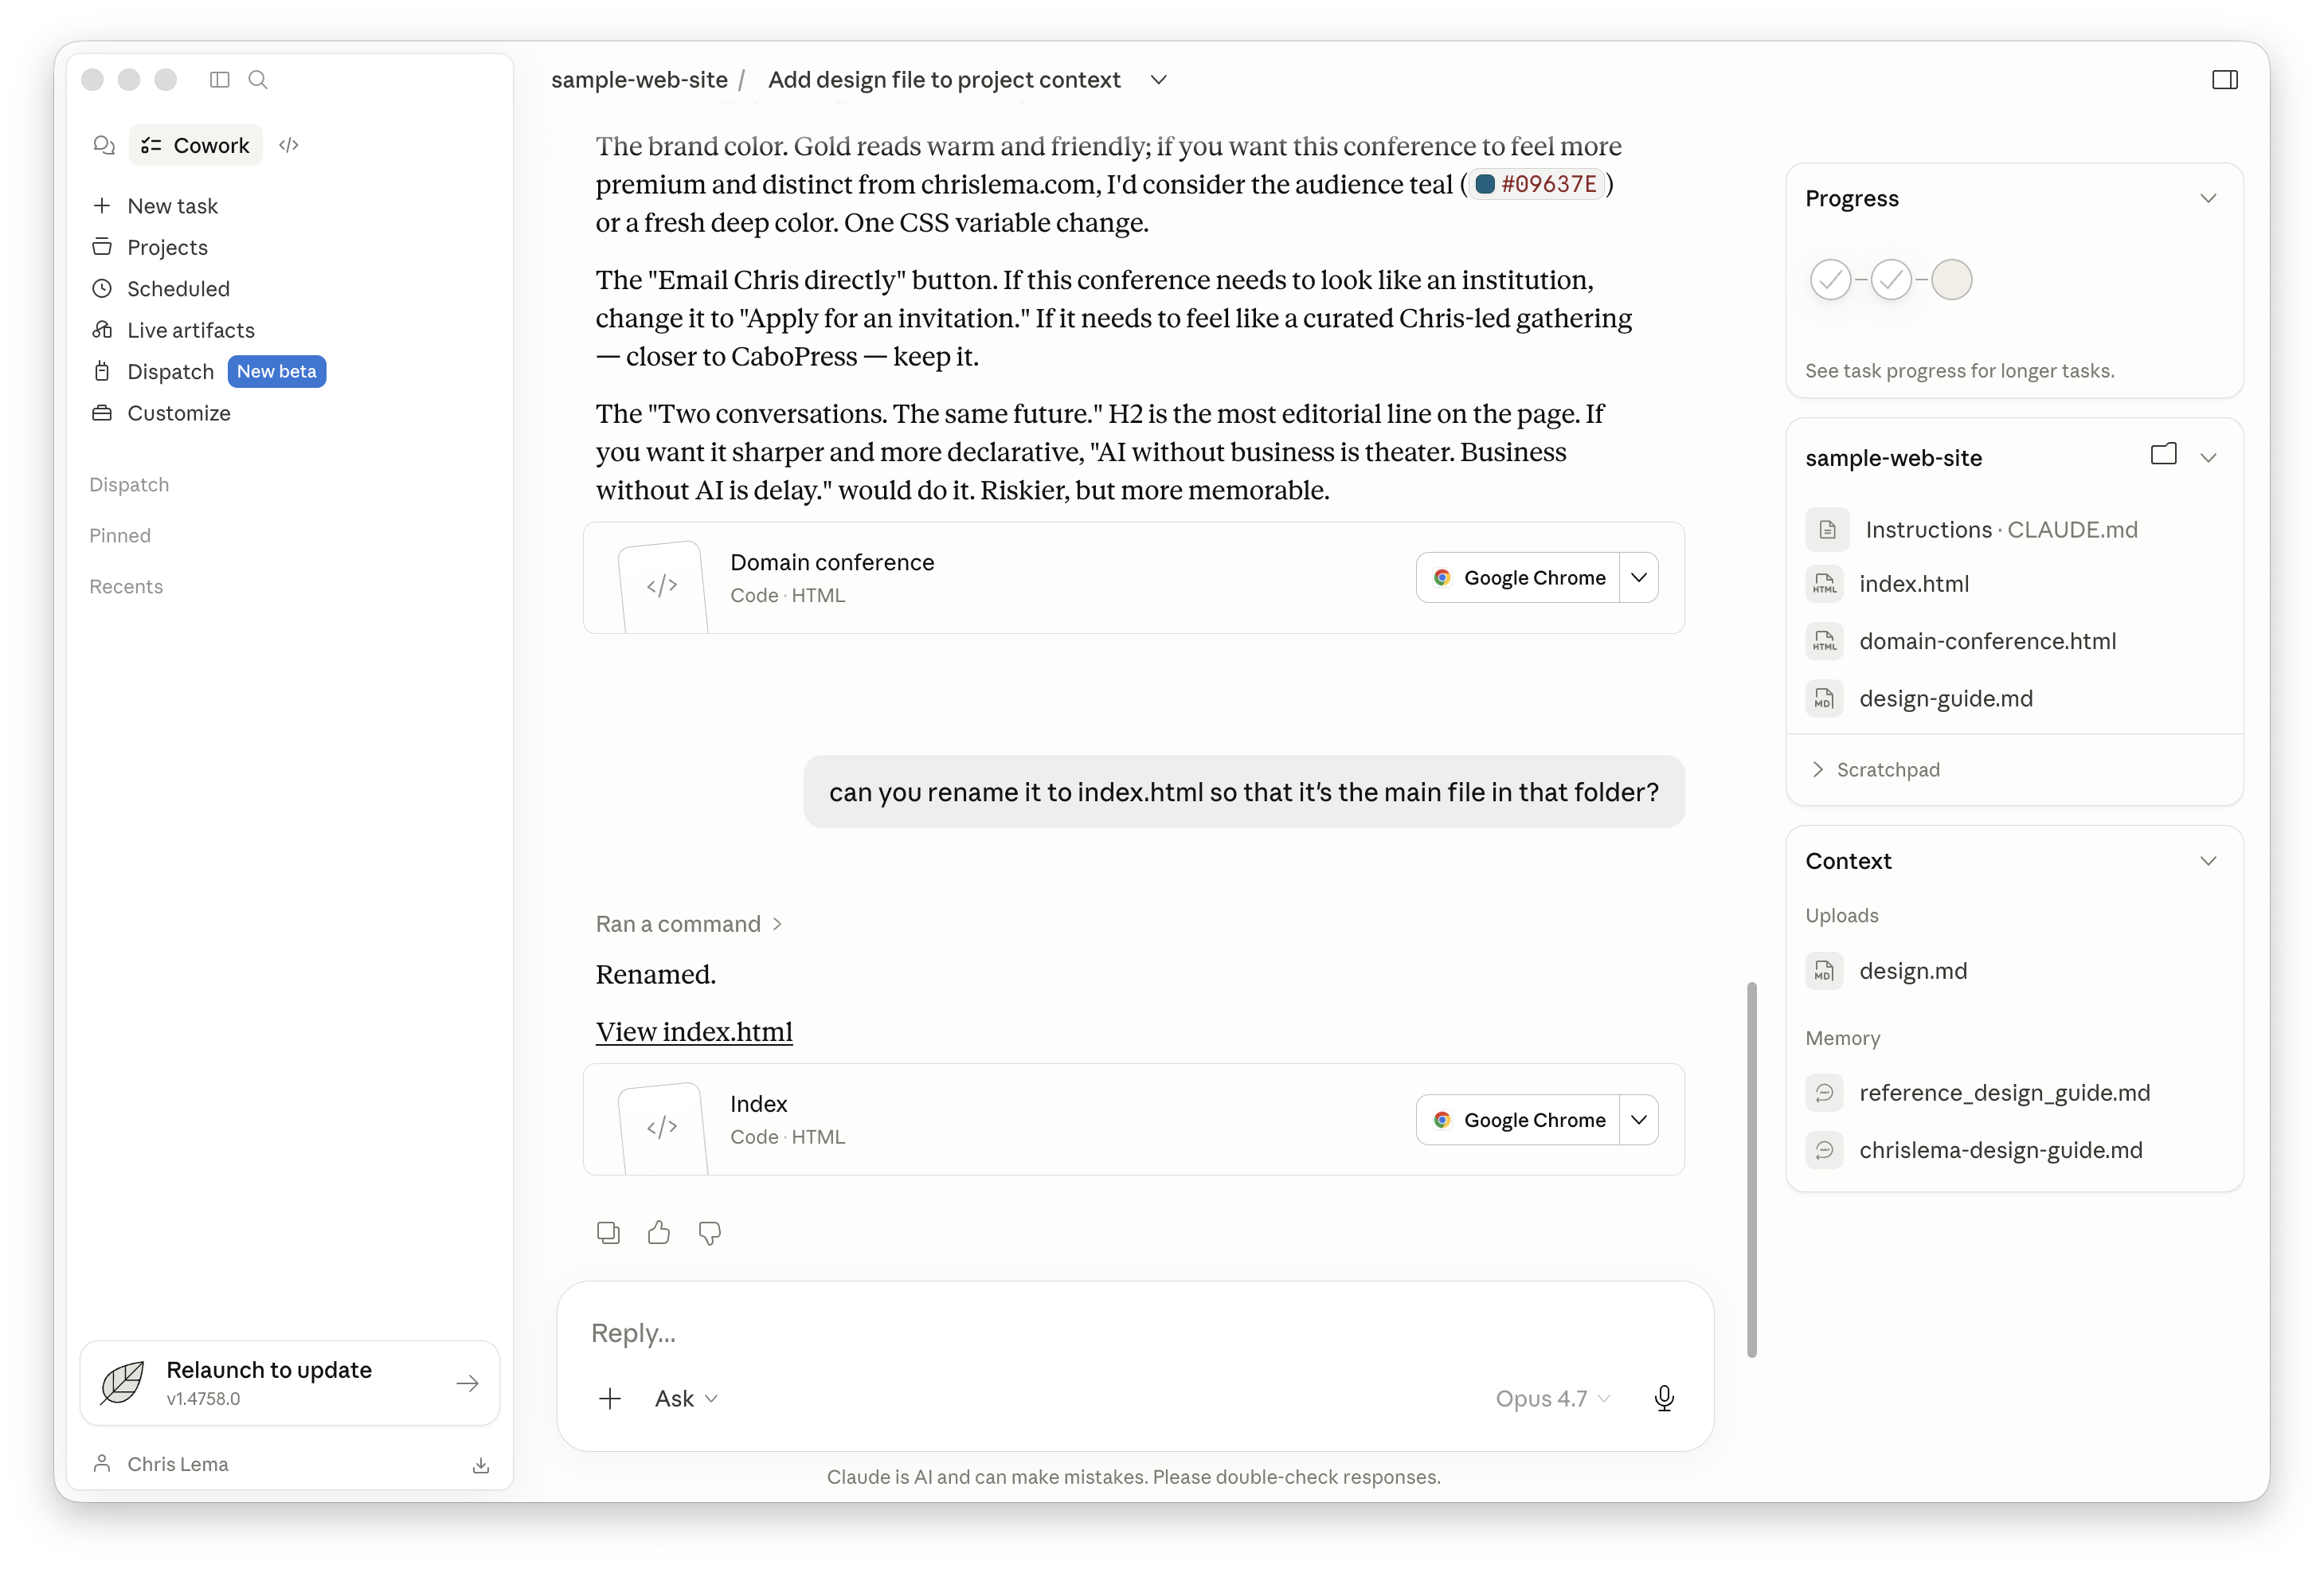
Step 20 — Save the file as index.html
Claude probably named the file something descriptive — mine was called domain-conference.html. We need to rename it to index.html, because web servers automatically look for a file called index.html first when someone visits a site. It's just the convention.
Ask Claude:
Can you rename it to index.html so that it's the main file in that folder?
Claude renames it. Done.
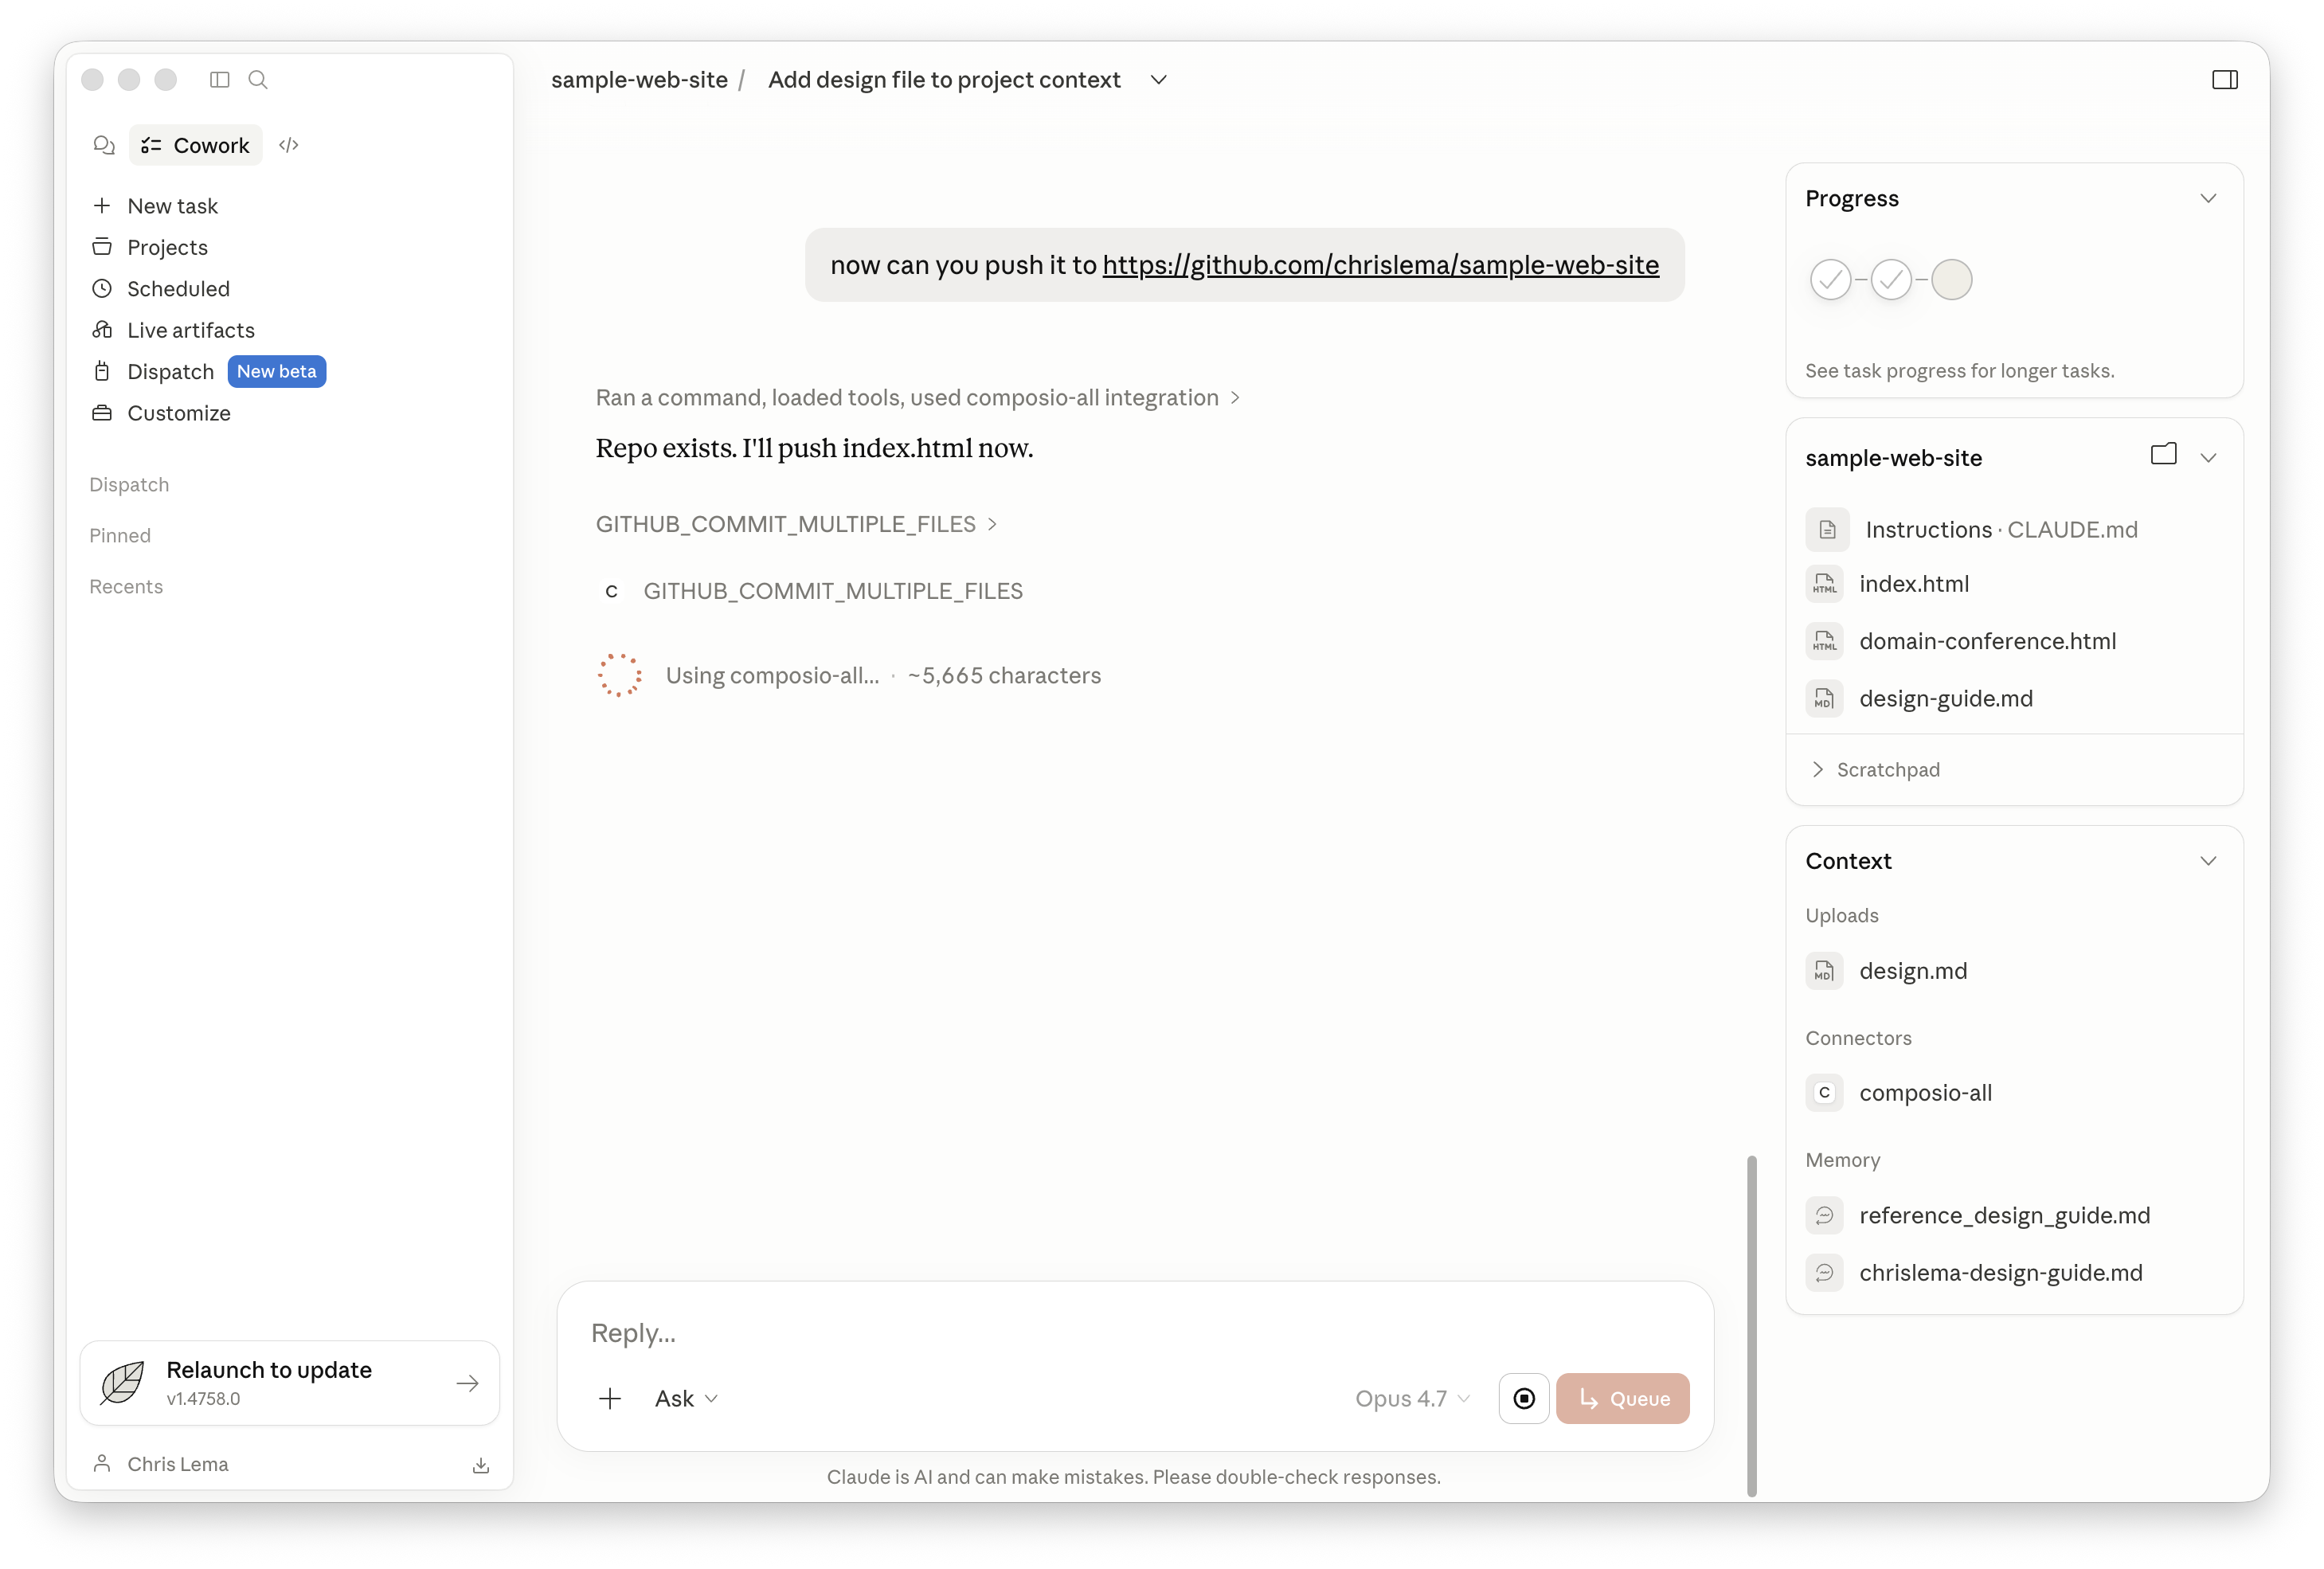
Step 21 — Push the site to GitHub
Now we send the finished file from your computer up to your GitHub repository. This is the step that would normally require command-line knowledge — but because we connected the GitHub integration to Claude back in Step 15, we can just ask.
Now can you push it to https://github.com/yourusername/sample-web-site
Claude commits the index.html file directly into your repository. No terminal, no Git commands, no SSH keys.
Refresh the GitHub page in your browser and you'll see index.html sitting in the repo, alongside the original README.
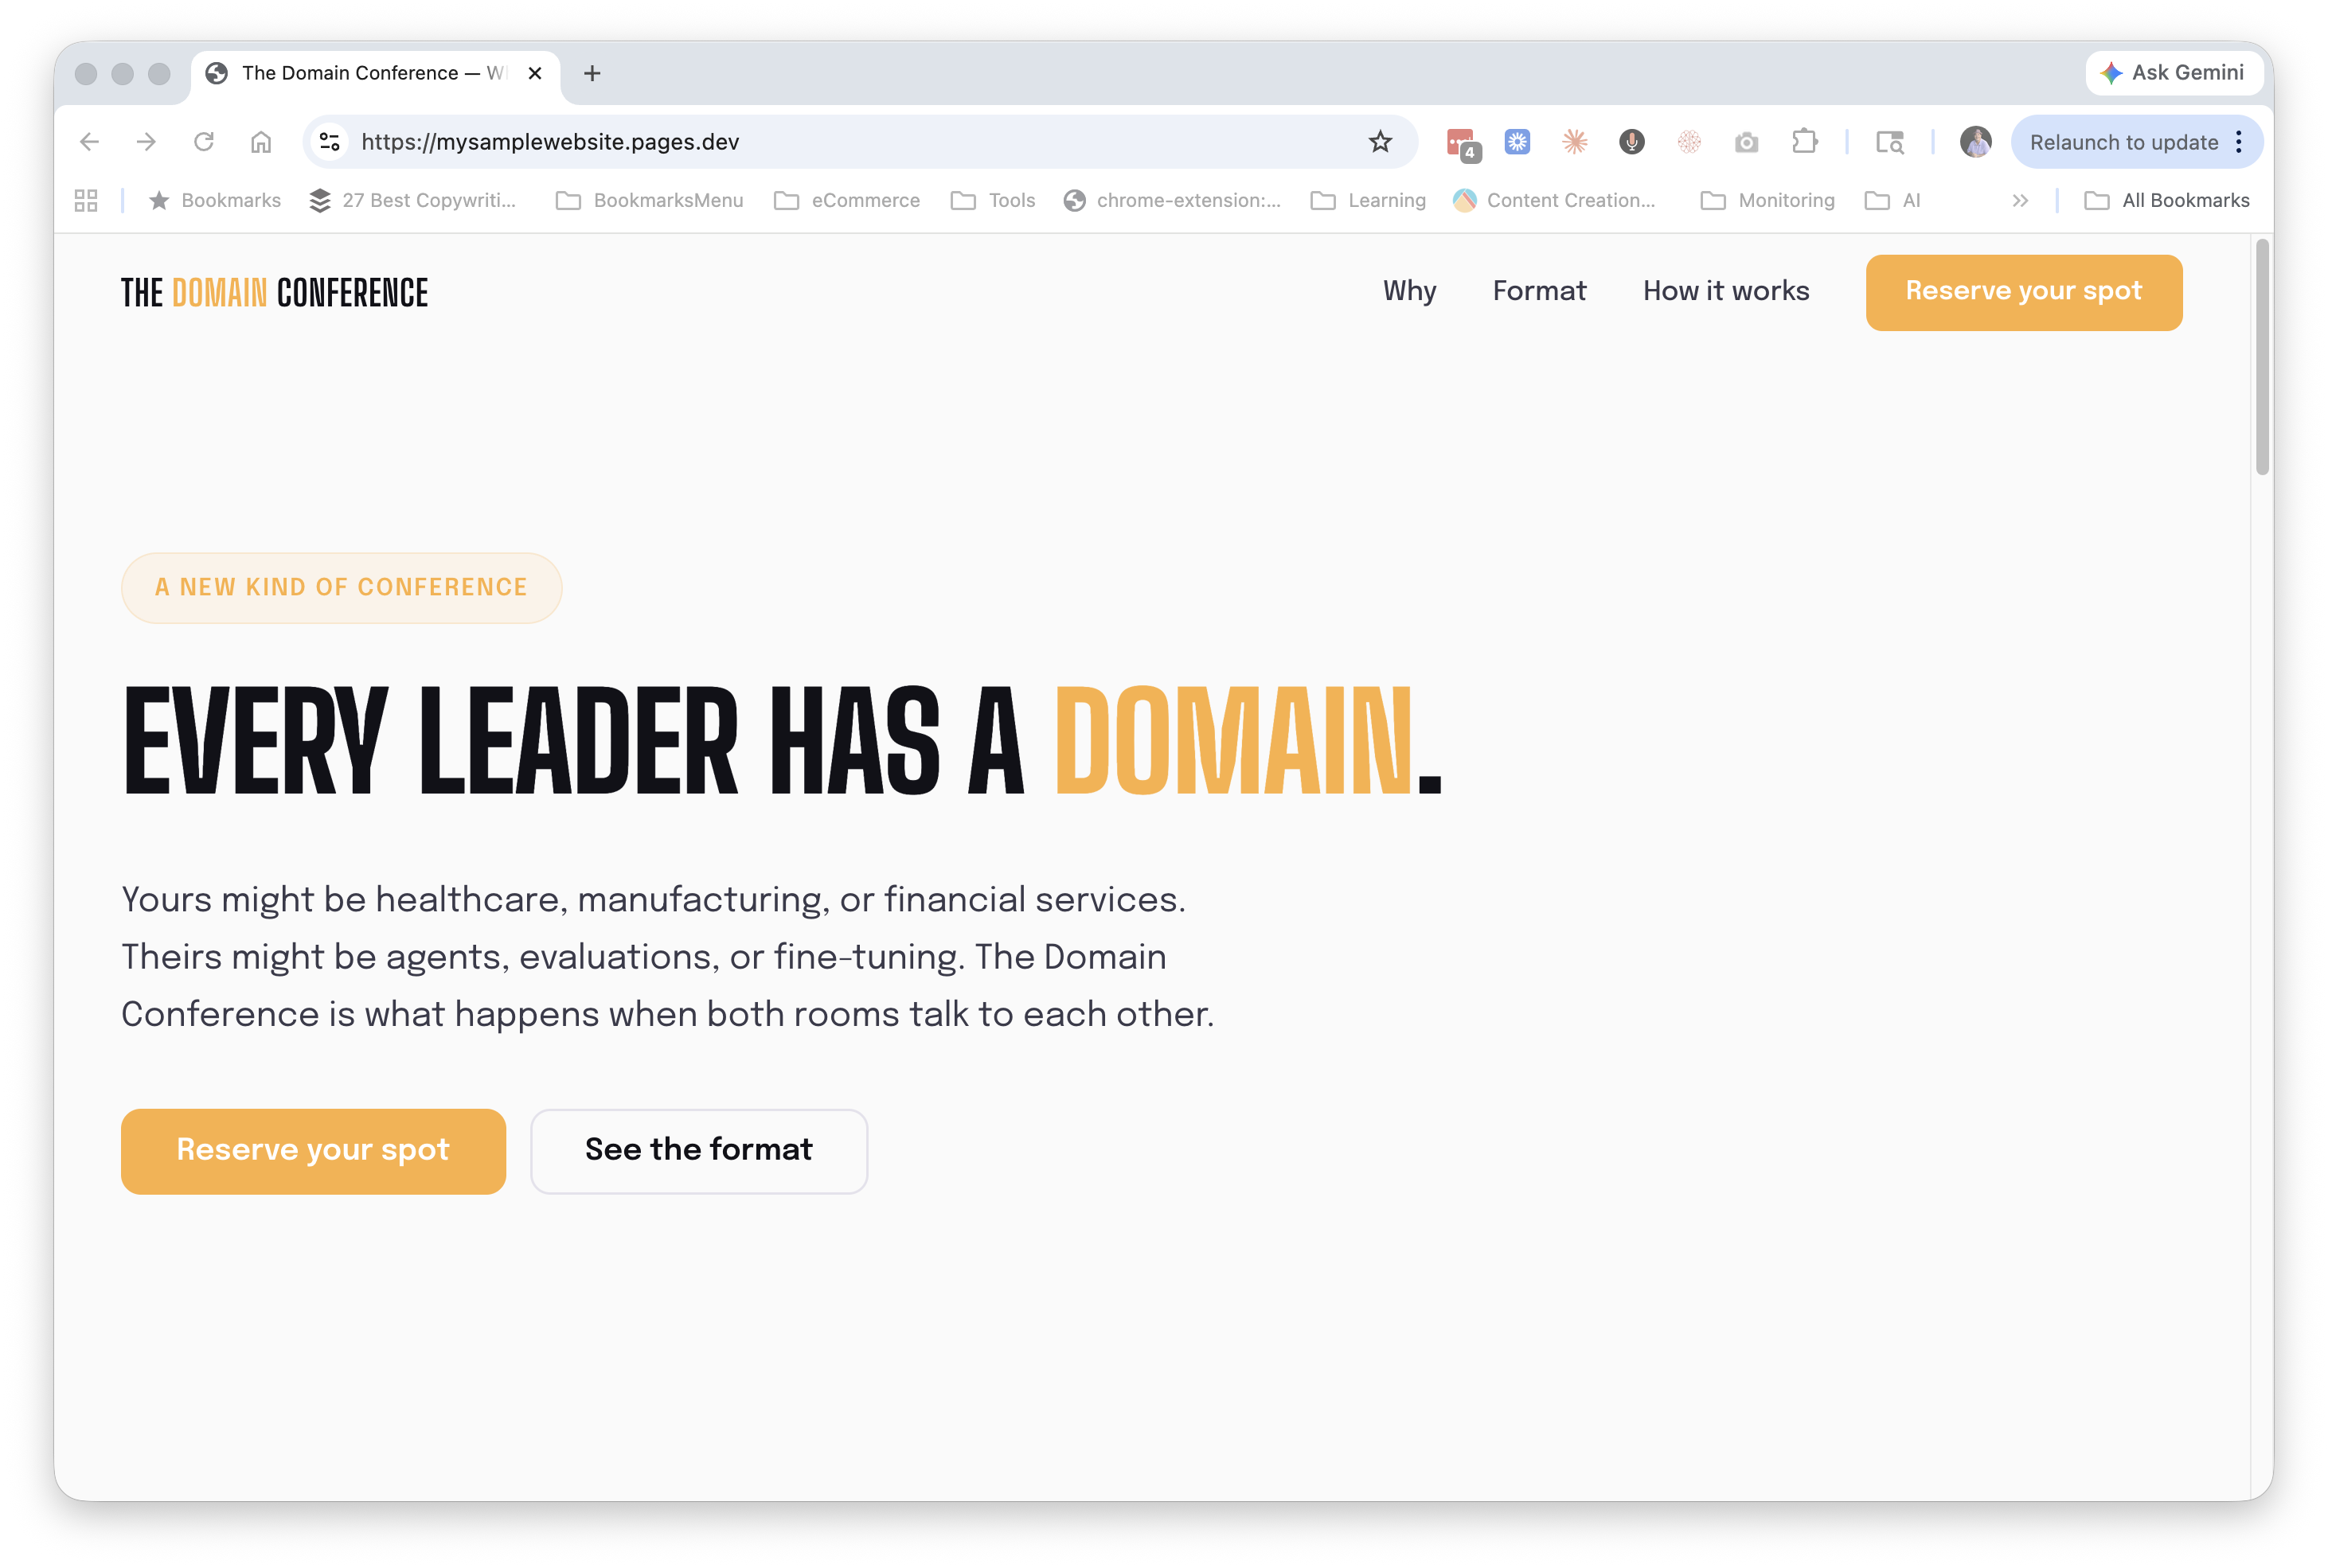
Step 22 — The website is live
Remember the Cloudflare auto-deployment we set up in Step 14? The moment Claude pushed your index.html to GitHub, Cloudflare detected the change, rebuilt the site, and republished it.
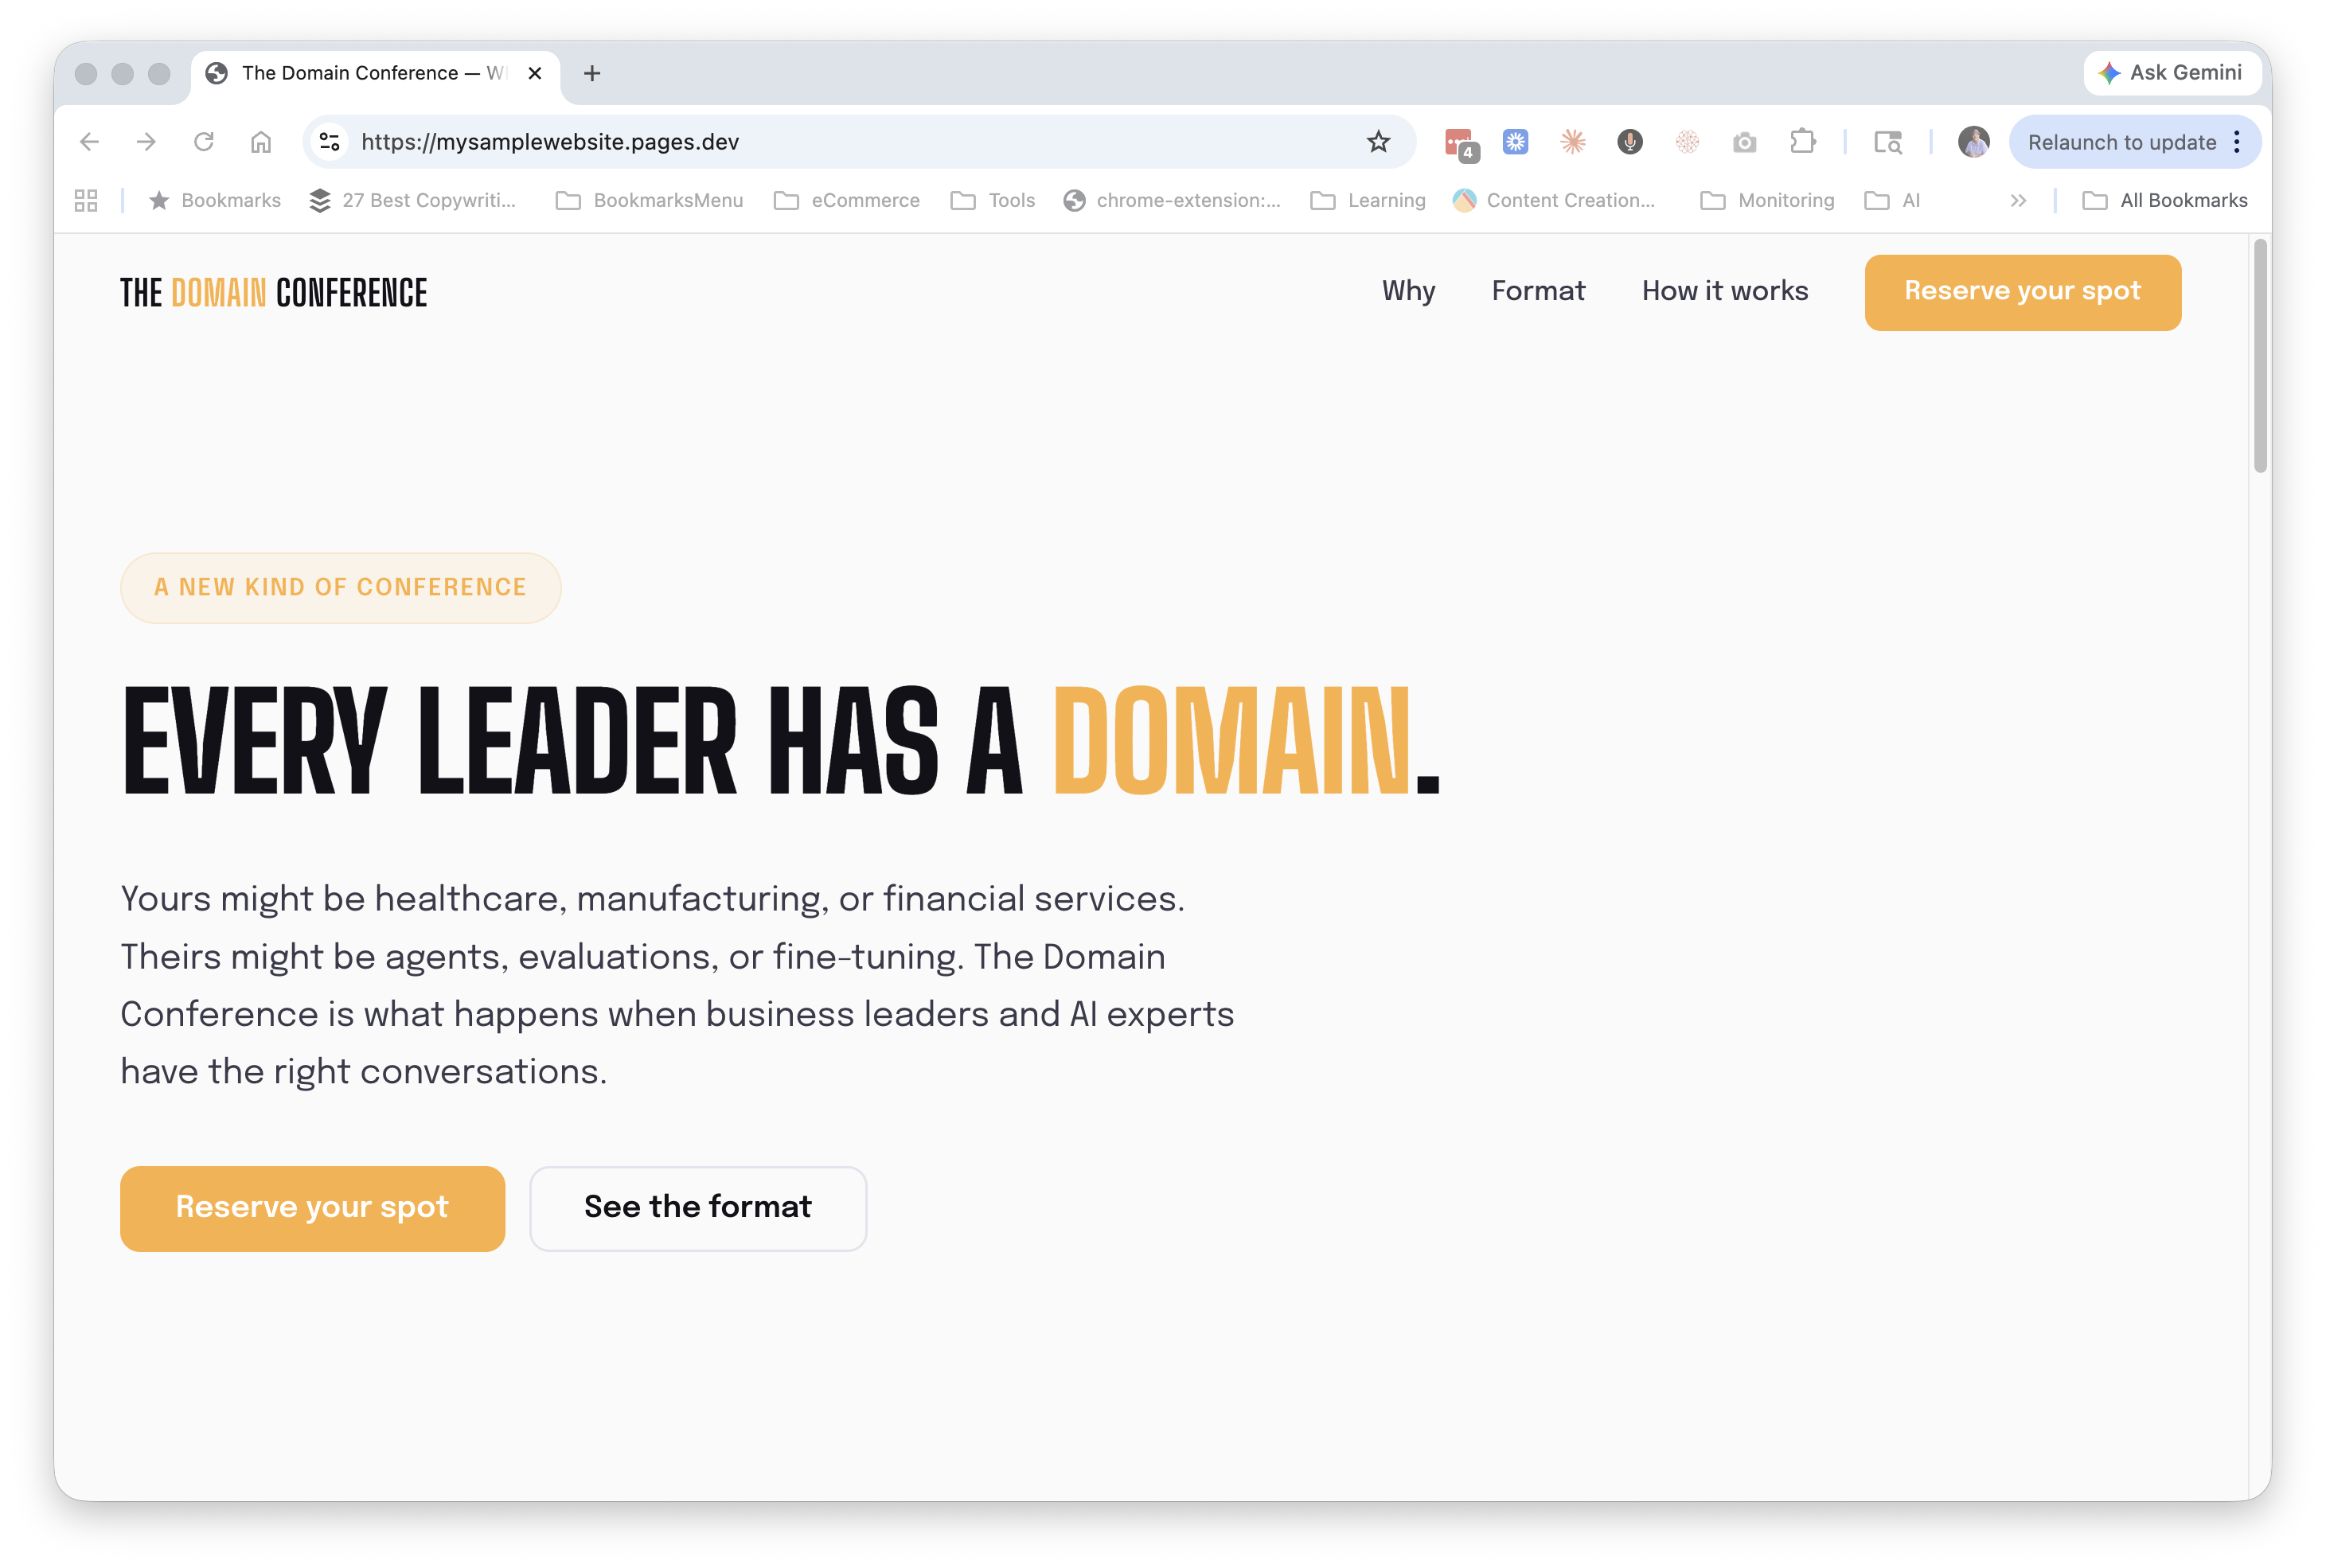
Refresh yourprojectname.pages.dev and there it is — your real website, on the real internet, at a real address. Anyone in the world can visit it.
Step 23 — Make an edit
Here's where the workflow really earns its keep.
Read your live site, find something you want to change, and just describe the change to Claude. I noticed a line on my homepage I wanted to rewrite:
On the home page, I see "The Domain Conference is what happens when both rooms talk to each other." and I want you to change it to "The Domain Conference is what happens when business leaders and AI experts have the right conversations."
Claude edits the index.html file, commits the change to GitHub, and pushes it — all in one move.
Step 24 — See the changes go live
Wait about a minute for Cloudflare to detect the new commit and rebuild, then refresh your live site. The new copy is there.
That's the workflow now. You describe what you want changed, Claude makes the change, GitHub remembers what was changed and when, and Cloudflare republishes the site automatically. End to end, an edit takes under two minutes.
What you actually built
Take a step back and look at what's now true:
You have a real website at a real web address that anyone can visit.
The files live in your own folder on your own computer, mirrored to your own GitHub.
You can edit the site by talking to Claude in plain English.
Every change is versioned, so you can roll back if you mess something up.
The whole stack is free for personal projects.
You never opened a terminal.
The trick wasn't learning to code. The trick was understanding that a website is just a folder of files, that there are services that will host that folder for free, and that Claude can act as the bridge between what you want and what those services need.
What I'd do next
A few directions to take this further once you've got the basics down.
A custom domain. Right now your site lives at something.pages.dev — fine for a sample, less ideal for a real project. Cloudflare lets you point a domain you actually own (like thedomainconference.com) at the site with a few clicks of configuration.
More pages. Ask Claude to add an "About" page, a "Speakers" page, a "Schedule" page. Same workflow — Claude creates the files, pushes to GitHub, Cloudflare deploys.
A working signup form. You'd connect to a service like Kit (formerly ConvertKit) or get fancy and build your own form (leveraging Cloudflare features), and Claude can wire it up for you. Just ask.
But that also brings me to why we chose Cloudflare. When you decide to get fancier — adding business logic, forms, other features, even AI — Cloudflare supports all of it. As part of its entire platform. And Claude can make it happen using the same technology we've used here (Cloudflare Workers, Workers AI, and/or Pages functions). When that day comes, here's how to make it real without touching the code yourself.
None of these next steps require you to become a developer. They just require you to know what you want, and to be willing to describe it clearly. If you want a head start on that, have these ten conversations with Claude first.
That's the real shift. The hard part used to be the technology. Now the hard part is knowing what to build. That's a different muscle than building, and it's one you can develop — you don't have to be technical to own the architecture.
So, Steve — you're up.
A story. An insight. A bite-sized way to help.
Get every article directly in your inbox every other day.
I won't send you spam. And I won't sell your name. Unsubscribe at any time.
About the Author
Chris Lema has spent twenty-five years in tech leadership, product development, and coaching. He builds AI-powered tools that help experts package what they know, build authority, and create programs people pay for. He writes about AI, leadership, and motivation.